Changing the PHP version in Wamp Server can be a simple process that allows you to switch between different versions of PHP depending on your needs. Whether you need to use an older version of PHP for compatibility reasons or want to take advantage of the latest features in a newer version, Wamp Server provides an easy way to make this change. This blog post will provide you with a step-by-step guide to help you easily change the PHP version in Wamp Server, ensuring that you can smoothly transition to the desired PHP version without any difficulties. Now, let’s check them out.
What is the relationship between the PHP version and the WAMP server?
Before we delve into the steps of changing the PHP version in Wamp Server, let’s briefly understand what Wamp Server is and its relationship with PHP versions.
Wamp Server is a prevalent and user-friendly software stack that allows users to create a local development environment on their Windows machines. It includes Apache, MySQL or MariaDB, and PHP, making it easy to set up a web server environment for testing and development purposes.
PHP is a server-side scripting language that is widely used for web development. It powers a significant portion of websites and applications on the internet, offering a range of features and functionalities.
Wamp Server allows users to switch between different PHP versions, which can be essential when working with projects requiring specific PHP versions or testing compatibility with various PHP releases. By switching between PHP versions in Wamp Server, you can ensure that your development environment matches the requirements of your project or application.
How to Properly Change PHP Version in WAMP?
Now, let’s check the following steps to properly change PHP version in WAMP.
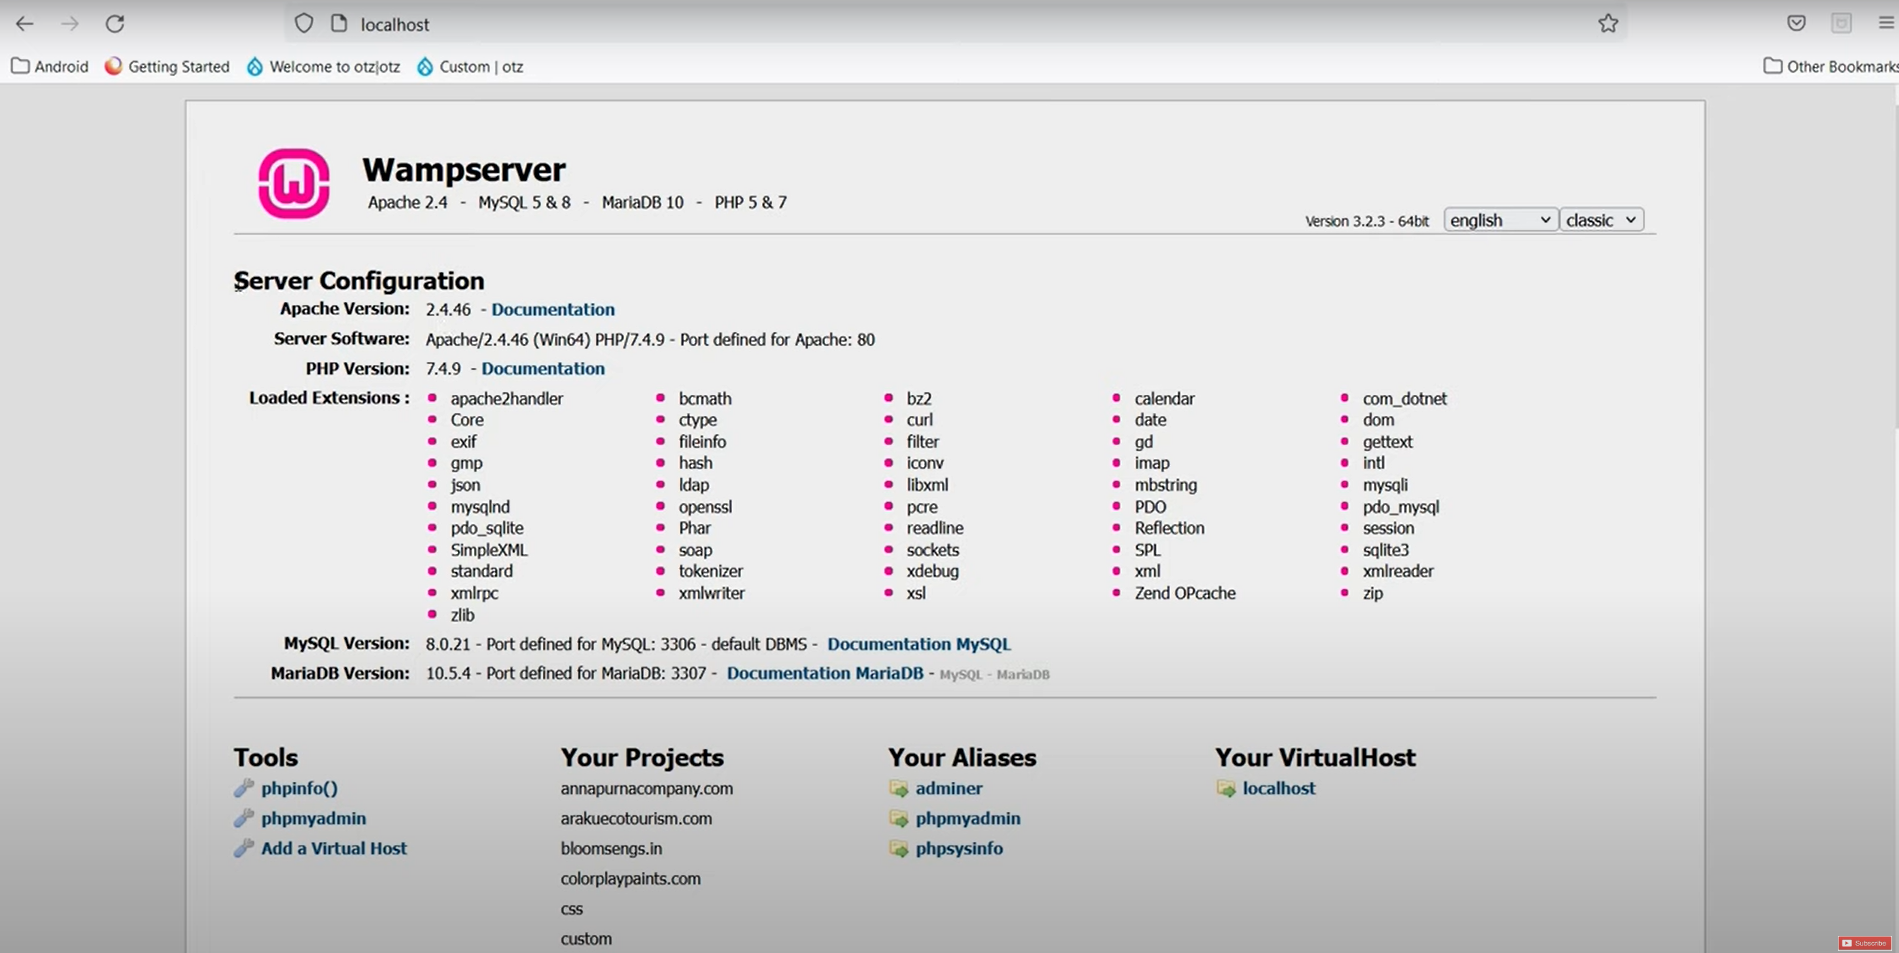
First of all, you need to go to your WAMP server. From there, you can check the current PHP version. In our case, the PHP version of our website is currently 7.4.9. In addition, you can also check the version of Apache, and MySQL that the system is using.
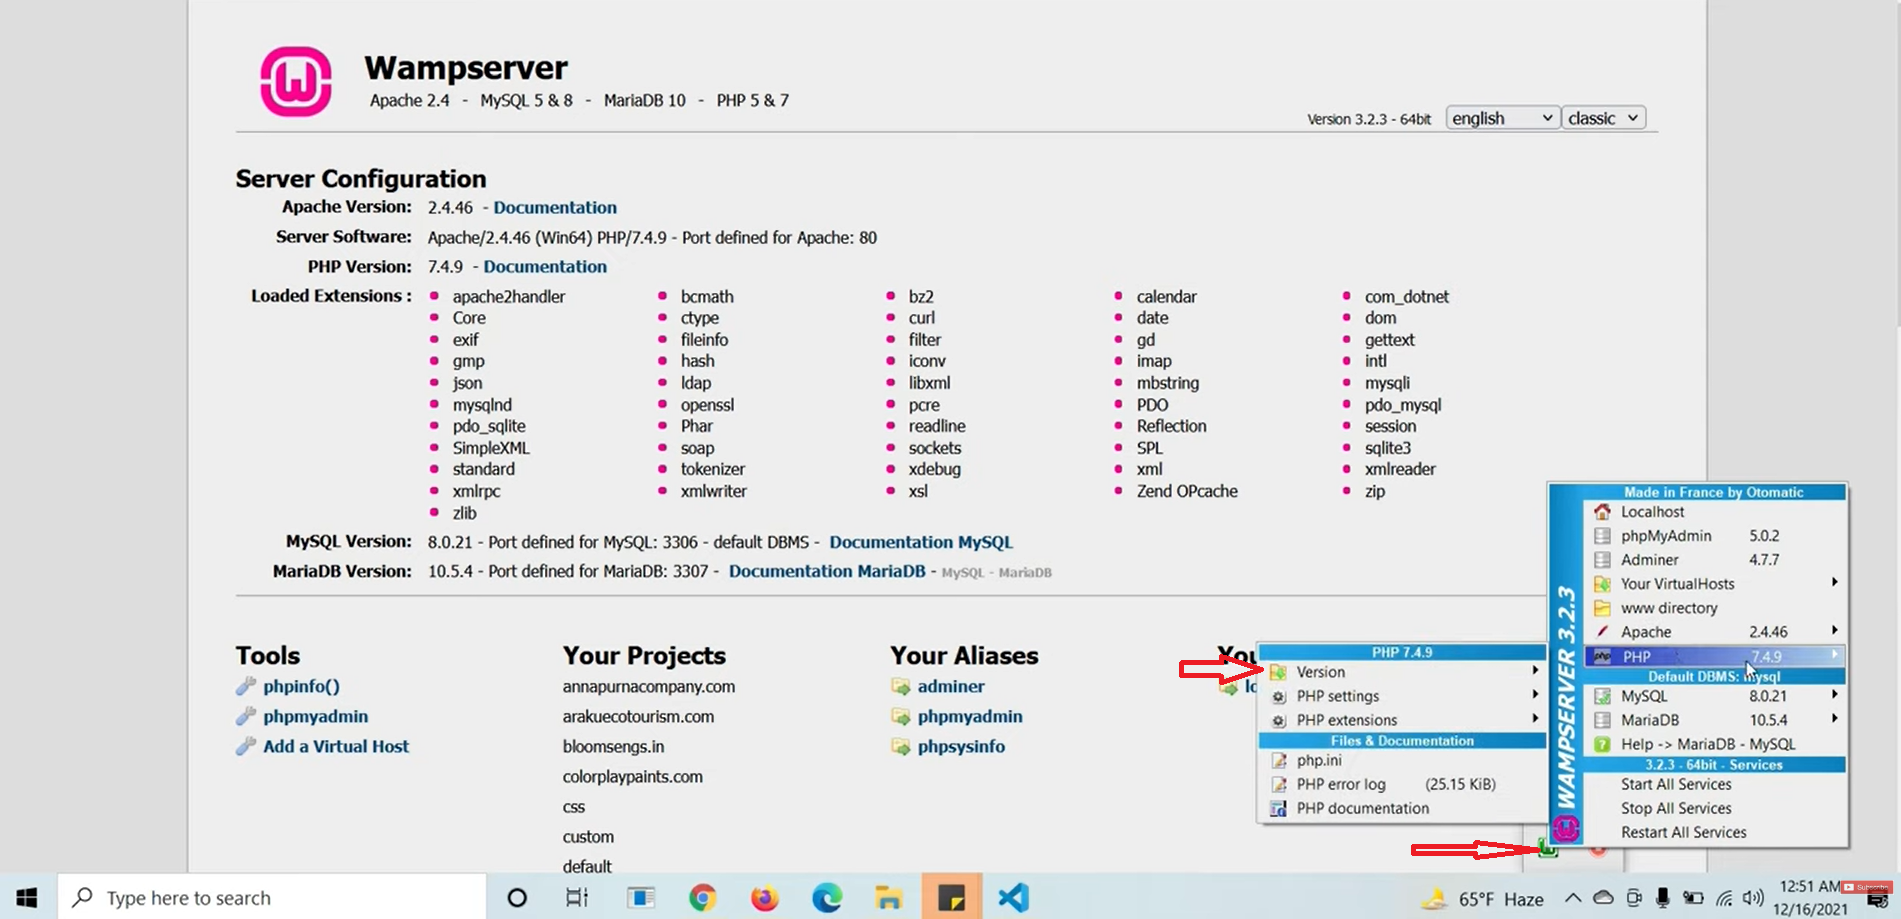
Next, you need to go to the WAMP icon in the bottom right toolbar and click on it. Then, choose PHP > Version.
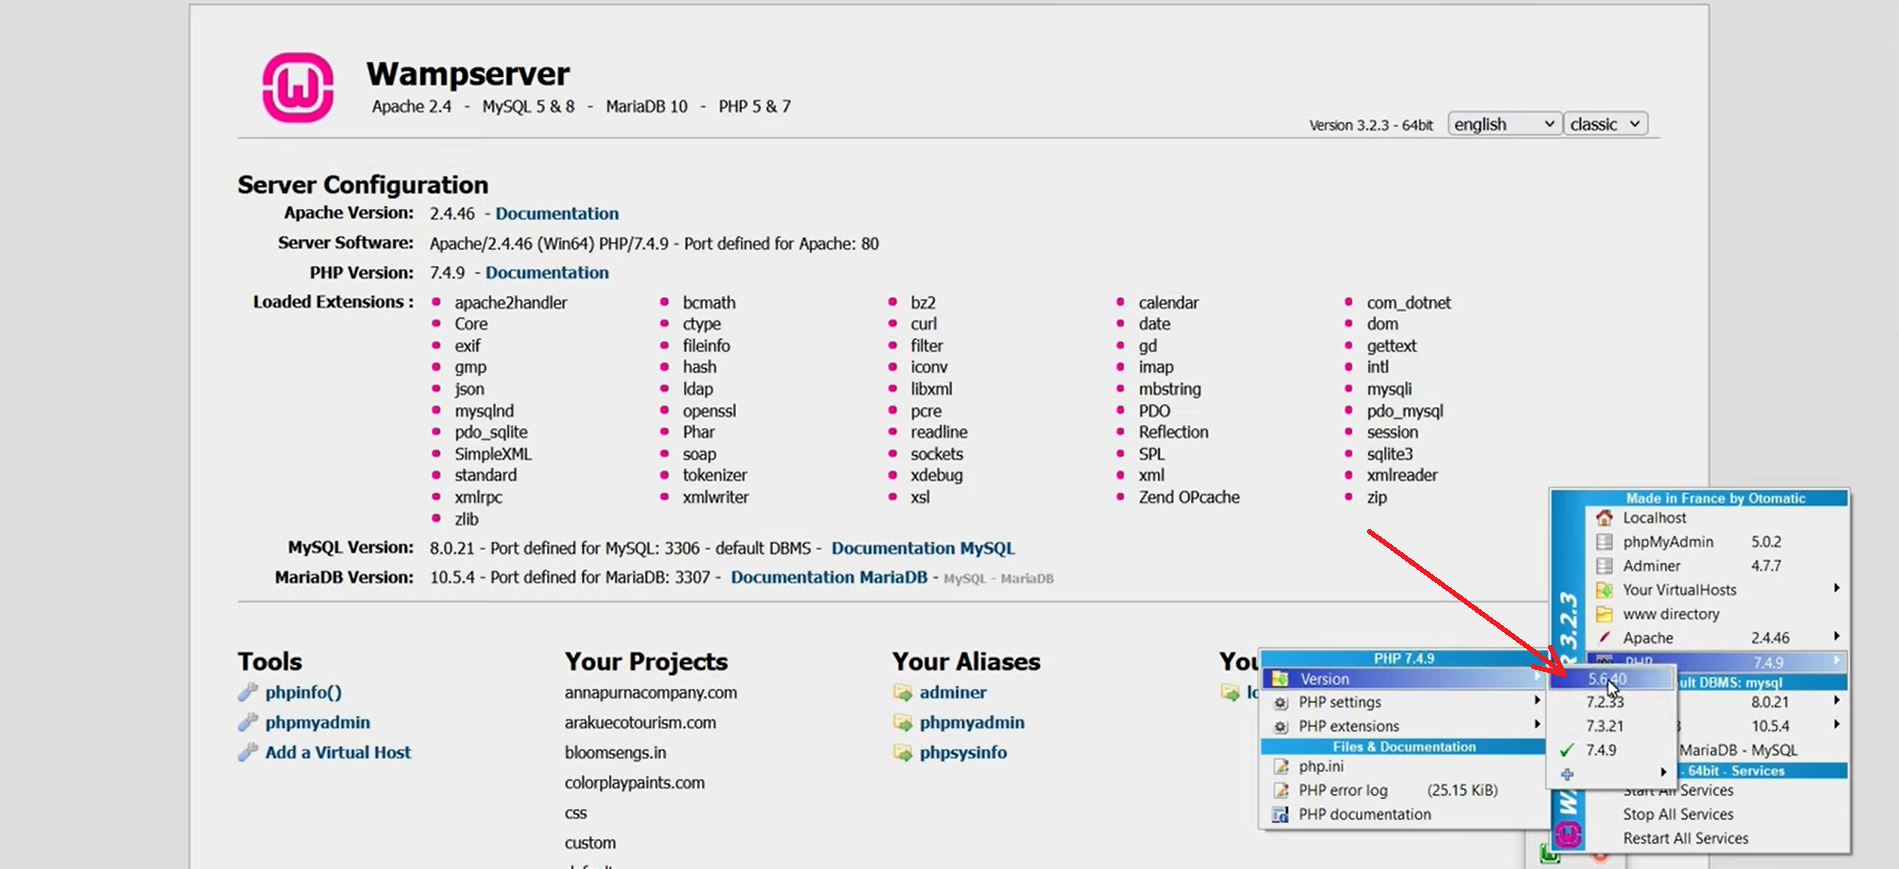
From there, this will display a list of available PHP versions including your current PHP version. You can choose any version you want to change and click on it. For example, we are going to change back to to version 5.6.40.
After that, the Wamp server will be rebooted for some time. You will notice that the colour of the Wamp icon will be changed from red to yellow, and to green.
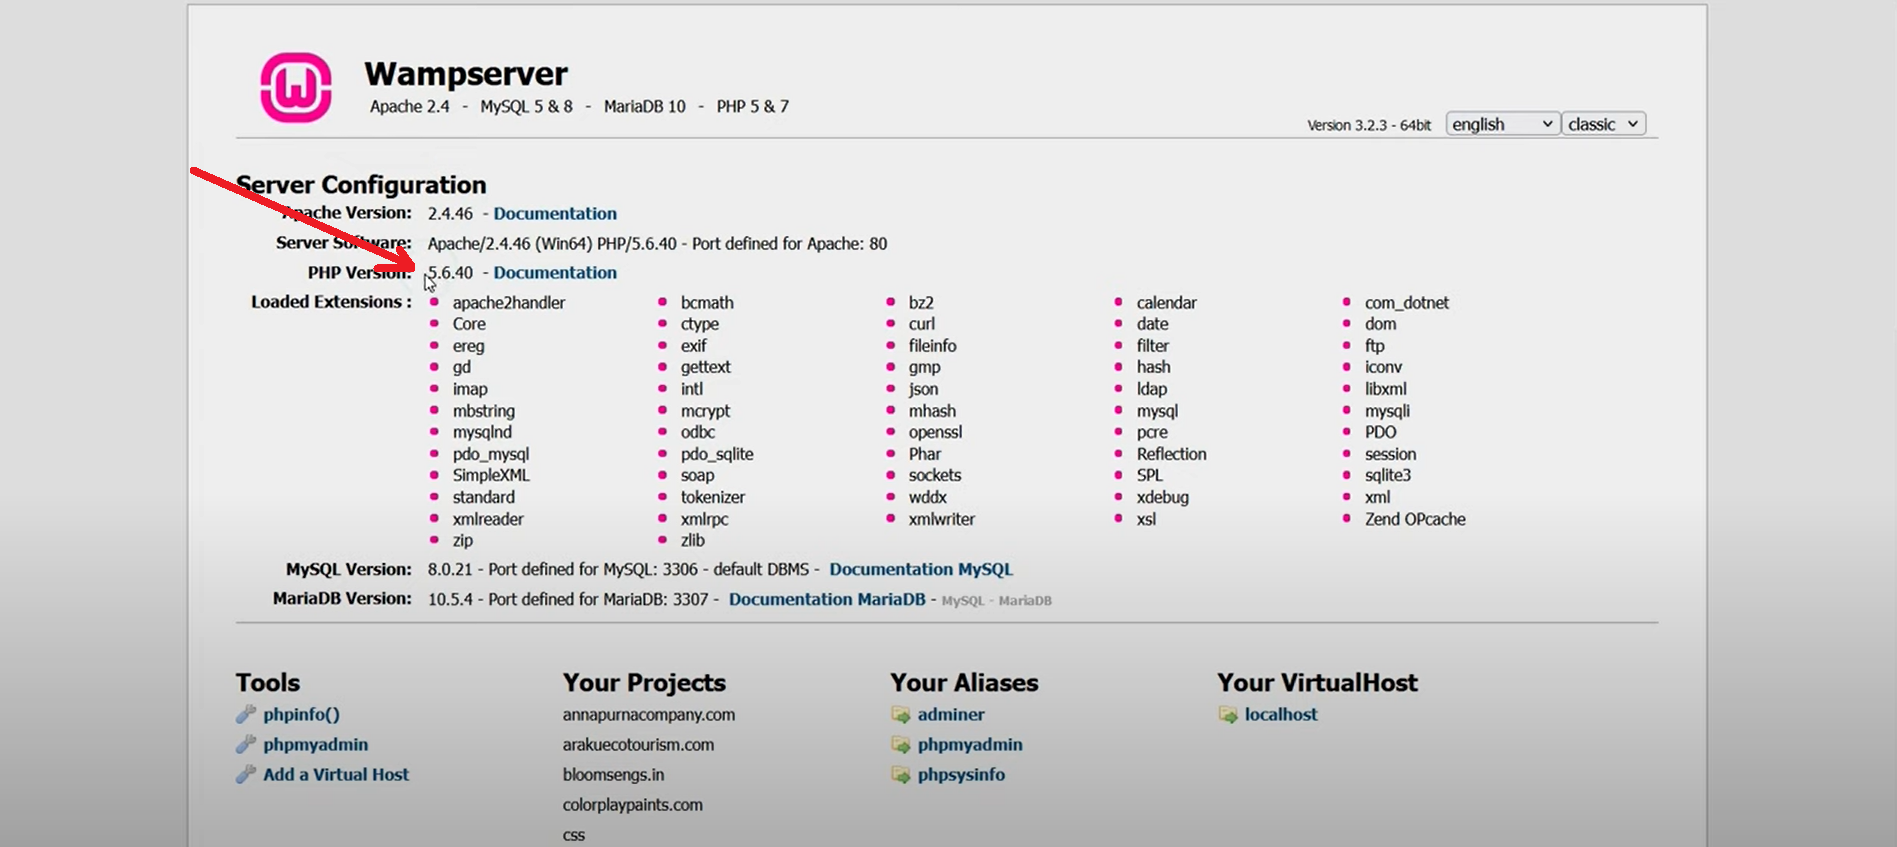
Now, you can reload your WAMP server to see the new version that you have just changed.
Conclusion
To sum up, changing the PHP version in WAMP is essential when you want to test your projects on various PHP versions and ensures compatibility with the required PHP version for deployment. Don’t forget to stay updated with the latest version of PHP to prevent your website from security holes, bugs and incompatibility. Hopefully, our blog is useful in helping you learn how to properly change PHP version in WAMP. If you have any questions, please leave a comment below.
By the way, you can drop by our website and discover tons of stunning, responsive, free WordPress Themes that will help you build an eye-catching website without touching any line of code.

Hello everyone! We’re Galussothemes content team, we love to write new blogs for WordPress Joomla! and other tech niches everyday. We’re talented young people who hold a strong passion for website development, designing, and marketing. Feel free to leave your comment if you have any issues or questions with our blogs.

