A customer in one region gets charged the wrong shipping rate. A heavy, oversized item ships for the same price as a small envelope. A shipping method you configured carefully doesn’t show up at checkout for some customers at all. Nearly every WooCommerce shipping frustration traces back to the same source: Shipping Zones and Shipping Classes are two separate systems working together, and getting their relationship wrong is easy to do without realizing it until a customer complains.
This is also one of the areas of WooCommerce where a small misconfiguration has an outsized real-world cost. Get product descriptions slightly wrong and you might lose a sale to confusion. Get shipping rates wrong and you’re either quietly losing money on every order that underprices shipping, or quietly losing customers who abandon checkout over a shipping cost that looks wrong or unexpectedly high for their region. Unlike many WooCommerce settings that are mostly about presentation, shipping configuration has a direct line to your actual margin on every single order.
Here’s how they actually work, individually and together, and a practical setup that avoids the most common mistakes.
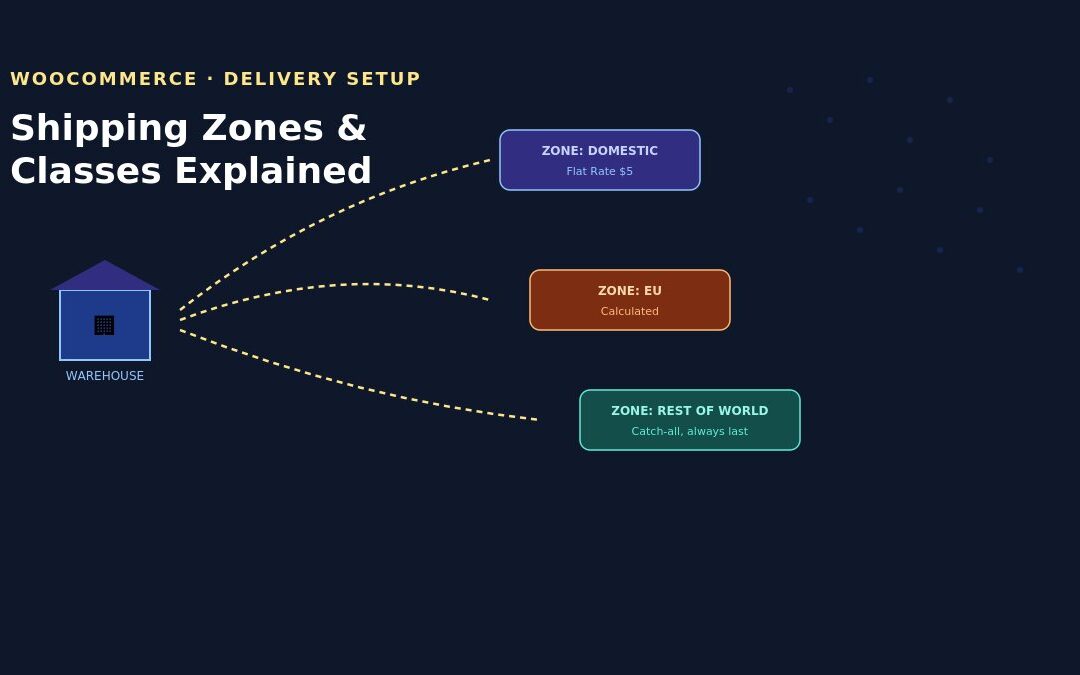
The Core Distinction: Zones Are Where, Classes Are What
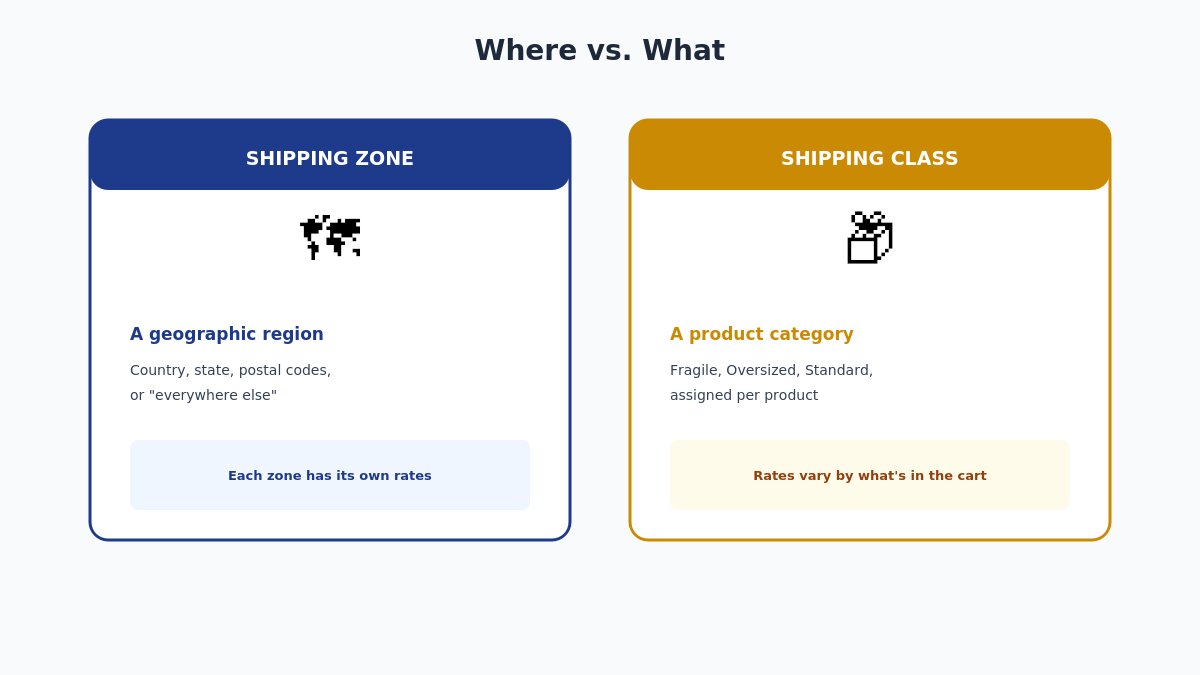
The difference between WooCommerce shipping zones and classes
A Shipping Zone is a geographic region — a country, a state, a set of postal codes, or “everywhere else” — and each zone has its own independent set of shipping methods and rates. A Shipping Class is a category you assign to individual products based on their shipping characteristics — fragile, oversized, requires refrigeration, standard — and shipping methods within a zone can define different rates per class.
The relationship: when a customer checks out, WooCommerce first determines which zone their address falls into, then looks at the shipping methods configured for that specific zone, and if those methods use class-based rates, applies pricing based on which classes are present in the customer’s cart. Get the zone wrong and customers see incorrect rates for their region entirely. Get the class assignment wrong and every product in that zone ships at the same generic rate regardless of what’s actually in the cart.
How Shipping Zones Actually Work
How WooCommerce shipping zones work
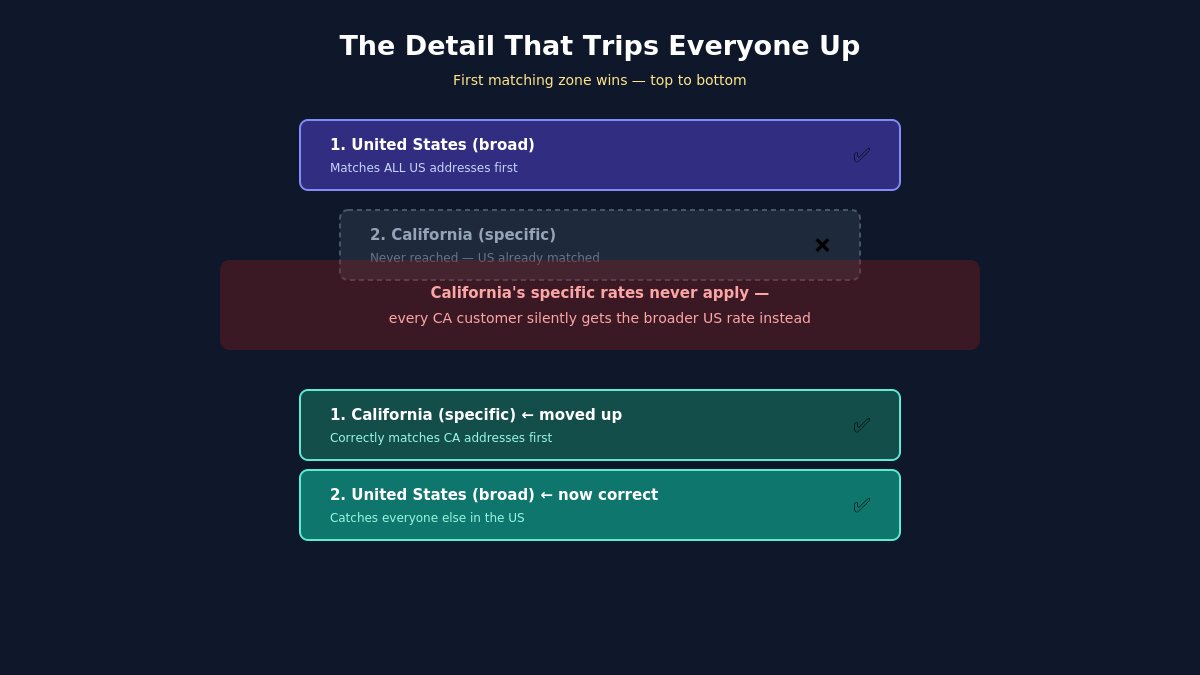
Zones are configured under WooCommerce → Settings → Shipping, and the mechanics have one detail that trips up almost everyone setting this up for the first time: zone order matters, and a customer is matched to the first zone (top to bottom in your list) whose region includes their address — not necessarily the most specific or most logical one.
This means if you have a broad “United States” zone listed above a narrower “California” zone, every California customer matches the broader US zone first and never reaches your California-specific rates at all, regardless of how carefully you configured that lower zone. The fix is straightforward once you know about it: order your zones from most specific to least specific, with your broadest catch-all zone (“Rest of the World” or similar) always at the very bottom of the list.
Each zone independently defines its own shipping methods — flat rate, free shipping, local pickup, or a real-time carrier calculation — and a method configured in one zone has no effect on any other zone. This is intentional and useful: it’s exactly how you’d offer free shipping domestically while charging calculated international rates, all within the same store.
Setting Up Your First Zone Correctly
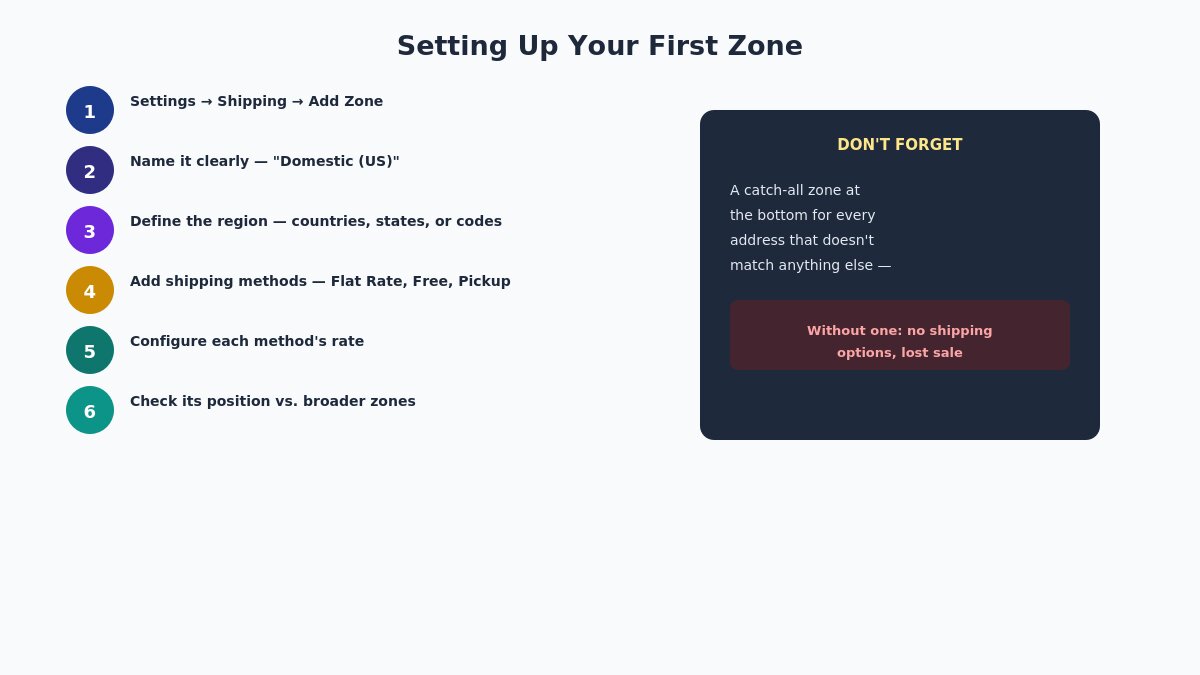
Steps to set up a WooCommerce shipping zone
Go to WooCommerce → Settings → Shipping → Add Zone.
Name the zone clearly — something you and future site editors will immediately understand, like “Domestic (US)” rather than a generic label.
Define the zone’s region — select specific countries, states, or enter postal codes, depending on how granular you need this zone to be.
Add one or more shipping methods to the zone — Flat Rate, Free Shipping, Local Pickup, or a shipping carrier integration if you’re using one.
Configure each method’s rate, including whether it uses class-based pricing (covered next) or a single flat amount regardless of cart contents.
Save, then check the zone’s position in your overall zone list, moving it above any broader zone that would otherwise catch the same addresses first.
Repeat this for each distinct region you need, always finishing with a catch-all zone at the bottom for addresses that don’t match any of your more specific zones — without one, customers outside your configured zones will see no shipping options at checkout at all, a genuinely common and easily avoidable cause of lost sales.
Extra Considerations for International Shipping
If your store ships beyond a single country, a few additional factors deserve deliberate attention beyond the basic zone setup covered above:
Customs, duties, and import taxes are generally not calculated by WooCommerce’s core shipping system at all — this typically requires either a dedicated tax/duty calculation plugin or clear messaging to customers that additional charges may apply on delivery, set expectations honestly rather than leaving customers surprised by an unexpected bill from their carrier.
Delivery time expectations vary enormously by region, and it’s worth setting these expectations directly in your shipping method’s description text rather than leaving customers to guess — a flat rate that doesn’t communicate “this typically takes 2-3 weeks for this region” creates support tickets from customers who assumed domestic-speed delivery.
Some countries or regions may need to be explicitly excluded from your shipping zones entirely, if your business genuinely can’t fulfill orders there — reachable via your zone configuration’s region selection, rather than accepting orders you won’t actually be able to ship.
Currency and pricing display interact with shipping in ways worth testing directly — if you’re using a multi-currency setup, confirm shipping costs convert and display correctly for international zones specifically, not just your default currency.
Restricted or hazardous product categories may need to be excluded from specific international zones for regulatory reasons, which is a genuine use case for shipping classes beyond just cost calculation — a class can also serve as a flag for “not eligible for this zone” if paired with the right configuration or a plugin that supports class-based zone restrictions.
International shipping is where the zone-and-class system gets tested most thoroughly, since it’s the scenario with the most genuine variation in cost, timing, and regulatory considerations — worth budgeting real setup and testing time here rather than treating it as an afterthought to your domestic configuration.
Auditing an Existing Store’s Shipping Setup
If you’ve inherited a WooCommerce store rather than configuring shipping from scratch, or you suspect the configuration has drifted since it was originally set up, a periodic audit catches problems before customers do:
List every configured zone in order and confirm the ordering still makes sense — specific to broad, catch-all at the bottom — since zones added later don’t automatically get inserted in the correct position.
Check every zone for a genuinely appropriate shipping method, rather than assuming a zone configured months or years ago still reflects current shipping costs or carrier relationships.
Spot-check shipping class assignments across a sample of products, particularly any added since the classes were originally set up, since new products don’t automatically inherit sensible class assignments.
Test checkout with addresses representative of each zone, not just your own location, confirming each one calculates a reasonable, expected rate.
Review your catch-all zone specifically — confirm it still exists, is still positioned last, and has a reasonable rate rather than being accidentally left at a default that doesn’t reflect your actual costs.
Cross-check shipping costs against actual carrier costs periodically, since carrier rates change over time and a flat rate that was profitable a year ago may no longer accurately reflect what you’re actually paying to ship.
This is a reasonable task to schedule quarterly or whenever you notice shipping-related complaints trending upward, rather than only investigating reactively once a specific customer complaint forces the issue.
Why Shipping Deserves More Setup Time Than It Usually Gets
It’s worth stepping back to make the broader case for why this particular area of store configuration deserves more careful attention than it typically receives. Product pages get photographed, described, and refined repeatedly. Homepage design gets iterated on. Shipping configuration, by contrast, often gets set up once during initial store launch, under time pressure to get the store live, and then rarely revisited unless something visibly breaks.
This is backwards relative to how much shipping actually affects the business. Pricing research consistently shows unexpected shipping costs are among the most common reasons customers abandon a cart at checkout — meaning a shipping configuration that’s confusing, inaccurate, or poorly communicated has a direct, measurable cost in lost sales, not just an occasional support ticket. Treating the initial zone and class setup with the same care as your product catalog, and revisiting it periodically rather than treating it as a one-time task, is a genuinely underrated lever for both customer trust and actual margin — arguably a higher-leverage use of setup time than many of the more visually obvious parts of store configuration that tend to get more attention by default.
How WooCommerce shipping classes work
Classes are configured under WooCommerce → Settings → Shipping → Classes, where you define named categories — “Fragile,” “Oversized,” “Standard” — that you then assign to individual products from each product’s Shipping tab in the product editor. A product left unassigned uses whatever your shipping method treats as its default rate.
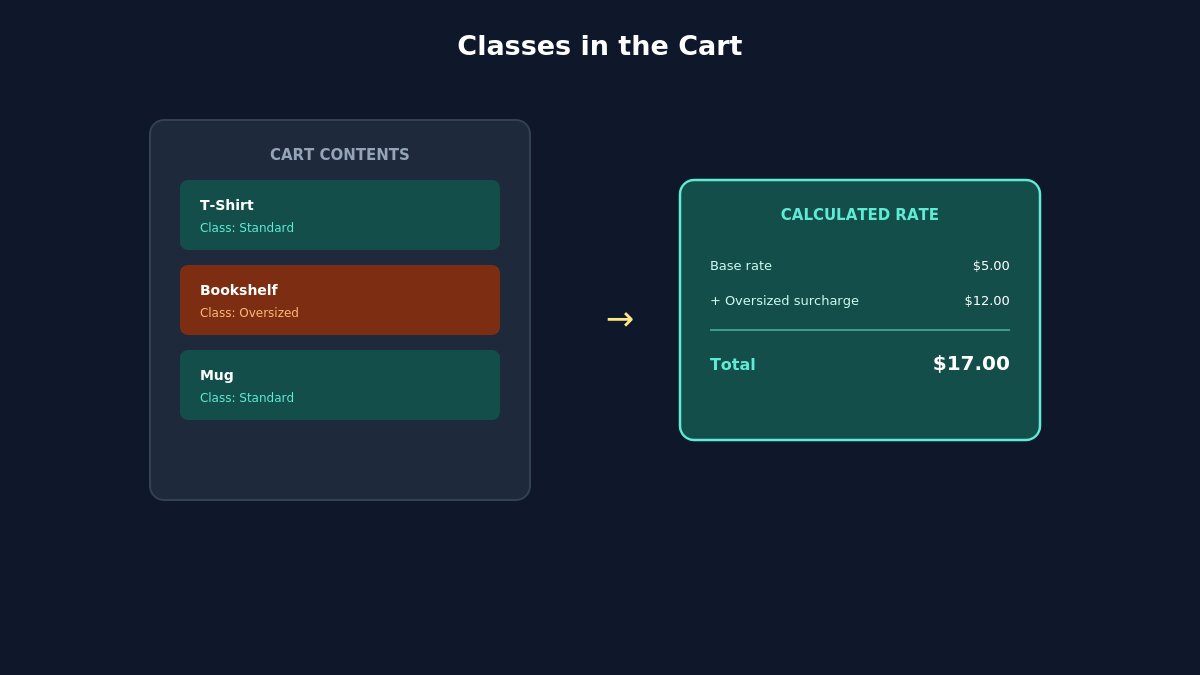
The actual pricing power comes from combining classes with a method’s rate configuration. A Flat Rate shipping method, for instance, can define a base cost plus additional per-class costs — so a cart containing one Standard item and one Oversized item can calculate a rate reflecting both, rather than charging the same flat amount whether the cart holds a single small item or several bulky ones.
A Practical Walkthrough: Different Rates for Different Product Types
Walkthrough for setting up class-based shipping rates
Here’s a concrete, common setup — a store selling both small standard items and large, heavier furniture pieces, needing meaningfully different shipping costs for each:
Create two shipping classes: “Standard” and “Oversized,” under Shipping → Classes.
Assign each product to the correct class via the Shipping tab on every individual product — this step is easy to forget on products added after the classes were created, and an unassigned product silently defaults to base pricing rather than throwing an error, which is exactly why it’s worth auditing.
Edit your zone’s Flat Rate method, and under its cost settings, define a base rate plus a specific additional cost tied to the “Oversized” class specifically, leaving “Standard” at the base rate alone.
Test with a real cart containing only standard items, then a cart with an oversized item added, confirming the calculated rate actually reflects the difference before trusting the configuration live.
Repeat for any other zone that should also apply class-based pricing — remember, this configuration is per-zone, so a rate structure set up in one zone doesn’t automatically apply anywhere else.
Beyond Flat Rate: How Other Shipping Methods Handle Classes
How different WooCommerce shipping methods handle shipping classes
Flat Rate is the most commonly used method for class-based pricing, but it’s worth knowing how classes interact with the other built-in options, since not every method treats them identically:
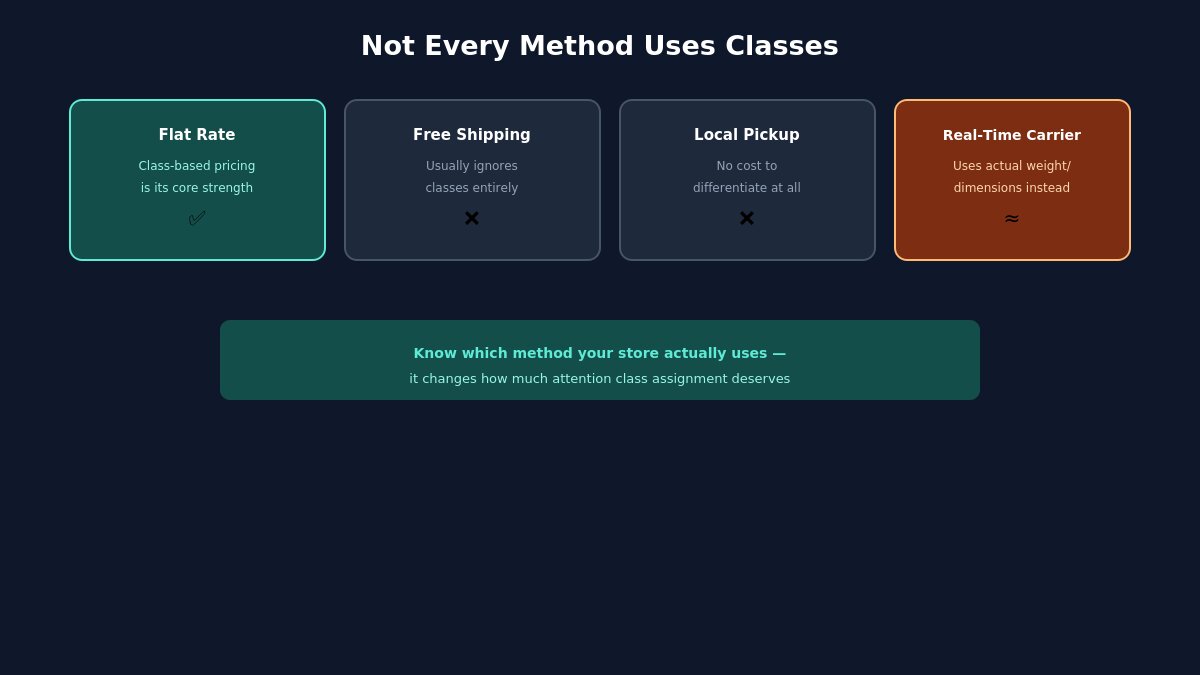
Free Shipping typically ignores shipping classes entirely — it’s usually configured as either available or unavailable based on a minimum order amount or a coupon, rather than varying by what’s in the cart. If you need to exclude oversized items from a free-shipping promotion specifically, this usually requires either a dedicated plugin or careful use of minimum-order-amount logic rather than the built-in class system.
Local Pickup generally ignores shipping classes as well, for the obvious reason that there’s no actual shipping cost to differentiate — the customer is collecting the order directly.
Real-time carrier calculated rates (UPS, FedEx, USPS integrations, and similar) typically calculate cost based on actual package weight and dimensions pulled from your product data, rather than your manually configured shipping classes at all — in this setup, accurate product weight and dimension fields matter more than shipping class assignment, since the carrier’s own rate engine is doing the real calculation.
Table Rate and other premium shipping plugins often extend class-based pricing well beyond what Flat Rate offers natively — multiple weight breakpoints, class combinations, and more complex conditional logic — worth considering if your product mix has shipping needs too complex for Flat Rate’s simpler class-cost model to handle well.
Knowing which method your store actually uses changes how much attention shipping class assignment deserves — it’s essential for Flat Rate class-based pricing, largely irrelevant for Free Shipping or Local Pickup, and secondary to accurate weight/dimension data if you’re using real-time carrier rates.
A Note on Naming Zones and Classes Clearly
Why clear naming conventions matter for shipping zones and classes
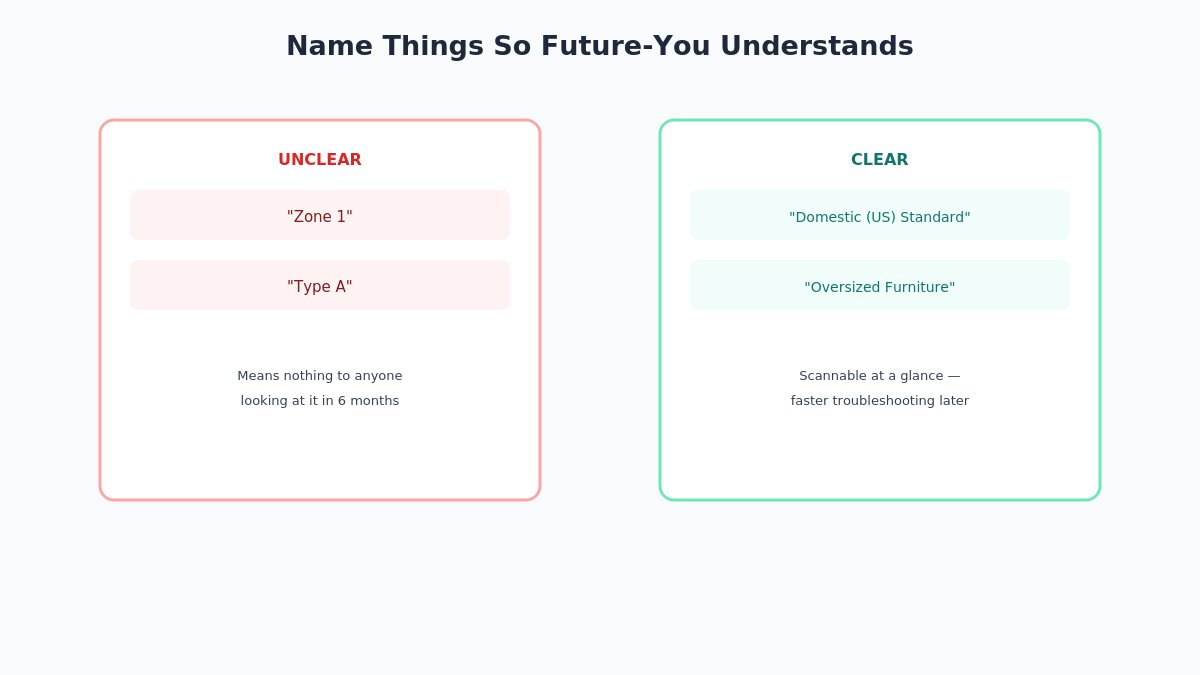
This sounds like a minor detail, but it has real practical consequences on any store that grows past a single person managing it, or that you might hand off to someone else eventually. A zone named “Zone 1” or a class named “Type A” means nothing to anyone looking at the configuration six months later, including your future self. Clear, descriptive naming — “Domestic Standard Shipping,” “Oversized Furniture,” “EU Countries” — turns your shipping configuration into something a new team member or a support person helping you troubleshoot can understand at a glance, rather than something that requires reverse-engineering the original setup logic from scratch.
This matters especially for troubleshooting: when a customer reports a wrong shipping rate, being able to quickly scan a zone list with clear names and immediately identify which zone should apply is considerably faster than clicking into several ambiguously-named zones one at a time to figure out which one is actually relevant. The few extra seconds spent naming things clearly during setup pays for itself many times over during every future troubleshooting session.
Common WooCommerce shipping zone and class mistakes
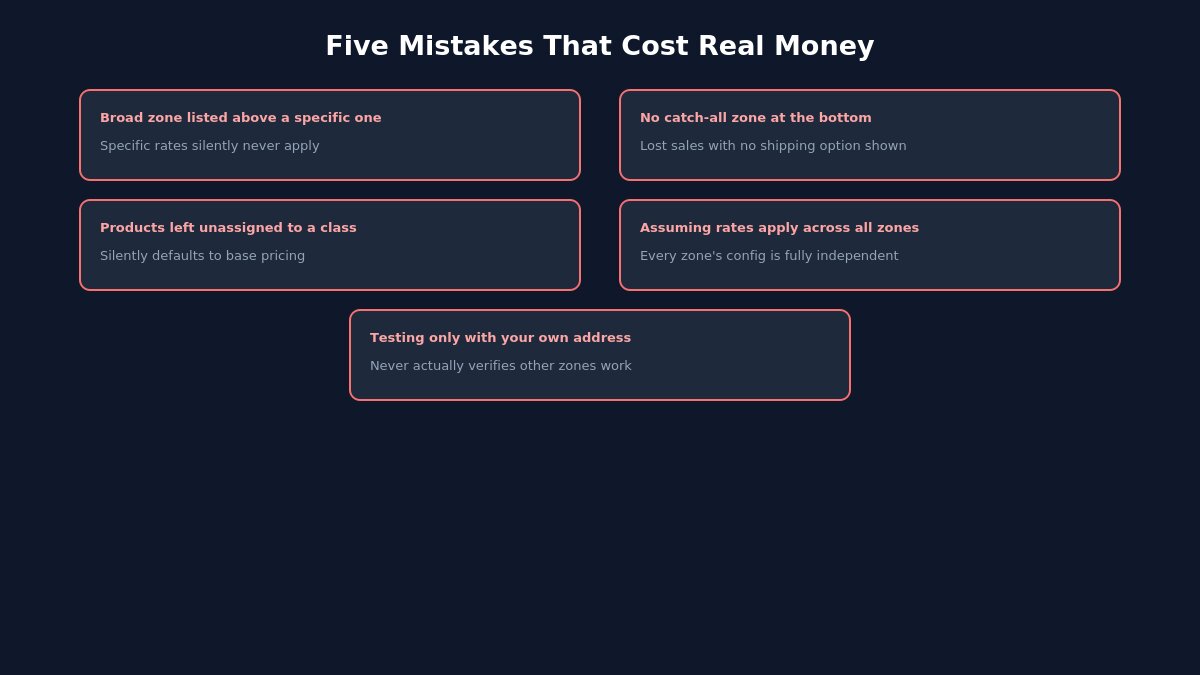
Zone order placing a broad region above a specific one, silently preventing the specific zone’s rates from ever being reached, exactly as covered above.
No catch-all zone at the bottom, leaving customers outside your defined regions with no shipping options and no way to complete checkout.
Products left unassigned to any shipping class, quietly defaulting to base pricing even though you intended class-based rates to apply — worth auditing your product catalog periodically, not just checking it once at initial setup.
Configuring class-based rates in one zone and assuming they apply everywhere, when zone configuration is always independent — a rate structure needs to be replicated deliberately in each zone that should use it.
Testing only with your own address, which likely matches whichever zone you personally live in, rather than testing with addresses representative of each configured zone to confirm each one behaves as expected.
Troubleshooting: The Wrong Rate Is Showing
If a customer reports an unexpected shipping rate, work through this in order:
Confirm which zone their address actually matches — check your zone list from top to bottom, since the first matching zone wins regardless of how specific a lower zone might be.
Check that zone’s configured shipping methods and rates directly, rather than assuming the issue is elsewhere.
Check the shipping class assigned to each product in the affected cart, confirming it matches what the rate configuration expects.
Test the exact same cart and address yourself in a private browser window, since caching or a logged-in session can occasionally show stale shipping calculations that don’t reflect a recent configuration change.
If you’re setting this up on a new store and want to avoid working through this reactively, our documentation covers general WooCommerce setup guidance, and our ticket support team can help review a specific zone and class configuration if something isn’t behaving as expected.
The Setup Order That Prevents Most Shipping Problems
If you set this up in a deliberate order, most of the common mistakes above become difficult to make by accident: define your shipping classes first, based on genuinely different shipping characteristics your products actually have. Then build your zones from most specific to least specific, always ending with a catch-all. Then configure each zone’s rates, applying class-based pricing wherever your product mix genuinely needs it. Then test with real addresses and real cart combinations before trusting the configuration live. Skipping the order — building zones first, adding classes as an afterthought, testing only with your own location — is exactly how the mistakes covered throughout this guide happen in practice.
None of this requires ongoing complexity once it’s set up correctly the first time. A well-ordered zone list and a clean set of clearly named shipping classes, configured once with real testing, tends to keep working correctly for a long time — the mistakes covered in this guide are almost always initial setup errors, not things that spontaneously break on their own later. Get the order right at the start, and shipping becomes one of the more set-and-forget parts of running the store, rather than a recurring source of customer complaints and lost revenue.
Hello everyone! We’re Galussothemes content team, we love to write new blogs for WordPress Joomla! and other tech niches everyday. We’re talented young people who hold a strong passion for website development, designing, and marketing. Feel free to leave your comment if you have any issues or questions with our blogs.
Interesting with this topic? You also interest with this articles: