Are you looking for ways to add space between blocks in WordPress? Have you noticed that your content looks cluttered and hard to read? Don’t worry, it’s easy to add space between blocks in WordPress and make your content look more organized. In this blog post, we’ll show you how to add space between blocks in WordPress.
Why and when do you need to add space between blocks in WordPress?
In WordPress, adding space between blocks is important for the visual clarity and readability of your content. Adding space between blocks helps break up the content into visually distinct sections, making it easier for readers to understand the structure and hierarchy of your content. Additionally, you can also add space between blocks to separate your blocks into different sections. As a result, it is clear for readers to enjoy each section of your content when your website has multiple sections on a page. Another benefit is that adding space will improve the readability of your content. Indeed, if you have long paragraphs of text, breaking them up with white space can make them easier to read and less daunting.
Overall, adding space between blocks in WordPress can make your content more readable and visually appealing. You should use it strategically to create a clear and organized layout that helps readers navigate your content. Hence, in today’s blog, we will provide you with a detailed tutorial to help you easily add space between blocks in WordPress. Let’s dive into our blog.
How to add space between blocks in WordPress?
There are a few different ways to add space between blocks in WordPress, depending on your preferences and the type of content you are working with. Now, you can refer to the following methods:
Method 1: Using built-in space block
WordPress comes with a built-in “Spacer” block that you can use to add blank space between other blocks. To use it, let’s follow the instructions below:
First of all, you need to open the page or post where you want to add space between blocks in the WordPress editor.
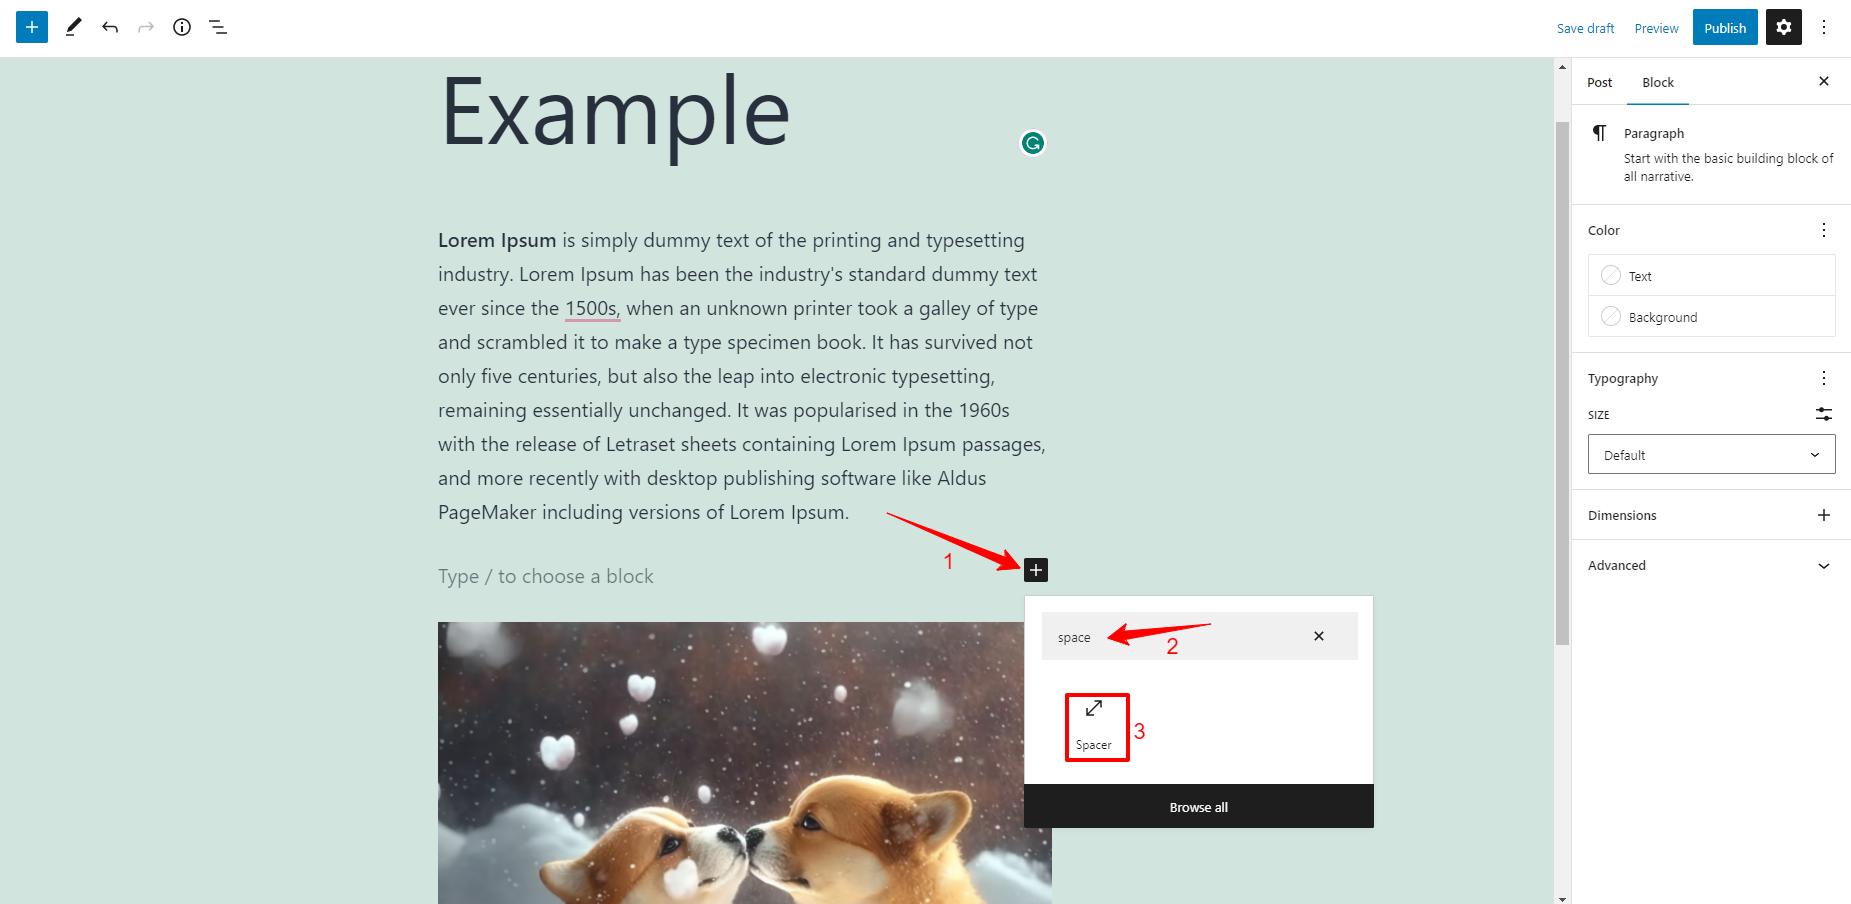
- Then, let’s determine the sections you want to separate and click on the “+” button to add a new block and search for the “Spacer” block from the block library and add it to your content.
- Once the spacer block is added to your content, now you can adjust the height of the spacer block as desired.
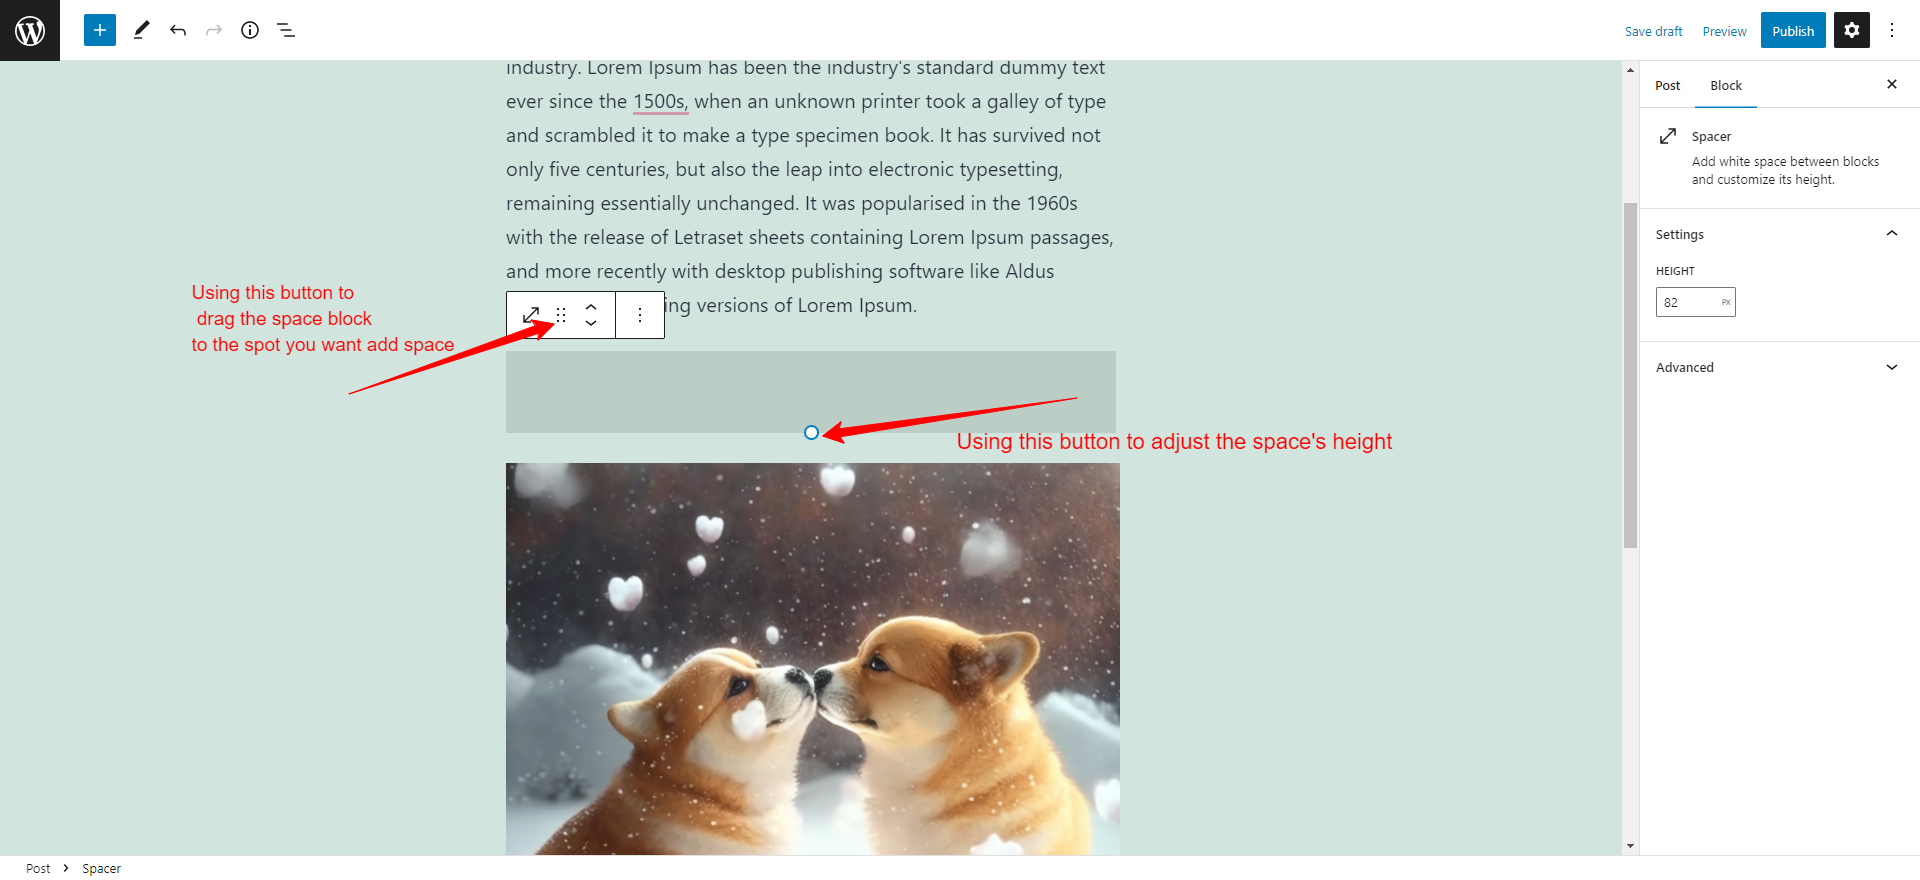
Moreover, you can also drag the spacer block to the spot where you want to add space between blocks.
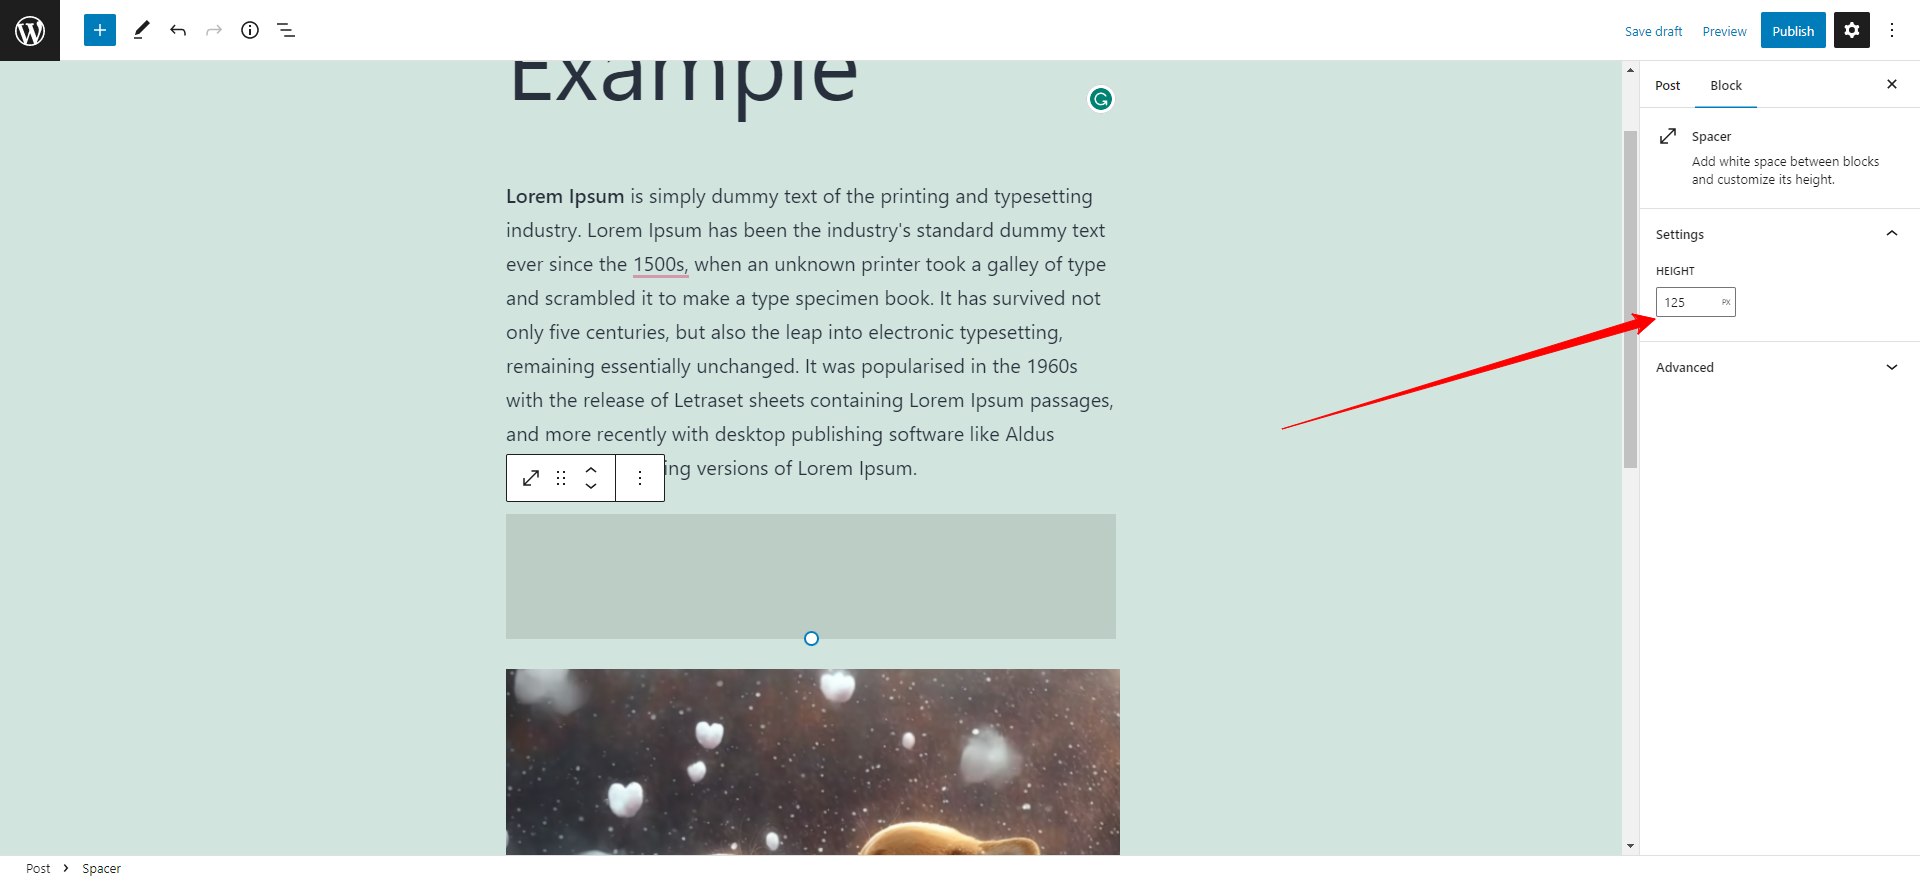
Alternatively, you can adjust the space’s height by entering the value you want in the Spacer block settings located in the sidebar.
Similarly, you can repeat the process to add additional spacer blocks as you need.
Method 2: Adding Custom CSS
If you have some knowledge of CSS, you can use custom CSS to add space between blocks in WordPress. One way to do this is to add a CSS class to the blocks you want to space out, and then use CSS to add margin or padding to the class. You can add custom CSS using a plugin such as Simple Custom CSS or by adding it to your theme’s stylesheet.
Here is a step-by-step tutorial to add space between blocks in WordPress by adding custom CSS:
Initially, let’s open the page or post where you want to add space between blocks in the WordPress editor.
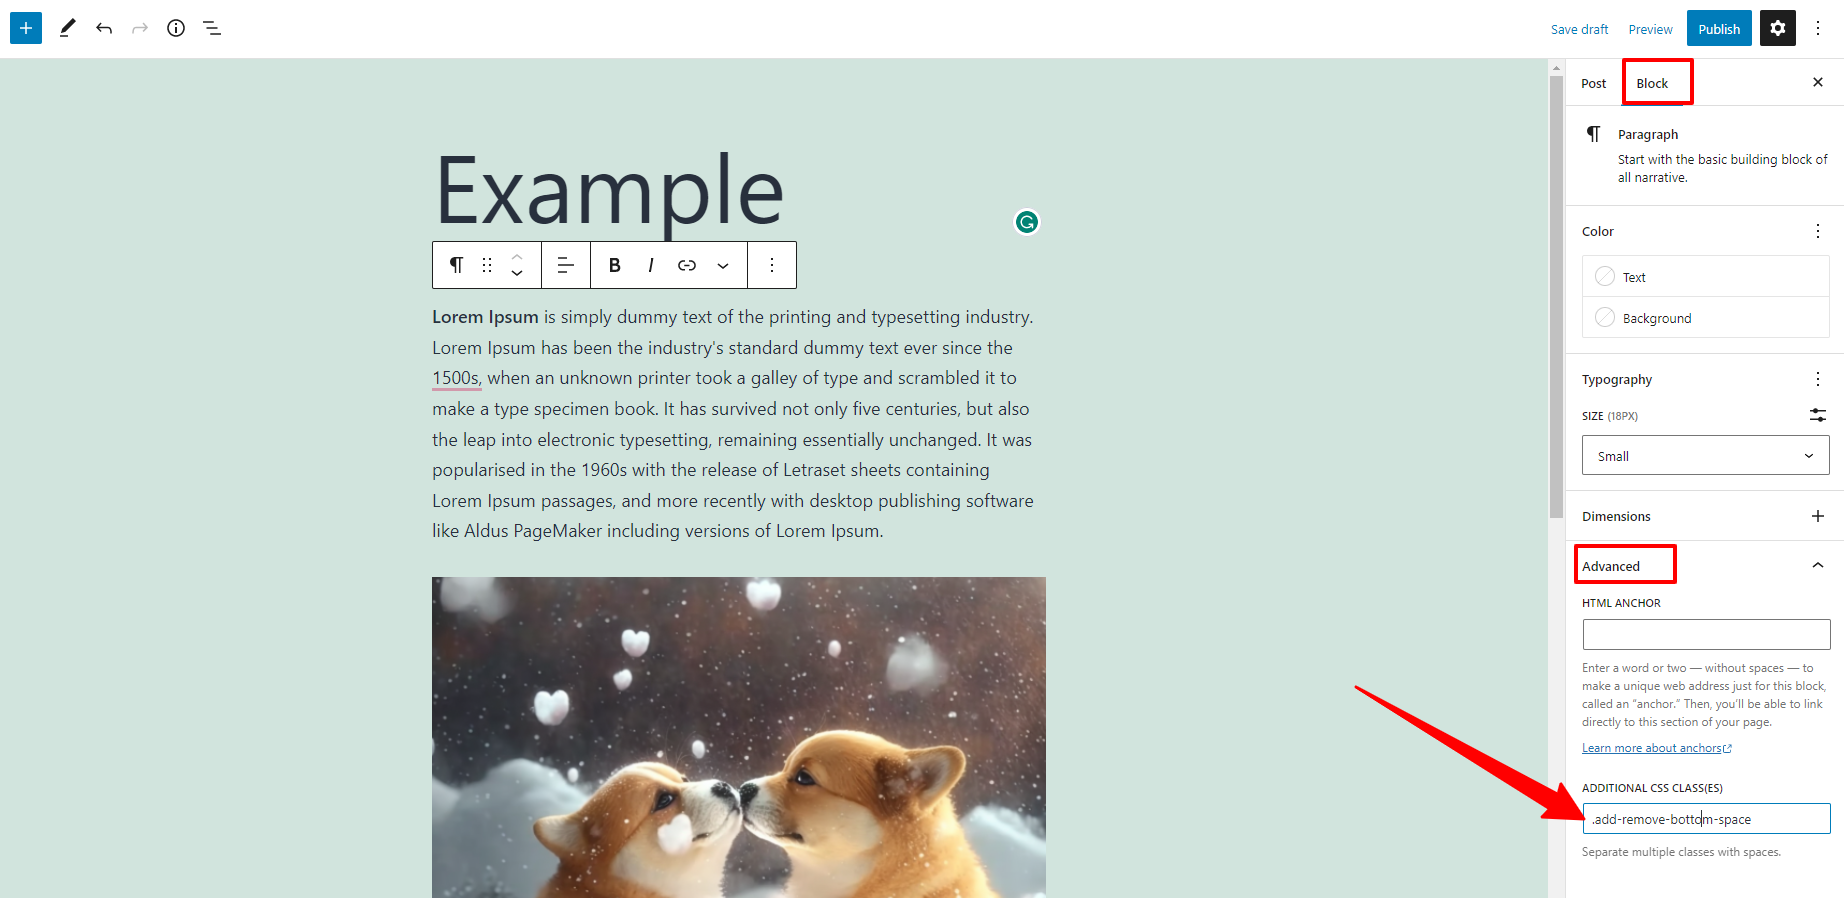
Next, you need to select the block you want to add space around and click on the “Block” tab in the right-hand options panel. Then, let’s scroll down to the “Advanced” settings section and click it. This will open a list of additional options for your selected block.
Now, you need to add the following code in the “Additional CSS classes” field:
.add-remove-bottom-space
This snippet will create a new CSS class specifically for your chosen block. Once, you are done, don’t forget to click on the “Update” button to save your changes.
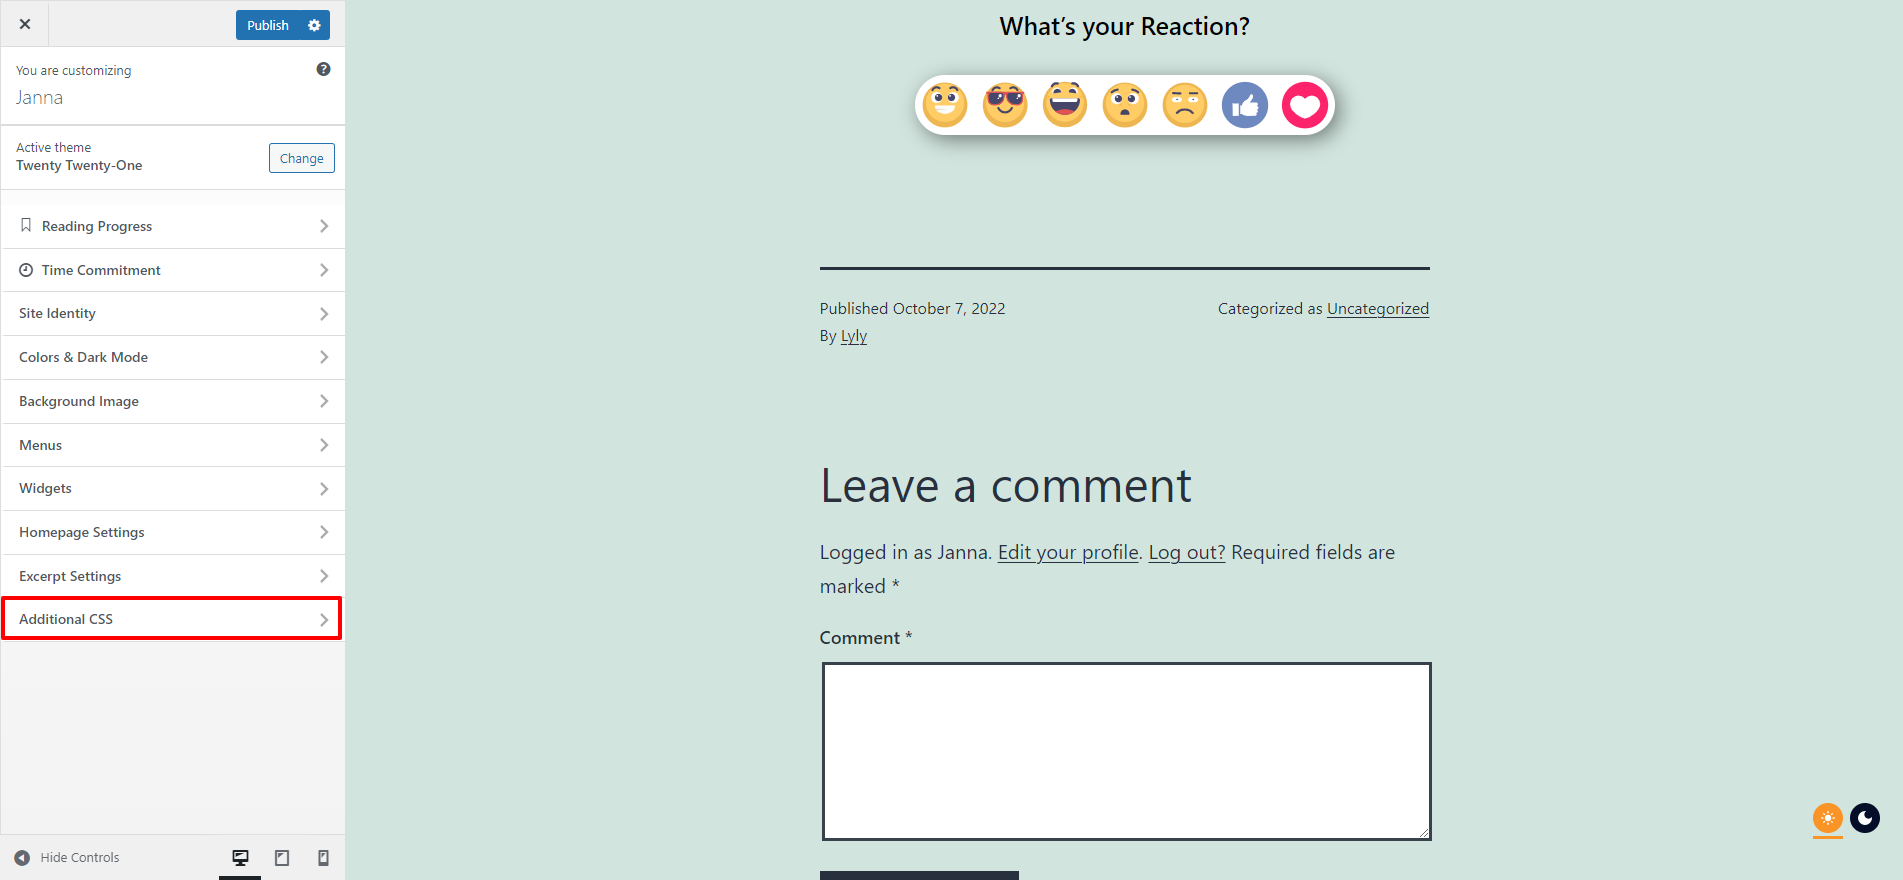
After that, you need to go to Appearance >Customize from your WordPress dashboard to open the WordPress Theme customizer. This will display a set of menu options on the left-hand side, you need to click on the “Additional CSS” option. It will take you to the place where you can add custom CSS code.
Next, paste the following code snippet into the given box.
.add-remove-bottom-space {

margin-bottom: 20;

}
This code snippet will help you add the space(20px) from your selected block. In addition, you can change the value from “20” to something that suits your requirements. Moreover, if you want to remove space between blocks, you can also set the bottom margin to “0”.
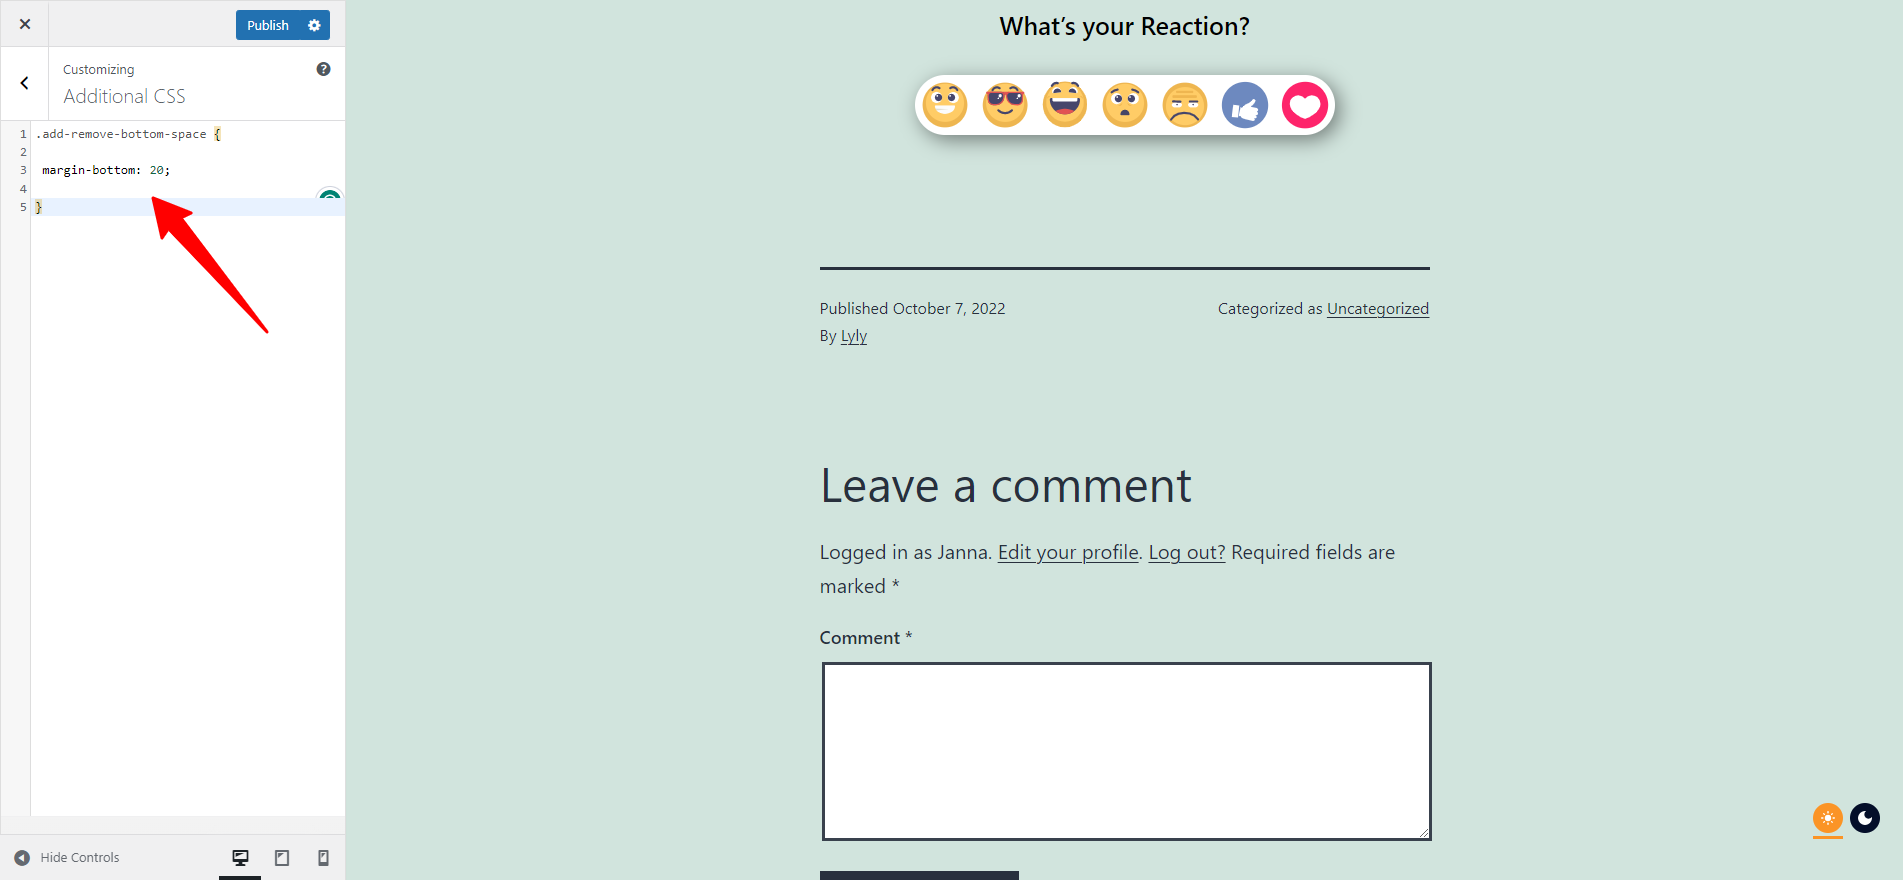
Once you are finished, don’t forget to click on the “Publish” button to save your changes.
End
Adding space between blocks in your WordPress blog can improve the visual design and readability of your content. There are a few different methods you can use to achieve this, including adding a spacer block, adjusting the padding or margin settings, and using custom CSS. No matter which method you choose, adding space between blocks can help create a clear and organized layout that helps readers navigate your content. It’s a small but important detail that can have a big impact on the overall look and feel of your WordPress blog.
If you have any questions or queries about our blog, don’t hesitate to leave a comment below. Moreover, you can drop by our website to discover tons of bewitching, eye-catching, free WordPress Themes.

Hello everyone! We’re Galussothemes content team, we love to write new blogs for WordPress Joomla! and other tech niches everyday. We’re talented young people who hold a strong passion for website development, designing, and marketing. Feel free to leave your comment if you have any issues or questions with our blogs.

