Are you looking for a way to make your WordPress website more visually appealing? If so, you’re in the right place! In this blog post, we’ll be giving you a step-by-step guide on how to easily display WordPress widgets in columns. So, if you’re ready to give your website a fresh look, keep reading to find out how!
What are the advantages of displaying WordPress Widgets in columns?
Displaying WordPress Widgets in columns brings your website plenty of benefits including
- Improved Layout: Displaying widgets in columns allows you to arrange content in a more organized and aesthetically pleasing manner. This helps to create a visually appealing layout for your website.
- Better Use of Screen Real Estate: By displaying widgets in columns, you can make better use of the available screen space. This is particularly important for websites with a lot of content or information to display.
- Increased Navigation: By organizing content in columns, you can create a more structured navigation experience for your users. This can help users to find the content they are looking for more quickly and easily.
- Customizable Design: WordPress widgets can be customized to suit your website’s design and style. By displaying widgets in columns, you can create a unique look and feel for your website.
- More Control: Displaying widgets in columns gives you more control over the placement and organization of content on your website. This can help to improve the user experience and make it easier for users to find the information they are looking for.
How to Display WordPress Widgets in Columns
Method 1: Displaying WordPress Widgets in the Footer Sidebar
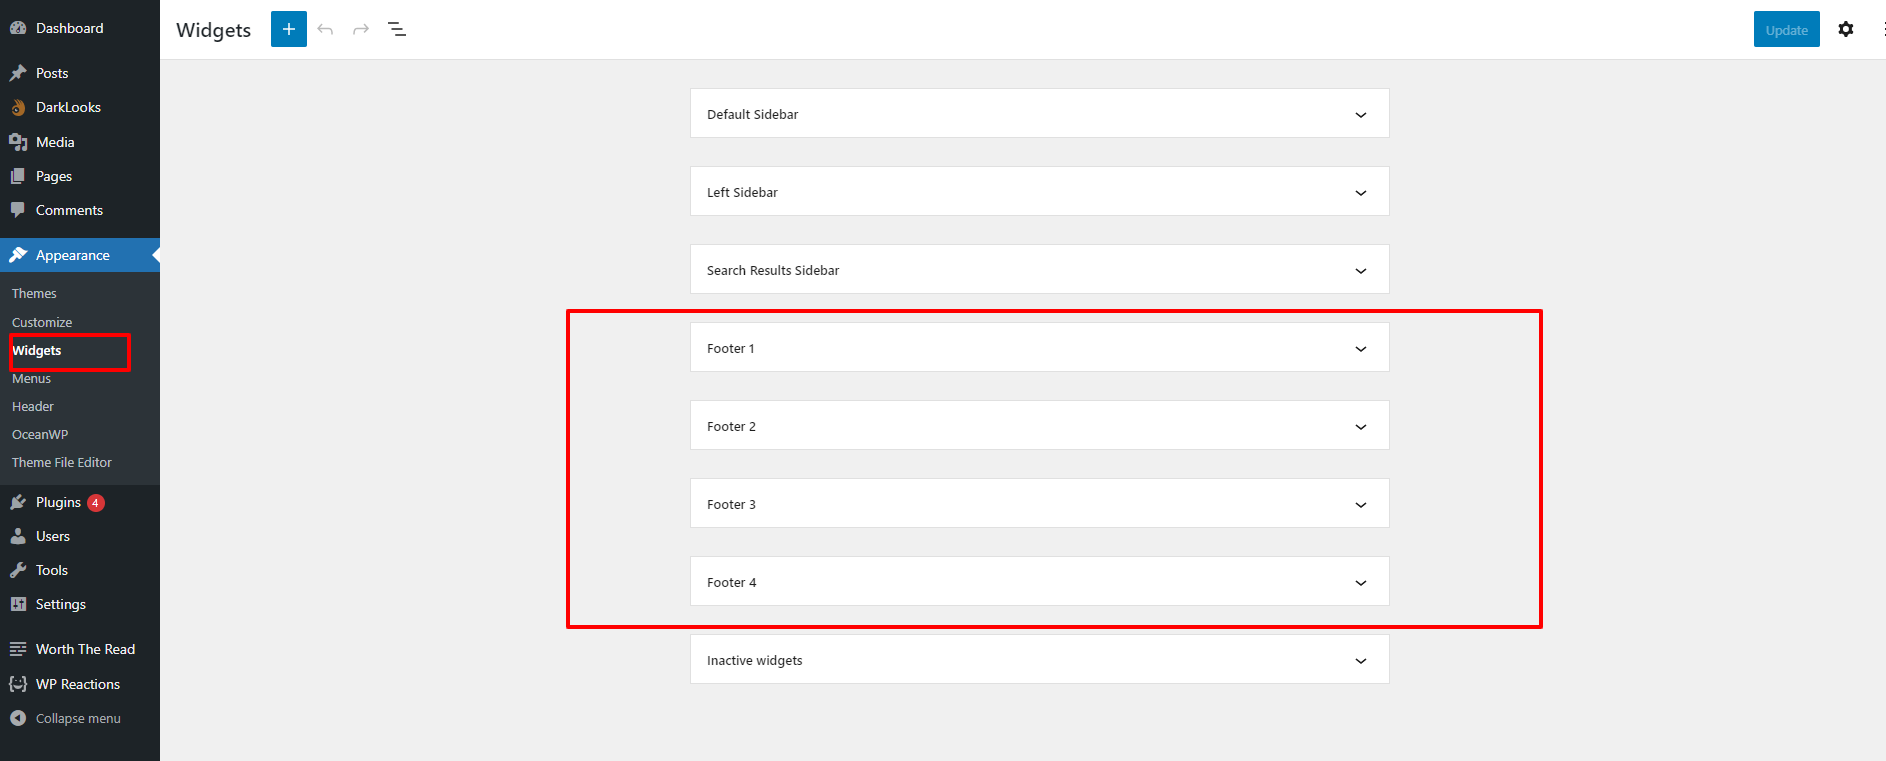
First of all, you need to check if your theme has a footer widget area. You can check by going to the “Appearance > Widgets” page and then scrolling down to see the footer widget area.
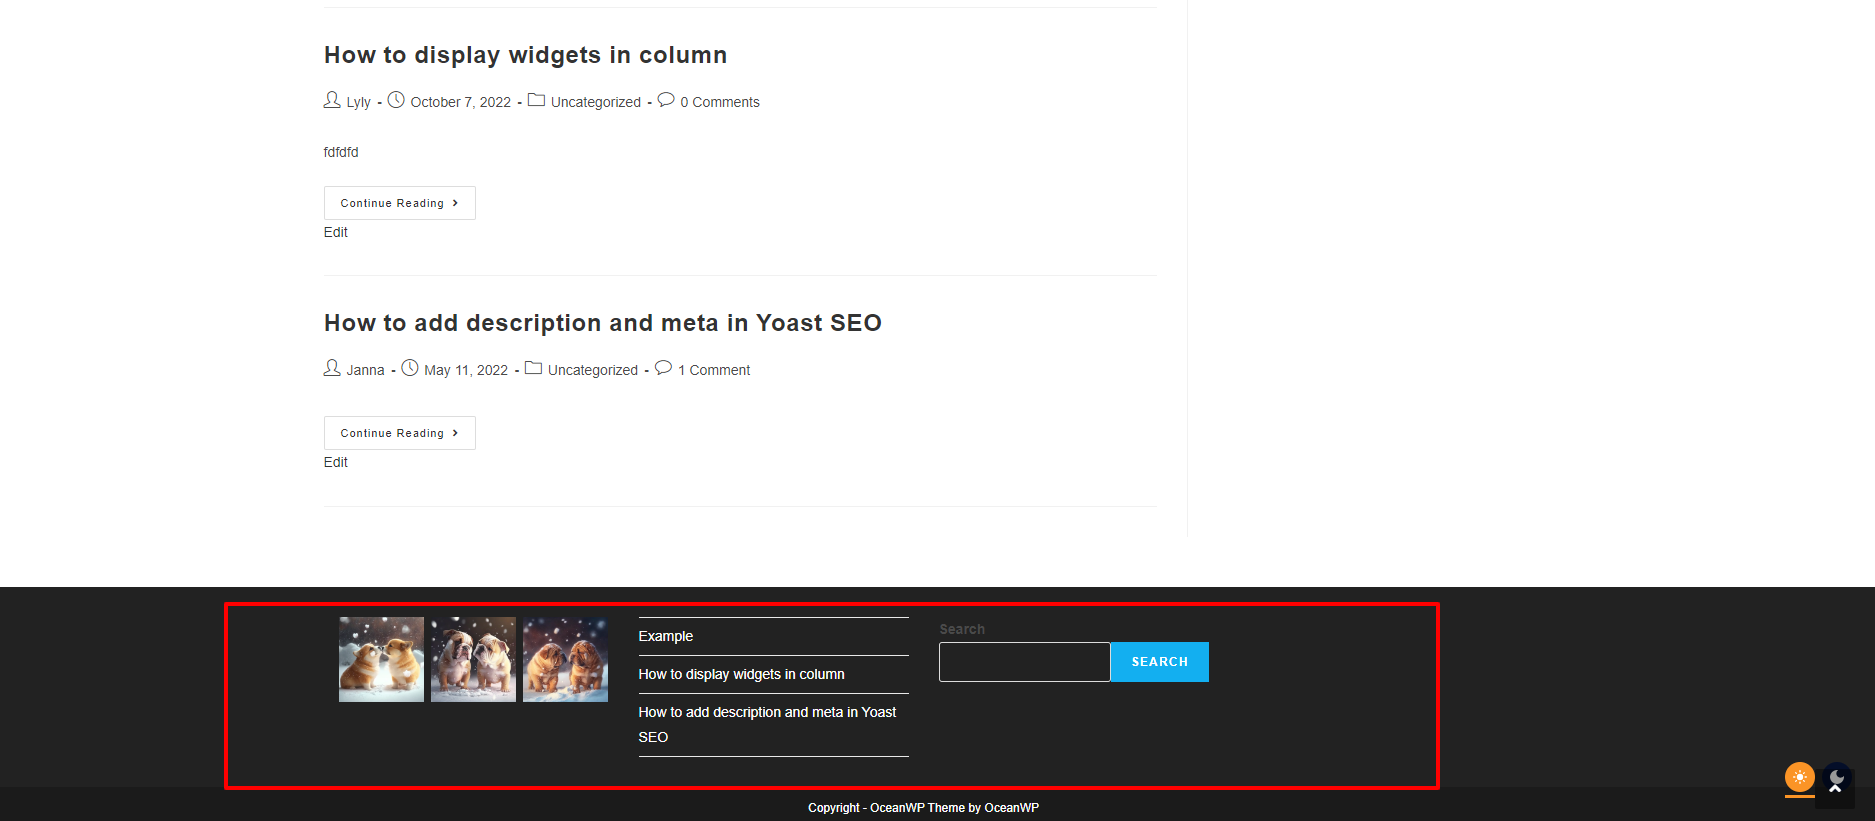
The number of footer widgets will depend on the theme that you are using. For example, we are using the OceanWP theme that comes with 4 widget areas in the footer. Each widget area will be shown as a separate column.
Now, in order to expand any footer widget area, you only need to add any widget from a list of available widgets on the left-hand side into the footer area that you want to expand.
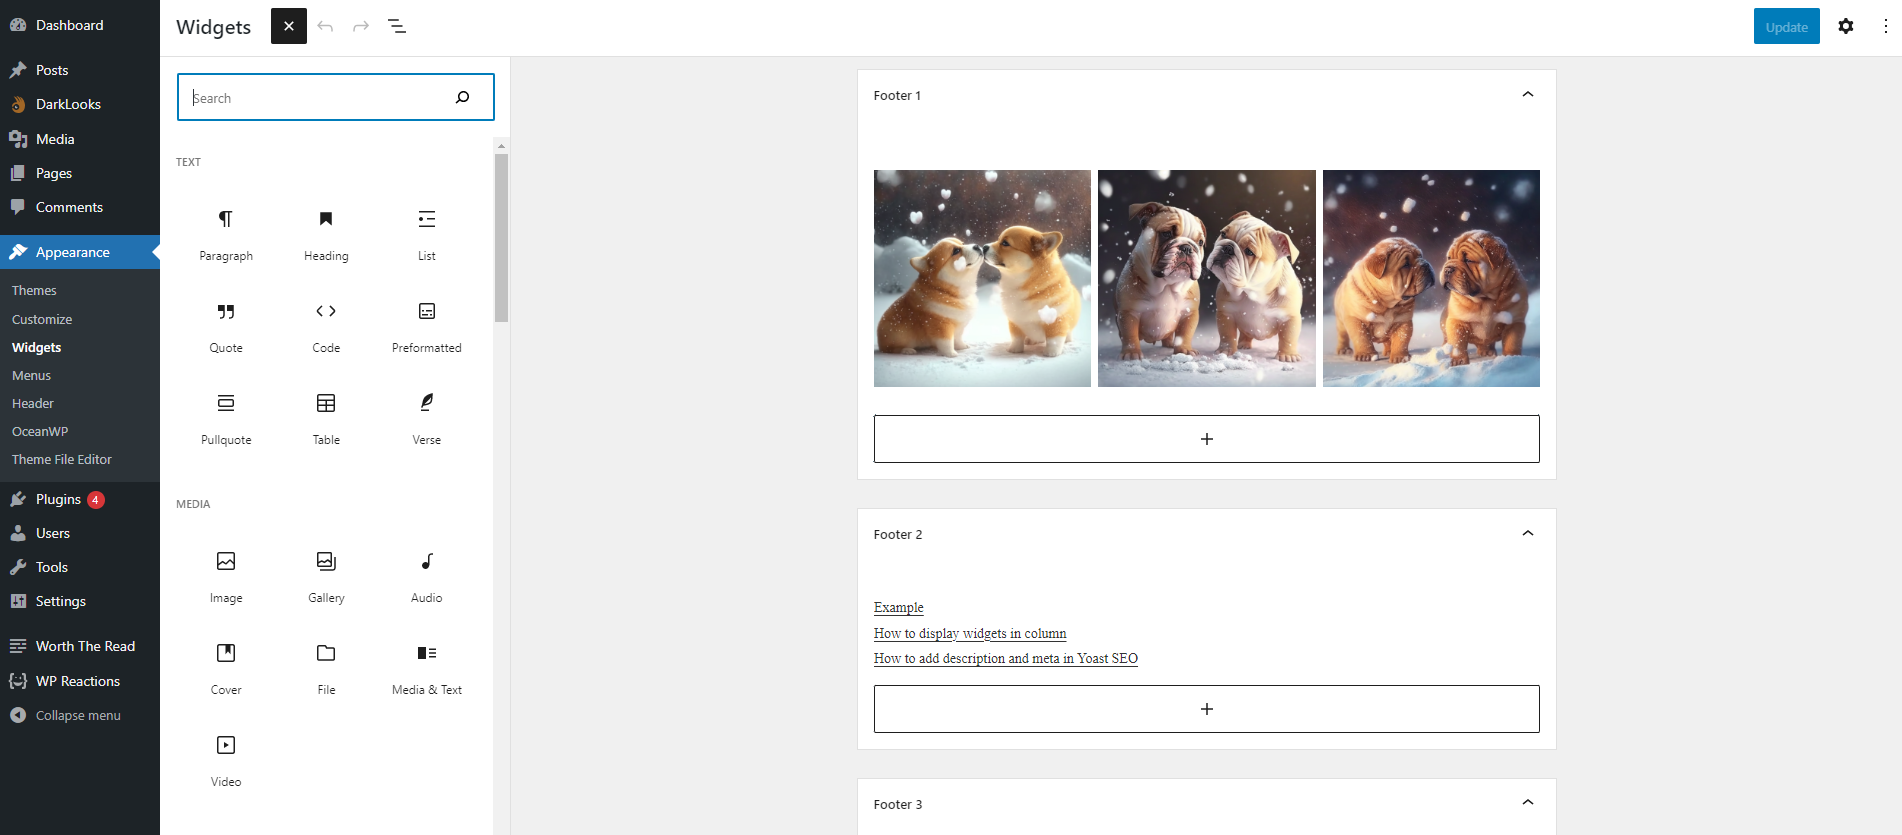
In addition, you can configure the settings of your added widgets as needed. This will vary depending on the specific widgets you have chosen.
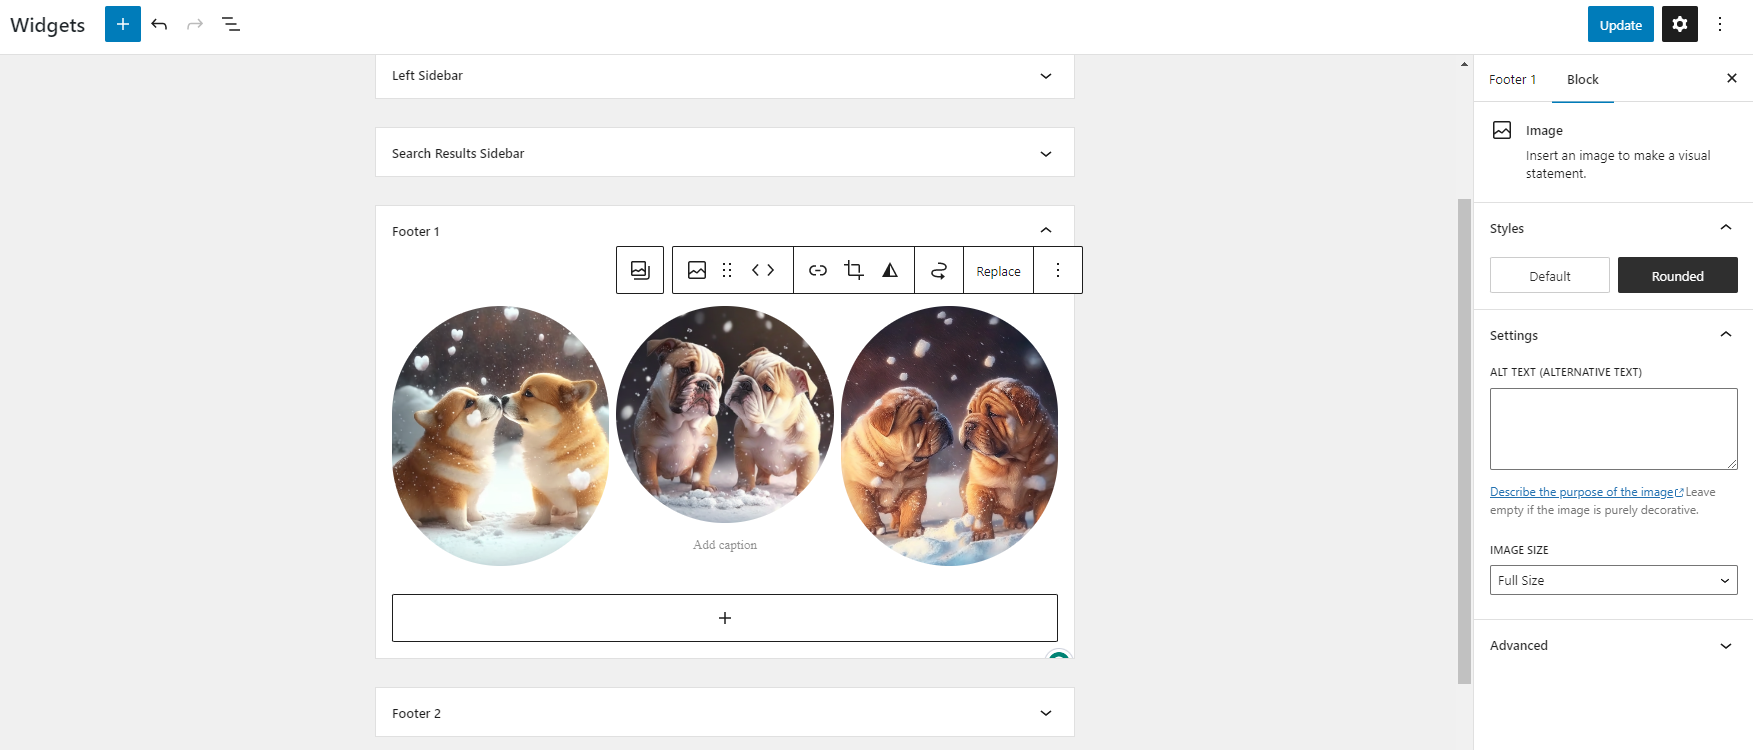
When you are done, don’t forget to click on the “Update” button in the top right corner to save your changes.
Now, you can visit our website to see your added widgets displayed in columns.
Method 2: Displaying WordPress widgets in columns inside Posts and Pages
As its name suggests, this method lets you display widgets in columns inside the content area of your posts/pages. To do that, first of all, you need to open any post/page that you want to display WordPress widgets in columns.
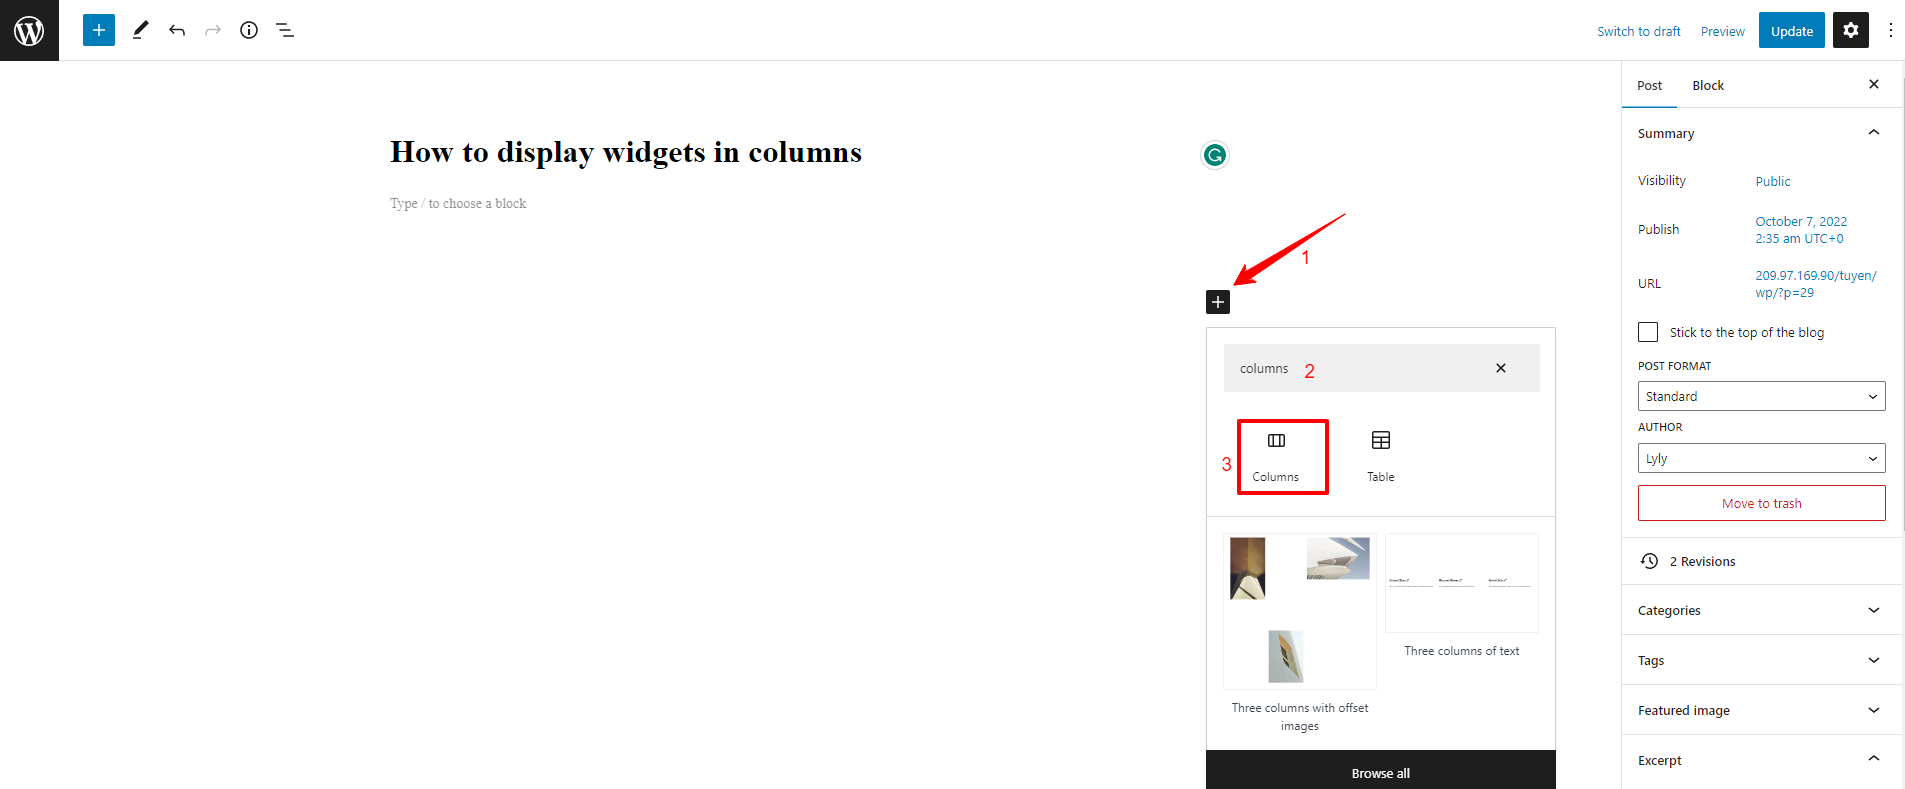
On the block editor screen, now you need to click on the “+” icon to add the “Columns block” to your content area.
Once the Columns block is added, you need to choose the number of columns you want to display.
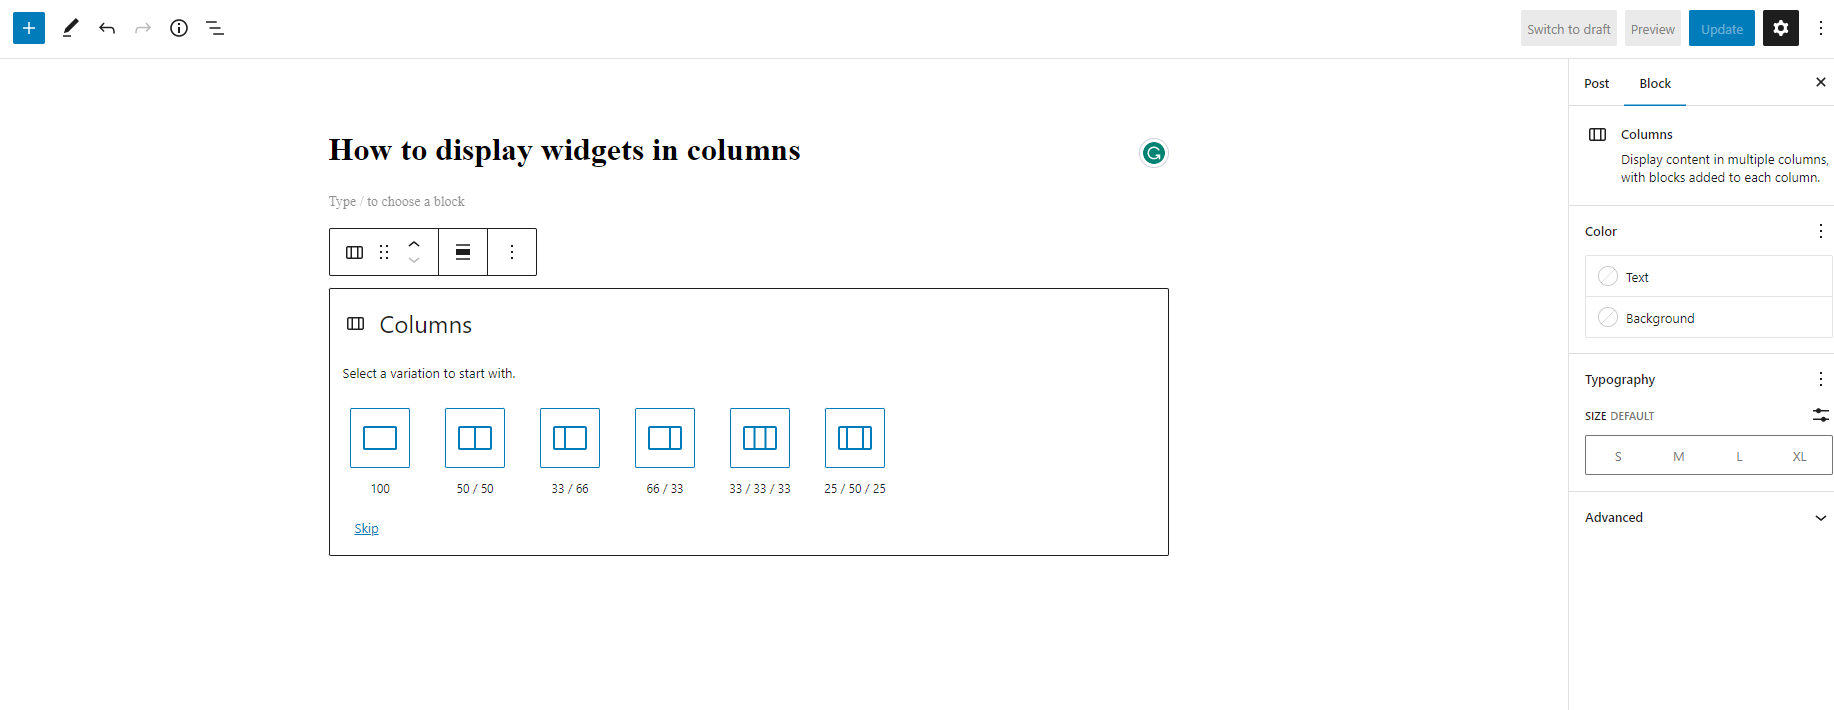
After choosing the column style, you need to add the block you want to the columns one by one.
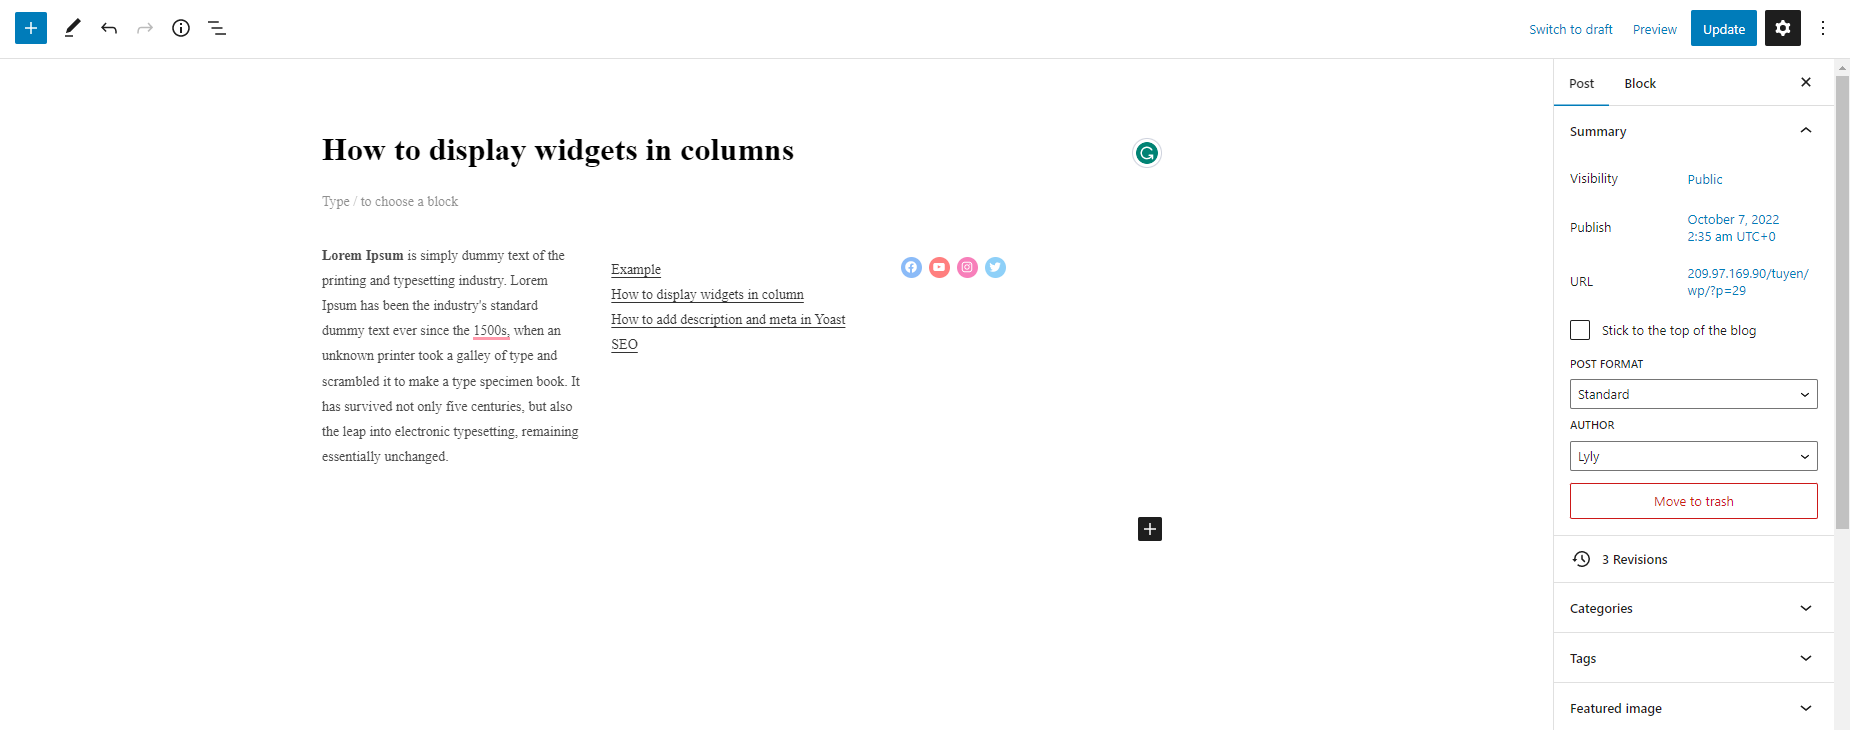
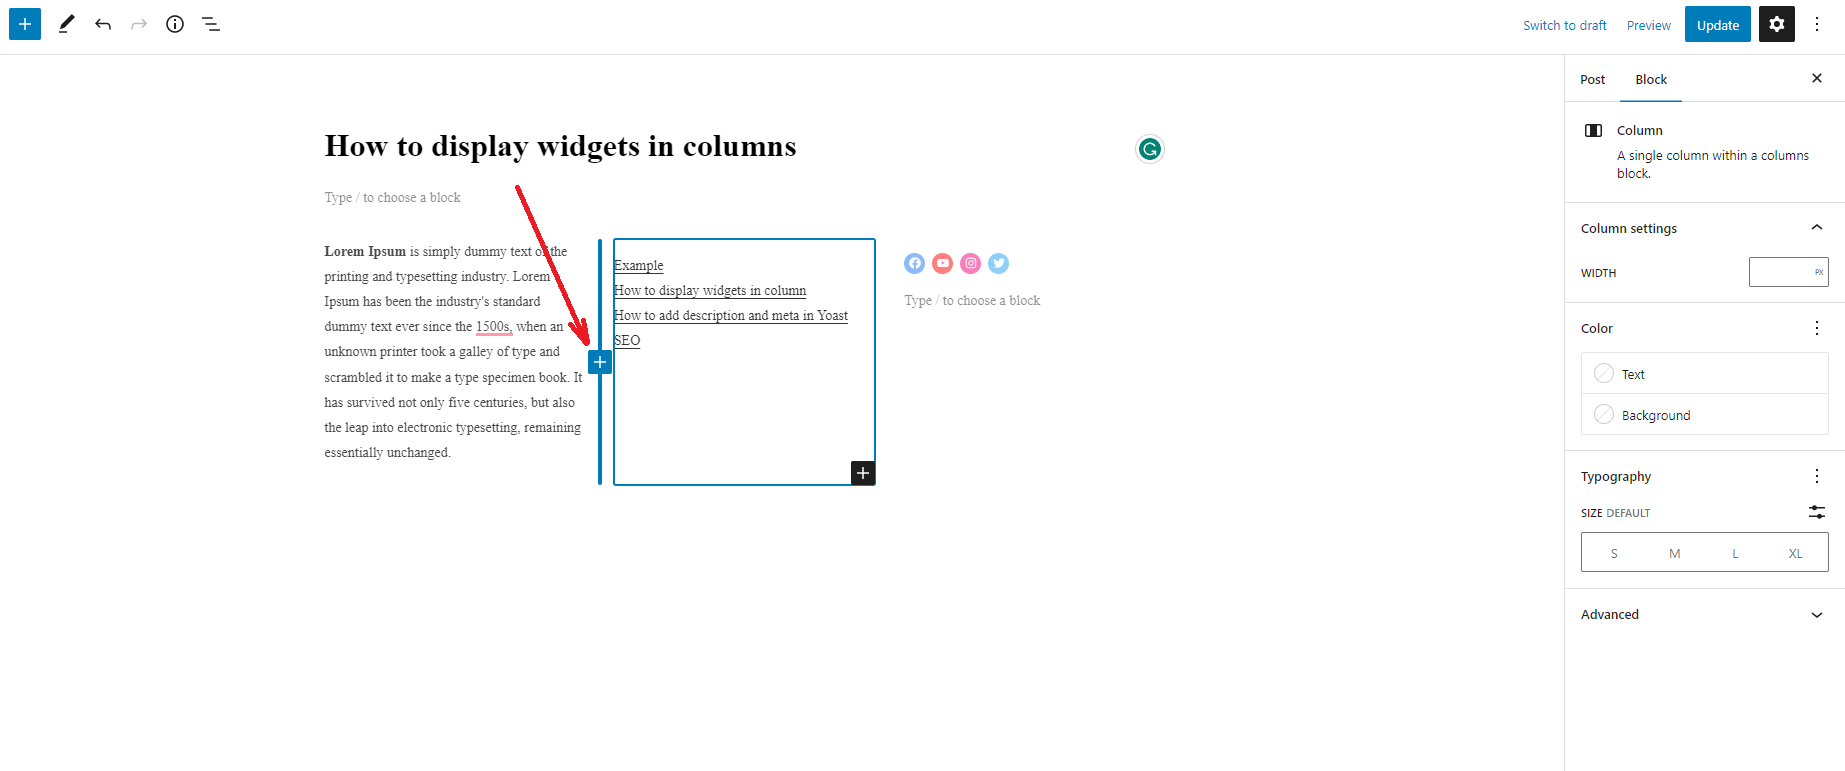
The most significant advantage of this method is that you can also add click on the “+” button to add any additional block that you want, which gives you a lot of flexibility.
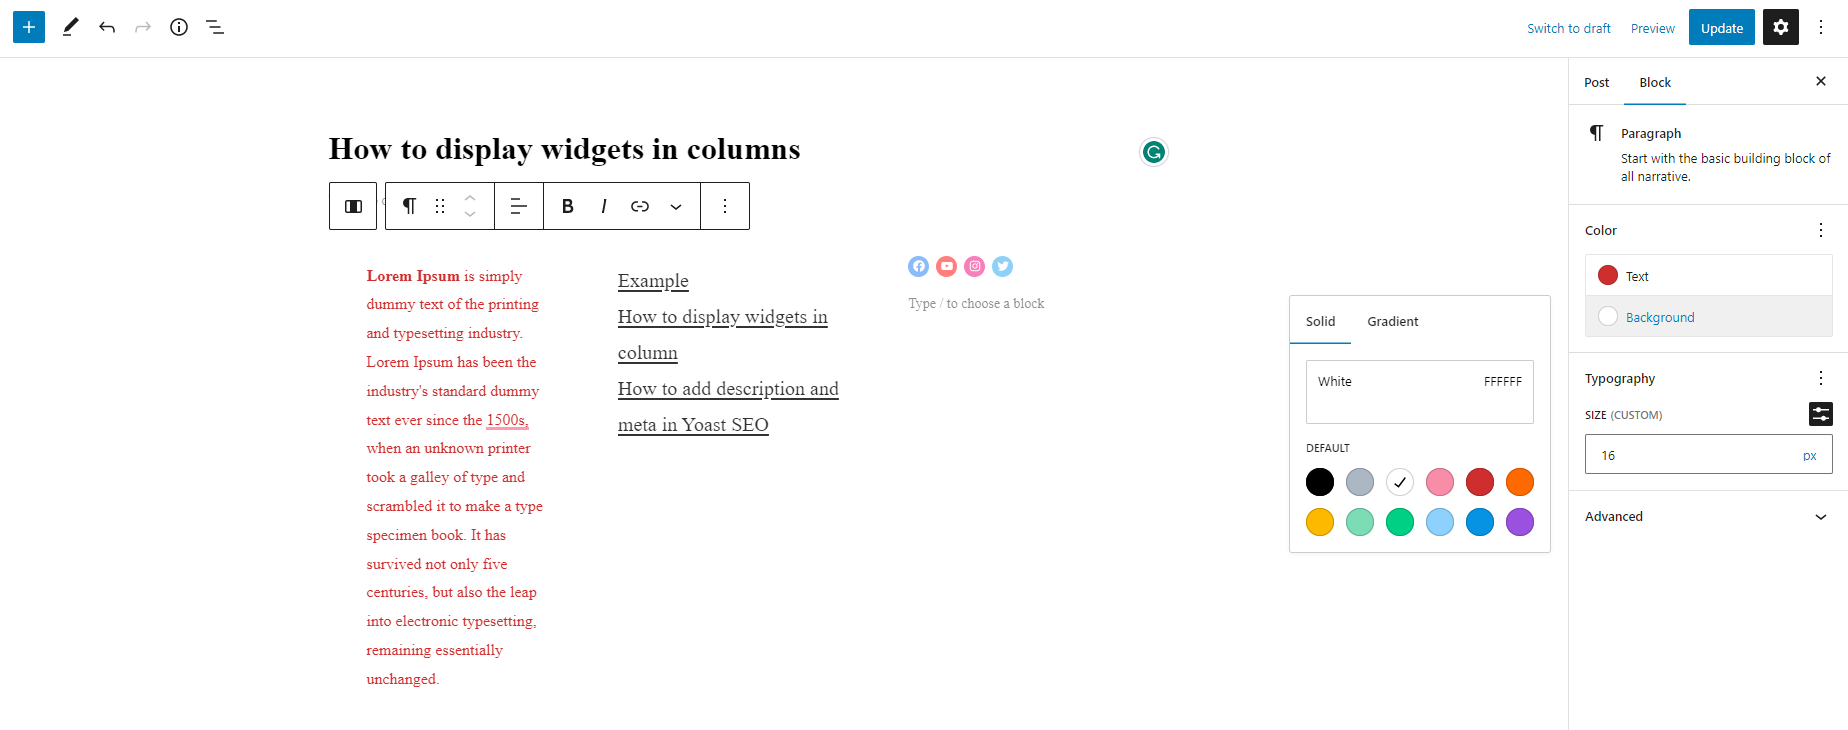
Plus, the block editor also allows you to customize the background and text color inside the block.
You can preview your design in action. Once you are pleased with your design, remember to click on the “Update” or “Publish” button to save your post or page.
Wrap up
Hopefully, these mentioned methods can help you improve the appearance and design of your content. If your page builder doesn’t support columns, you still can use the assistance of plugins such as Genesis Widget Column Classes to create columns for your widget. This allows you to specify the number of columns you want to create and insert your widgets into each column.
Hopefully, this blog is useful for your website. If you have any queries, please leave a comment below. Moreover, visiting our website is a great chance for you to discover tons of free WordPress Themes. Let’s check them out.

Hello everyone! We’re Galussothemes content team, we love to write new blogs for WordPress Joomla! and other tech niches everyday. We’re talented young people who hold a strong passion for website development, designing, and marketing. Feel free to leave your comment if you have any issues or questions with our blogs.

