You built a nice card, a call-to-action box or a team-member block, saved it as a synced pattern, and placed it on twenty pages. Then you notice the problem: every copy shows the same heading, the same text and the same button link, because a synced pattern is identical everywhere. Detaching each copy breaks the sync, so the next design change has to be made twenty times by hand.
Pattern overrides solve exactly this. You keep one synced pattern that controls the layout and styling, and you mark a few blocks inside it (a heading, a paragraph, an image, a button) as editable per instance. This tutorial walks through the whole process in the current block editor, explains what can and cannot be overridden, and covers the mistakes that usually trip people up.
What pattern overrides actually do
WordPress has two kinds of patterns. An unsynced (standard) pattern is a starting point: when you insert it, the blocks are copied into the page and have no further link to the original. A synced pattern (called a reusable block before WordPress 6.3) is a single stored object: every place you insert it points back to the same content, so editing the original updates every instance. If you have not used synced patterns before, our older guide on creating and using WordPress reusable blocks covers the basics of the feature under its former name.
Overrides, introduced in WordPress 6.6, sit in between. The structure, spacing, colours and block order stay synced with the original pattern. Only the blocks you explicitly enable for overrides become editable on each page, and each instance stores its own values for them. When you later change the pattern design, for example the background colour of the card, every instance picks up the new design while keeping its own heading and text.
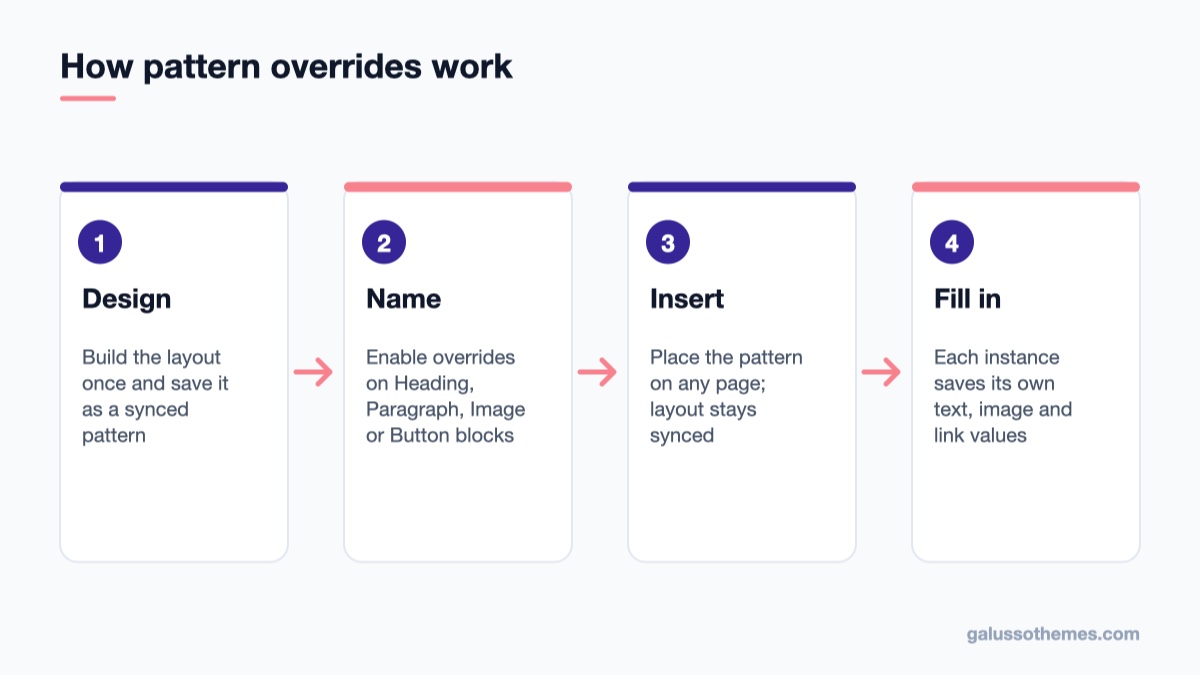
The pattern holds the design; each instance stores only its own values for the named blocks.
Under the hood, overrides are built on the Block Bindings API. Each overridable block gets a binding to the source core/pattern-overrides, and the instance on the page saves its values in the pattern block’s attributes. You do not need to write any code to use the feature, but knowing this helps when you look at the code editor and wonder where the text lives.
Everything else inside the pattern, such as Group, Columns, Cover, Spacer, List or a third-party block, stays fully synced. Styling of the overridable blocks themselves (font size, colour, alignment) is also synced: an instance can change what a heading says, not how it looks. That is usually the point, because it keeps a consistent design across the site.
Plan your pattern with this list in mind. If you want an editable list of features in a pricing card, use several Paragraph blocks instead of a List block. If you want an editable background image, use an Image block rather than a Cover block background.
Step 1: Build the layout and create a synced pattern
Start in any post or page in the block editor. Build the layout you want to reuse. A typical example is a service card: a Group block containing an Image, a Heading, a Paragraph and a Buttons block with one Button.
Create the pattern
Select the outer block that wraps everything (here, the Group). The Group block guide explains why wrapping your design in one container makes it easier to select and move.
Click the three-dot Options menu in the block toolbar.
Choose Create pattern.
Enter a clear name, for example “Service card”.
Optionally assign a category so the pattern is easy to find in the inserter.
Make sure the Synced toggle is turned on. Overrides only exist for synced patterns.
Click Create.
The selected blocks are now replaced by an instance of the synced pattern, and the pattern appears in the block inserter under the Patterns tab, in the “My patterns” section. These steps match the official Synced Patterns documentation on wordpress.org.
Step 2: Enable overrides on the editable blocks
Overrides are configured in the original pattern, not in an instance on a page.
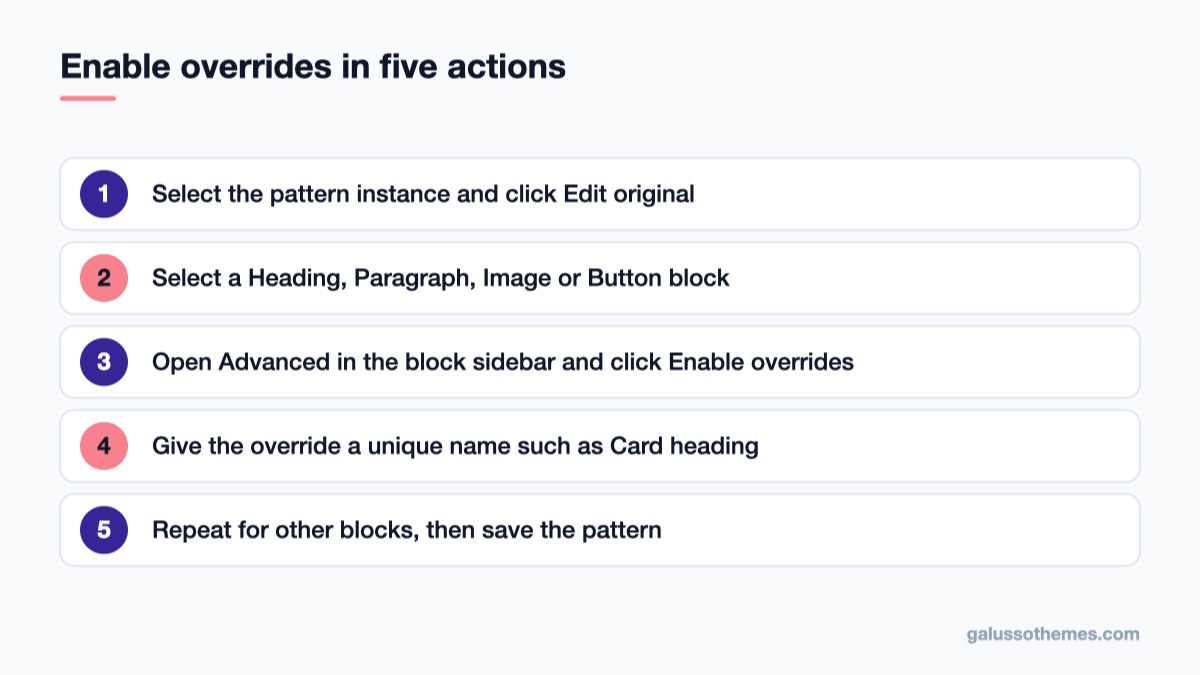
Overrides are set in the original pattern, never in a page instance.
Open the original pattern
Select the pattern instance and click Edit original in the block toolbar. The editor switches to the pattern itself. You can also reach the pattern from the Patterns screen: in a block theme go to Appearance → Editor → Patterns; in a classic theme use Appearance → Patterns, which WordPress added for classic themes in version 6.5.
Mark each block as overridable
Select the Heading block inside the pattern.
In the block settings sidebar, open the Advanced panel.
Click Enable overrides.
In the dialog, type a unique, descriptive name such as “Card heading” and confirm.
Repeat for the Paragraph (“Card text”), the Image (“Card image”) and the Button (“Card button”).
Save the pattern.
The name matters. It is shown to editors in the List View, it is how WordPress matches stored values to blocks, and it is what you will see in the code editor. “Heading 1” tells a colleague nothing; “Card heading” does.
Once saved, the blocks you named appear with their names in the List View, and the pattern sidebar lists the overrides you defined. To remove an override later, select the block in the original pattern and use the same Advanced panel to disable it.
Step 3: Use the pattern and fill in each instance
Go back to a page and insert the pattern. You can open the block inserter, switch to the Patterns tab and pick it from “My patterns”, search for its name with the add-block button, or type a slash followed by the name in an empty paragraph.
Click into the instance. Only the overridable blocks accept your input: you can rewrite the heading, change the text, pick a different image and set a new button label and link. Everything else is locked to the original. Insert the pattern again for a second card and give it different content; both cards keep the same design.
If you change an instance and want to go back to the pattern’s default content, select the pattern instance and use the Reset option in the toolbar. That restores the original values for the overridden blocks in that instance only.
What the saved markup looks like
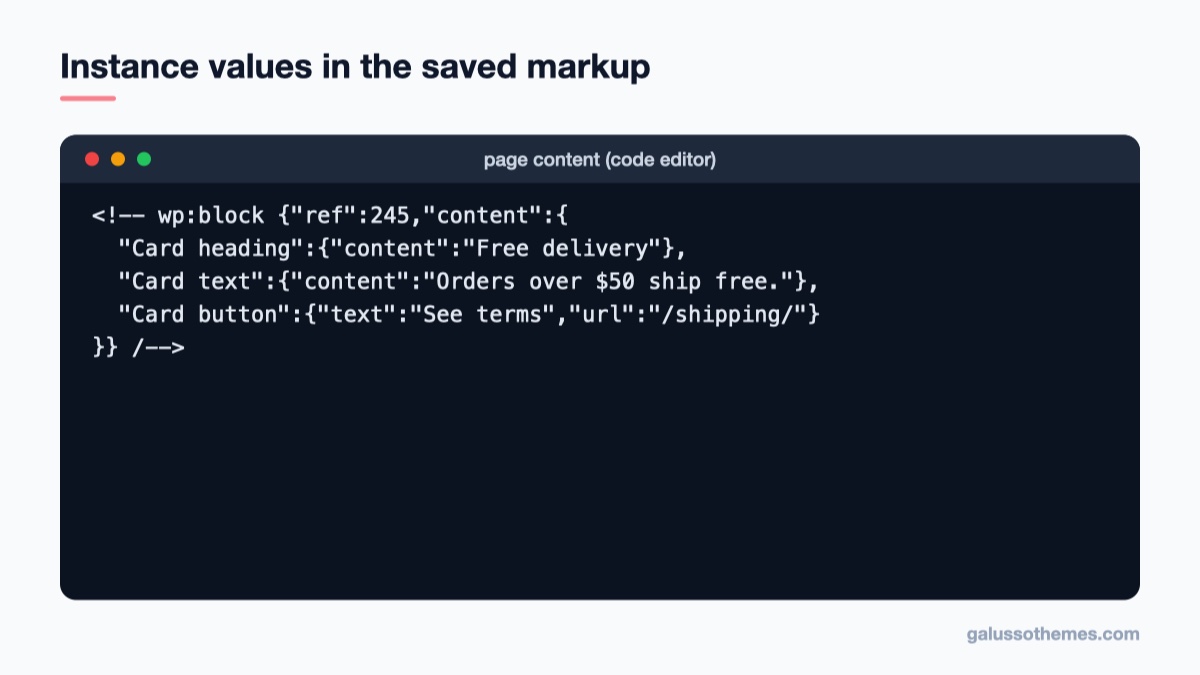
Open the code editor (Options menu in the top bar → Code editor) and you will see that the page does not contain the card’s blocks at all. It contains a single pattern block that references the stored pattern by ID, plus the per-instance values keyed by the override names:
The page stores one pattern block with a reference ID and the override values by name.
WordPress stores this on one line; it is wrapped here for readability. The ref value is the ID of the pattern post (synced patterns are stored as the wp_block post type). This also explains a key behaviour: if you rename an override in the original pattern, existing instances still store values under the old name and lose their custom content for that block. Choose names once and keep them.
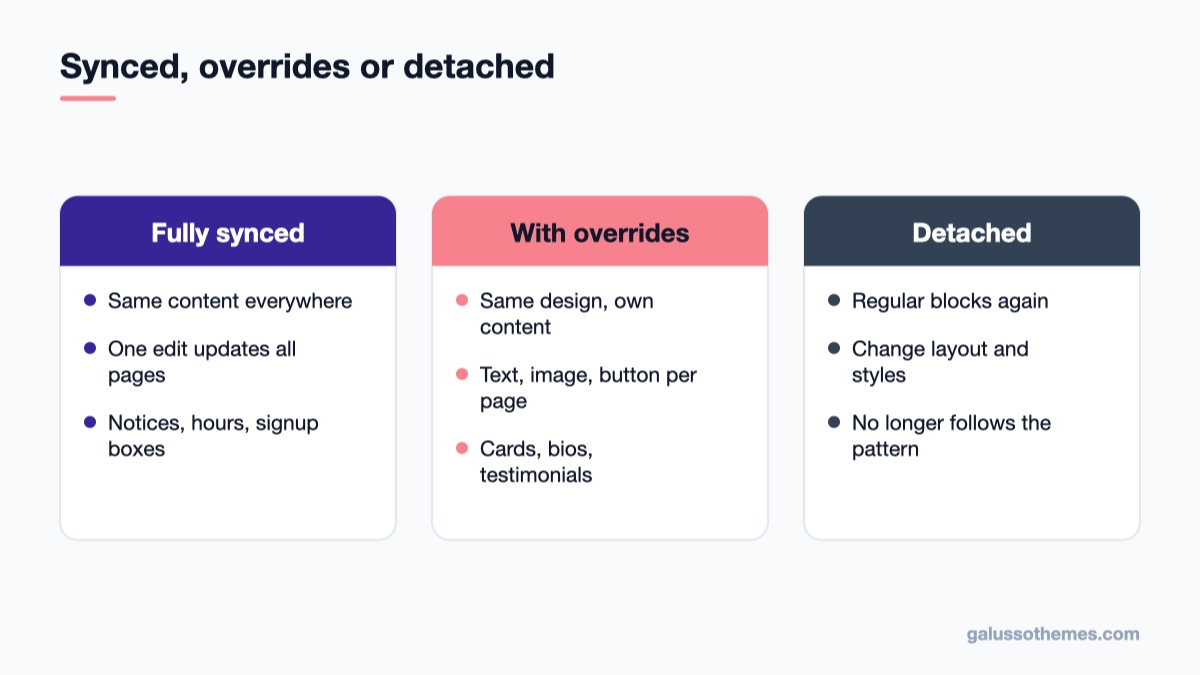
Synced, overrides or detached: which to use
Overrides are not always the right tool. Here is a quick way to decide.
Pick the option by what must stay identical across pages.
Fully synced pattern: the content must be identical everywhere. Good for a shipping notice, a newsletter signup box or business hours. One edit updates the whole site.
Synced pattern with overrides: the design must stay identical but the words, images or links differ. Good for service cards, testimonial boxes, author bios, product highlight banners and team members.
Detached or unsynced pattern: you need to change the structure or styling of one copy, for example add a column or switch colours. Select the instance and choose Detach from the toolbar. The copy becomes regular blocks and will no longer follow changes to the pattern.
A common workflow is to start with overrides and detach only the rare instance that really needs a different layout. That keeps the number of independent copies small.
Using synced patterns in a classic theme template
Many GalussoThemes customers run classic themes where the header, footer and sidebars come from PHP templates rather than the Site Editor. You can still output a synced pattern in a template file of a child theme. The block markup from the code editor works with the core do_blocks() function, which parses block markup and renders it to HTML:
<?php
// In a child theme template, e.g. footer.php
echo do_blocks( '<!-- wp:block {"ref":245} /-->' );
?>
Replace 245 with your pattern’s ID. You can find it by opening the pattern from Appearance → Patterns and reading the ID in the address bar of the editor. Always make this kind of change in a child theme so a theme update does not wipe it.
Moving patterns between sites
Synced patterns live in the database, not in theme files, so they do not travel with a theme. To copy a pattern to another site, open the Patterns screen, open the actions menu of the pattern and choose Export as JSON. On the other site, open the Patterns screen, use the add-new-pattern menu and import the JSON file. We cover the older, plugin-free version of this flow in how to export and import Gutenberg blocks in WordPress.
After importing, open the pattern and confirm that it is still synced and that its overrides are listed in the sidebar. Images inside the pattern point to the source site’s media URLs, so upload the images on the new site and update the Image blocks if the old site will not stay online.
Common mistakes and how to fix them
“Enable overrides” is missing
You are probably editing an instance on a page rather than the original pattern, or the block is not one of the supported types. Use Edit original, and check that the block is a Heading, Paragraph, Image or Button. Also confirm the pattern is synced; standard patterns have no overrides.
Content disappeared after editing the pattern
If you renamed an override or deleted and re-added a block, instances lose the values stored under the old name. Restore the old name, or re-enter the content on each page. Check pages with the pattern before renaming anything on a busy site.
Editors keep breaking the design
That is the reason overrides exist. Replace fully editable copies with a synced pattern that exposes only the text and image blocks. If some users should not touch certain blocks at all, see our tutorial on hiding blocks from specific users in WordPress.
“Block has been deleted or is unavailable”
The pattern post was deleted from the Patterns screen. Every instance referenced that pattern, so all of them show this message. Restore the pattern from the trash if it is still there, or rebuild it and re-insert it on the affected pages.
A theme that keeps patterns looking right
Patterns look best in a theme with clean block styles, so your cards, buttons and headings inherit sensible spacing and typography. Among our Gutenberg-ready themes, Salinger suits writers and personal blogs that reuse author boxes and newsletter callouts, Viomag fits magazine sites that repeat promo and section-intro cards across many posts, and Parfum works for boutique shops that want consistent product highlight banners. You can also browse our free WordPress themes.
Wrap-up and next step
Pattern overrides let one synced pattern control the design while each page supplies its own heading, text, image and button. The workflow is short: create a synced pattern, open the original, enable overrides on the Heading, Paragraph, Image and Button blocks with clear names, save, and then fill in each instance. Keep override names stable, detach only when a copy truly needs a different layout, and export patterns as JSON when you move them between sites.
Your next step: find the block you have copied most often on your site, such as a call-to-action box or a testimonial, rebuild it as a synced pattern with overrides, and replace the loose copies one page at a time. The next time you change its design, you will do it once.
Hello everyone! We’re Galussothemes content team, we love to write new blogs for WordPress Joomla! and other tech niches everyday. We’re talented young people who hold a strong passion for website development, designing, and marketing. Feel free to leave your comment if you have any issues or questions with our blogs.
Interesting with this topic? You also interest with this articles: