Do you want to use Gutenberg table block to add a dynamic table in WordPress? In this blog, we will provide you with a step-by-step tutorial to help you use this block effectively. Let’s check our blog now.
What are the advantages of using Gutenberg table blocks in your content?
Indeed, using the Gutenberg table block in your content has numerous advantages. First of all, it can help you enhance the user experience, and save a lot of time. You can easily add the dynamic table by using the default table block instead of installing any additional plugin or coding.
Additionally, the block editor also offers plenty of customization options that allow you to adjust the appearance of your table to match the style of your website or brand. Further, tables created with Gutenberg are responsive, making them mobile-friendly and accessible to a wider audience. Also, the accessibility features provided with Gutenberg table blocks make it easier for people with disabilities to access and understand your content. Last but not least, using tables can improve the SEO of your content by making it easier for search engines to understand the structure and organization of your information.
For those advantages, in today’s blog, we will give you a detailed guide to help you easily create a dynamic table in WordPress by using the Gutenberg table block. Now, let’s read our blog.
How to Use Gutenberg Table Blocks in WordPress effectively?
Insert table block to post/page
It is very easy to insert a table block to post/page in the Gutenberg editor. First of all, you need any post/page where you want to add a table block. Then, in the block editor, you simply click on the Plus (+) icon and search for the “Table” block. Next, let’s click on the block to add it to your content.
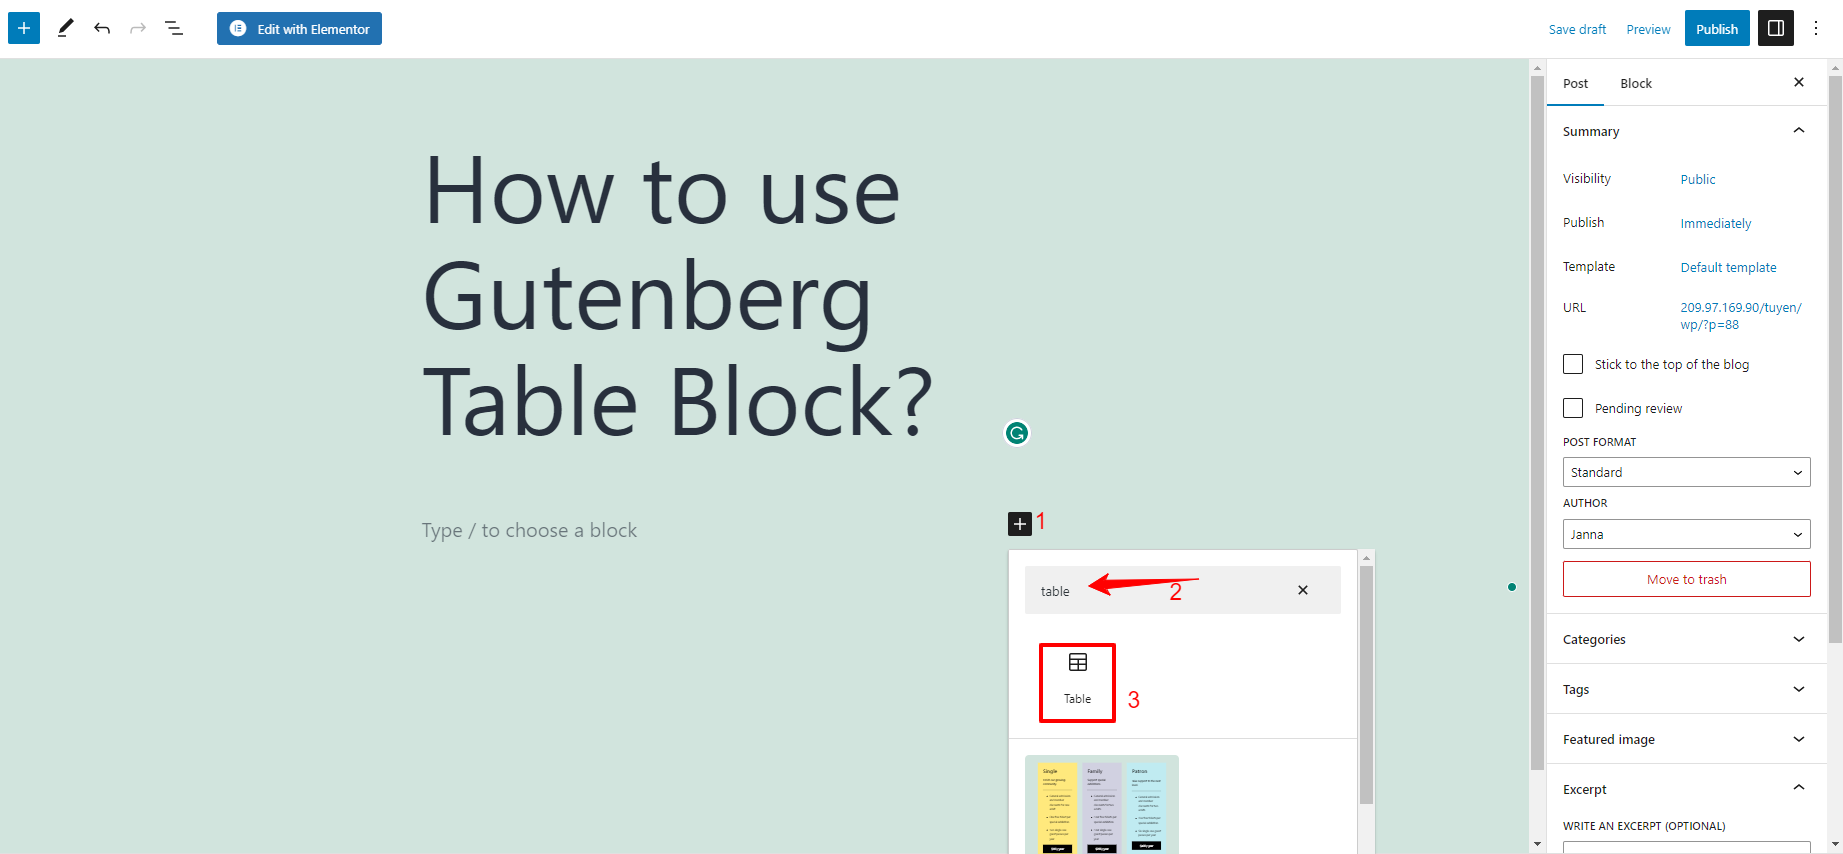
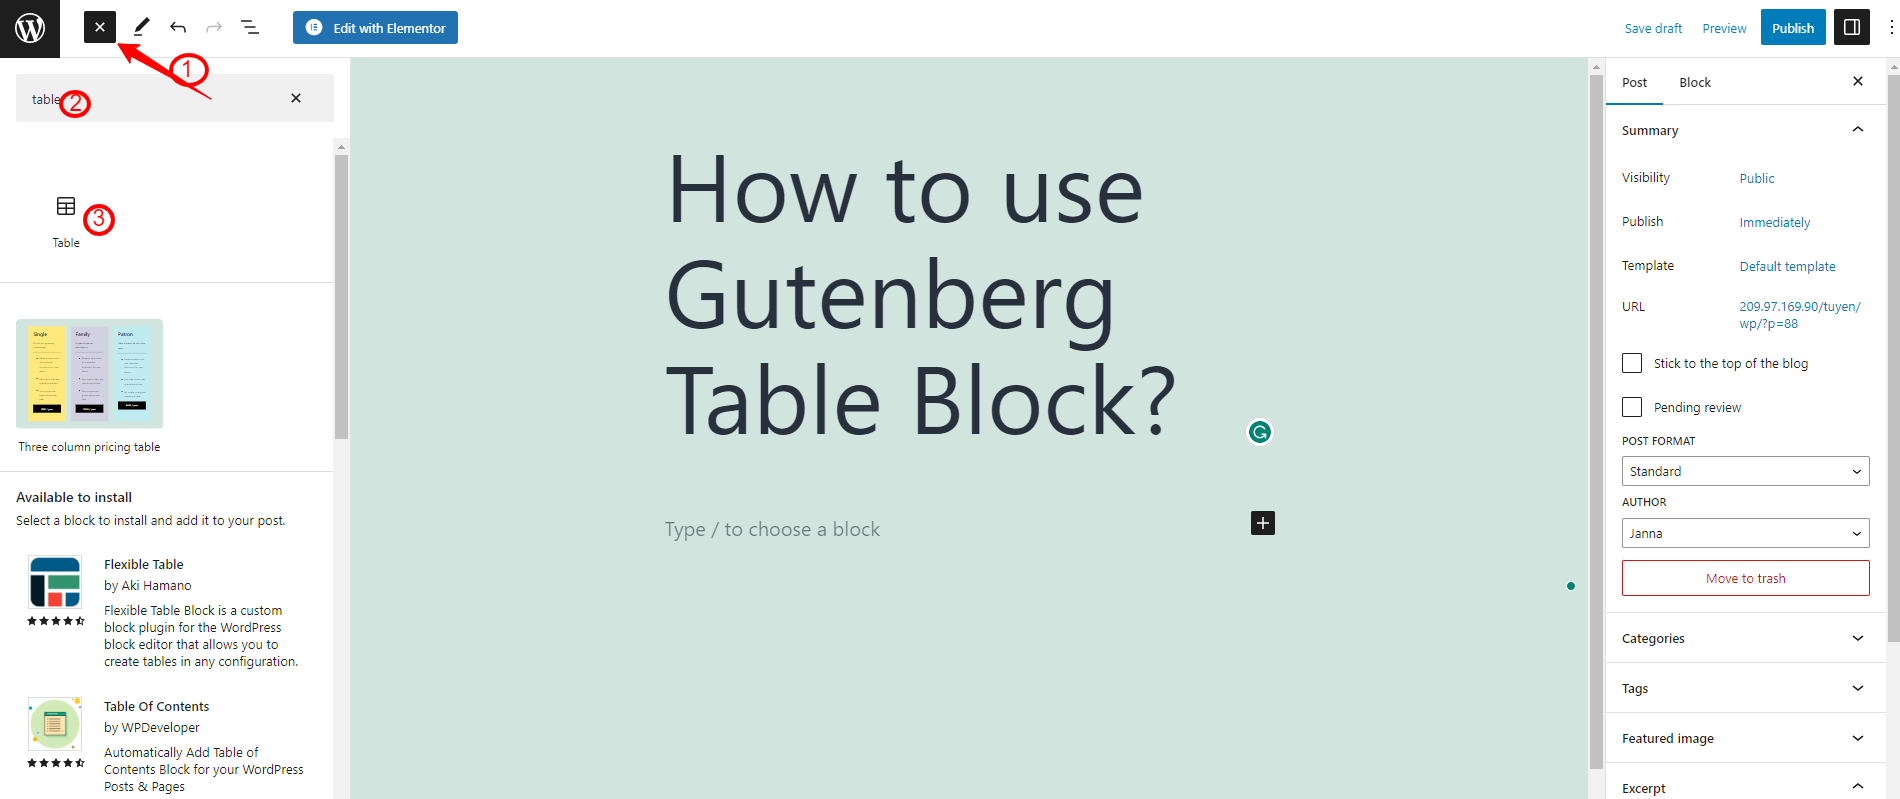
Alternatively, you can utilize the inserter in the top left of the screen and type the “table” block in the search bar, and hit enter.
Adding content to the Table Block
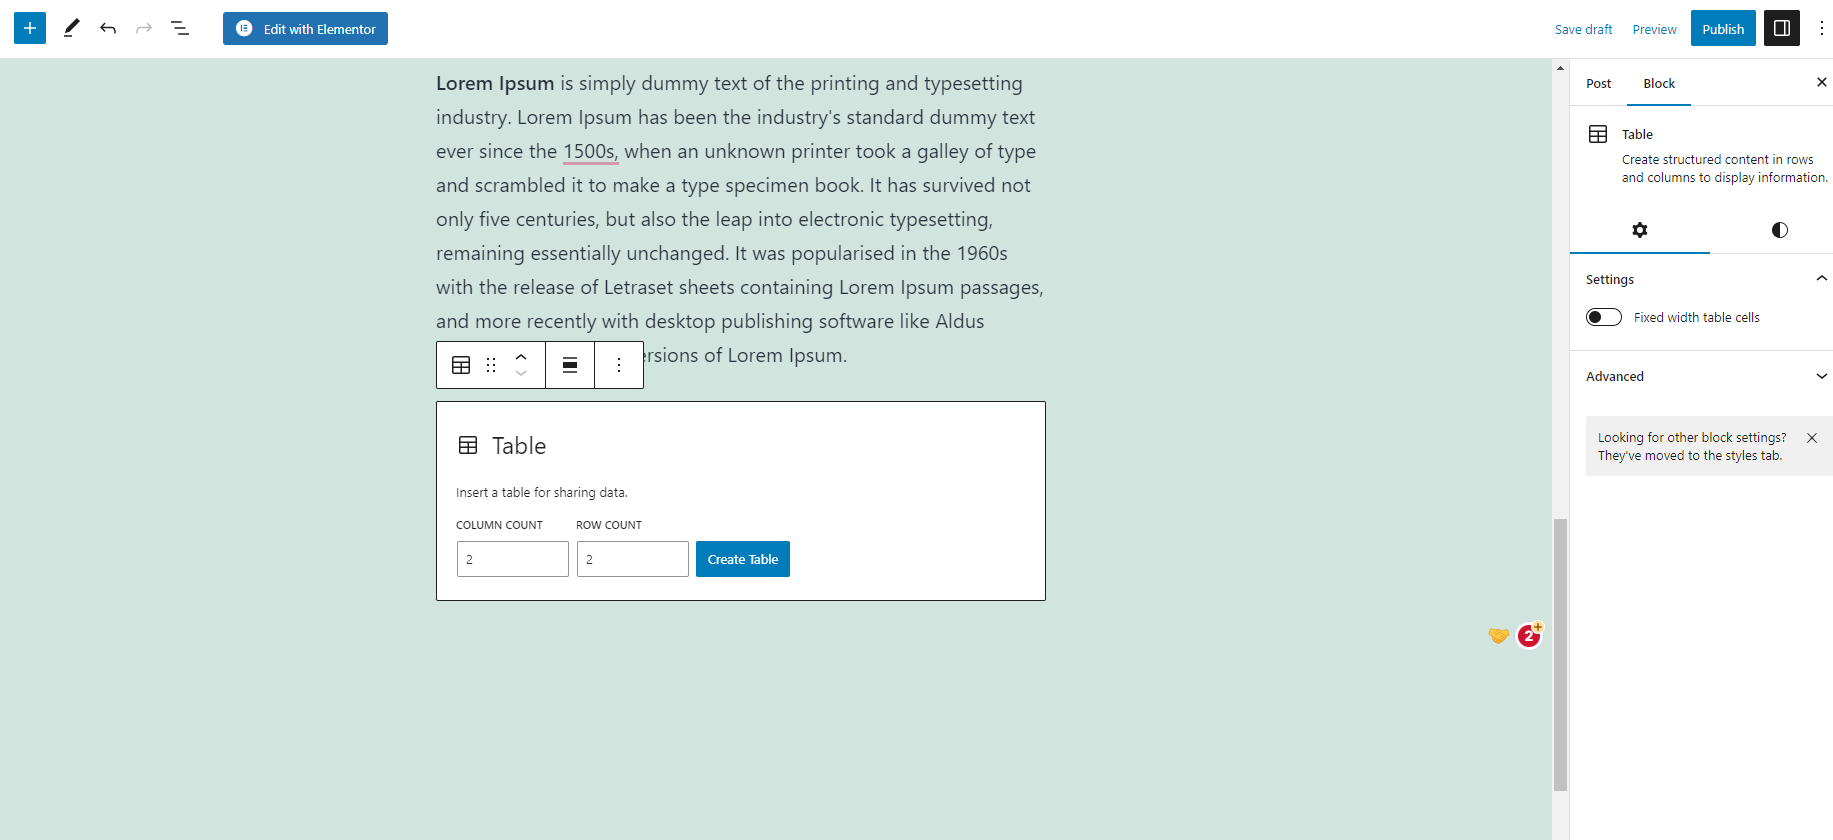
Once you have added a Table Block, you can specify the number of columns and rows you want by increasing or decreasing the up and down arrow icon. Then, click on the “Create table” button to create your desired table.
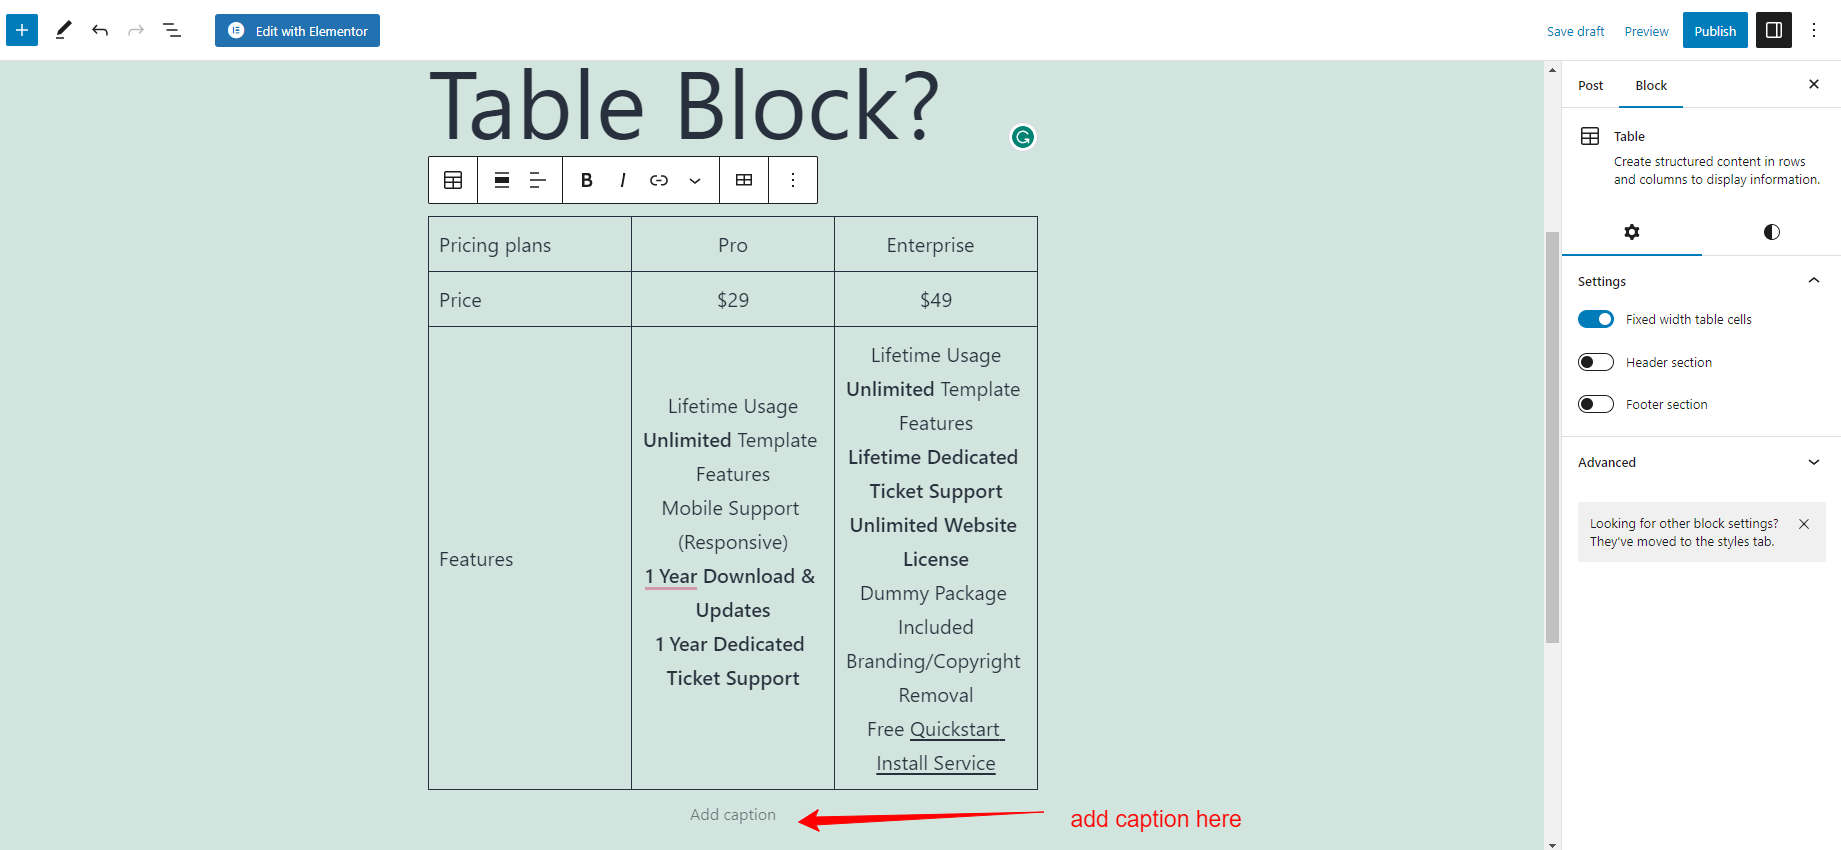
After adding the table to your content, now you can add content to the cells and even add a caption at the bottom.
Editing the Table Block
The table block comes with a wide range of useful options that are displayed on the toolbar of the Table block, so you can easily edit the design of the table as you desire. Simply click on the table block, and you will see the toolbar appearing on the top.
- Change block type or style
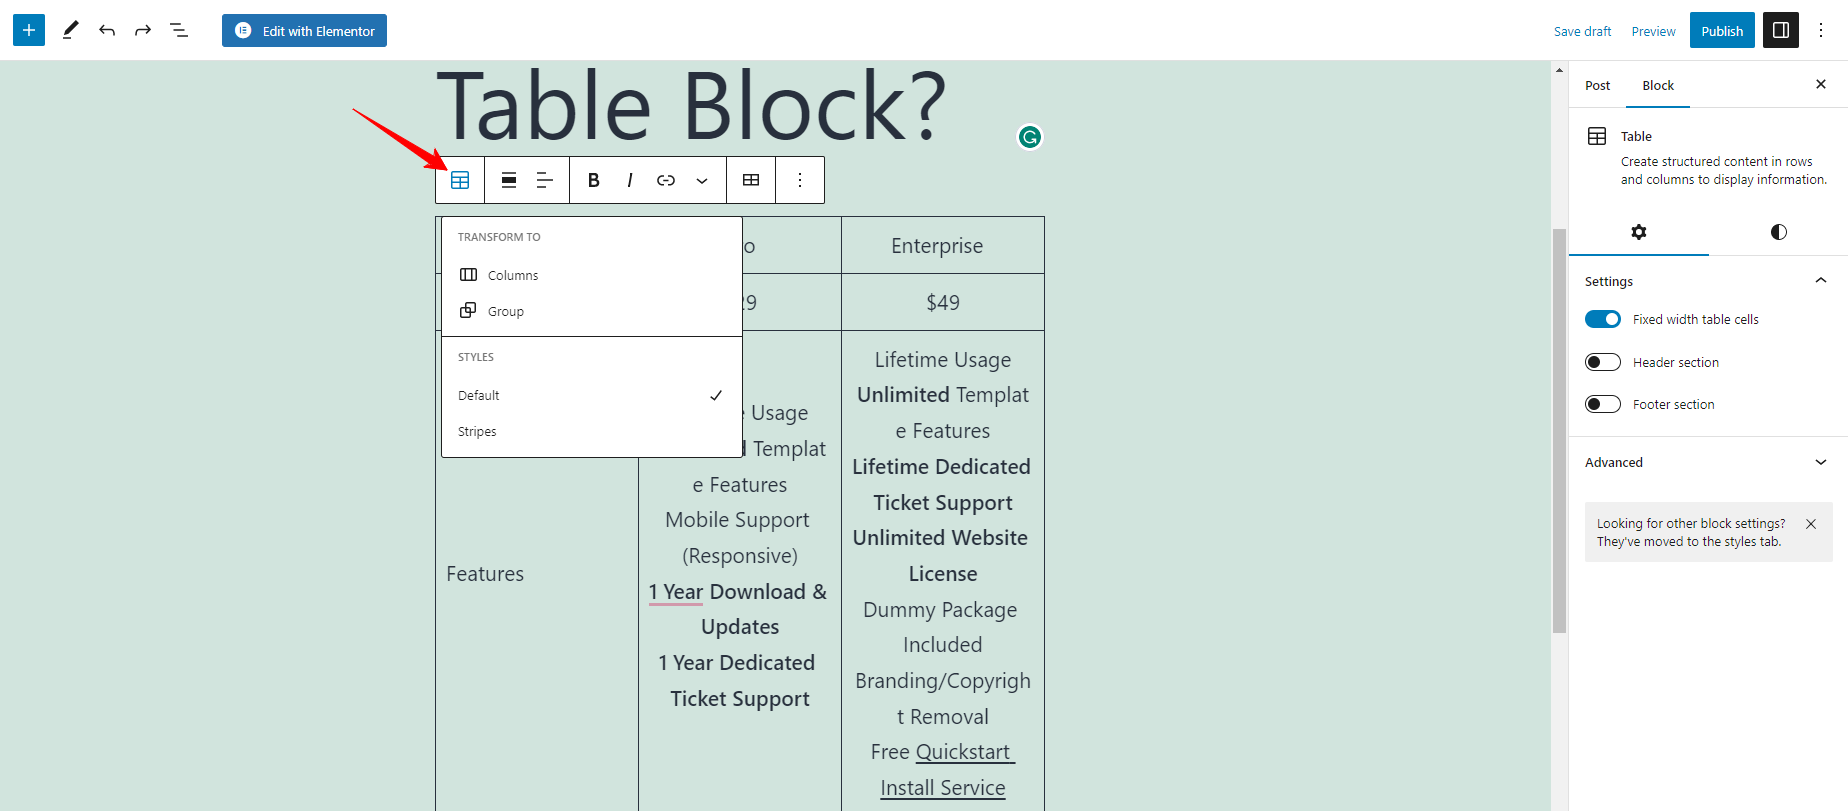
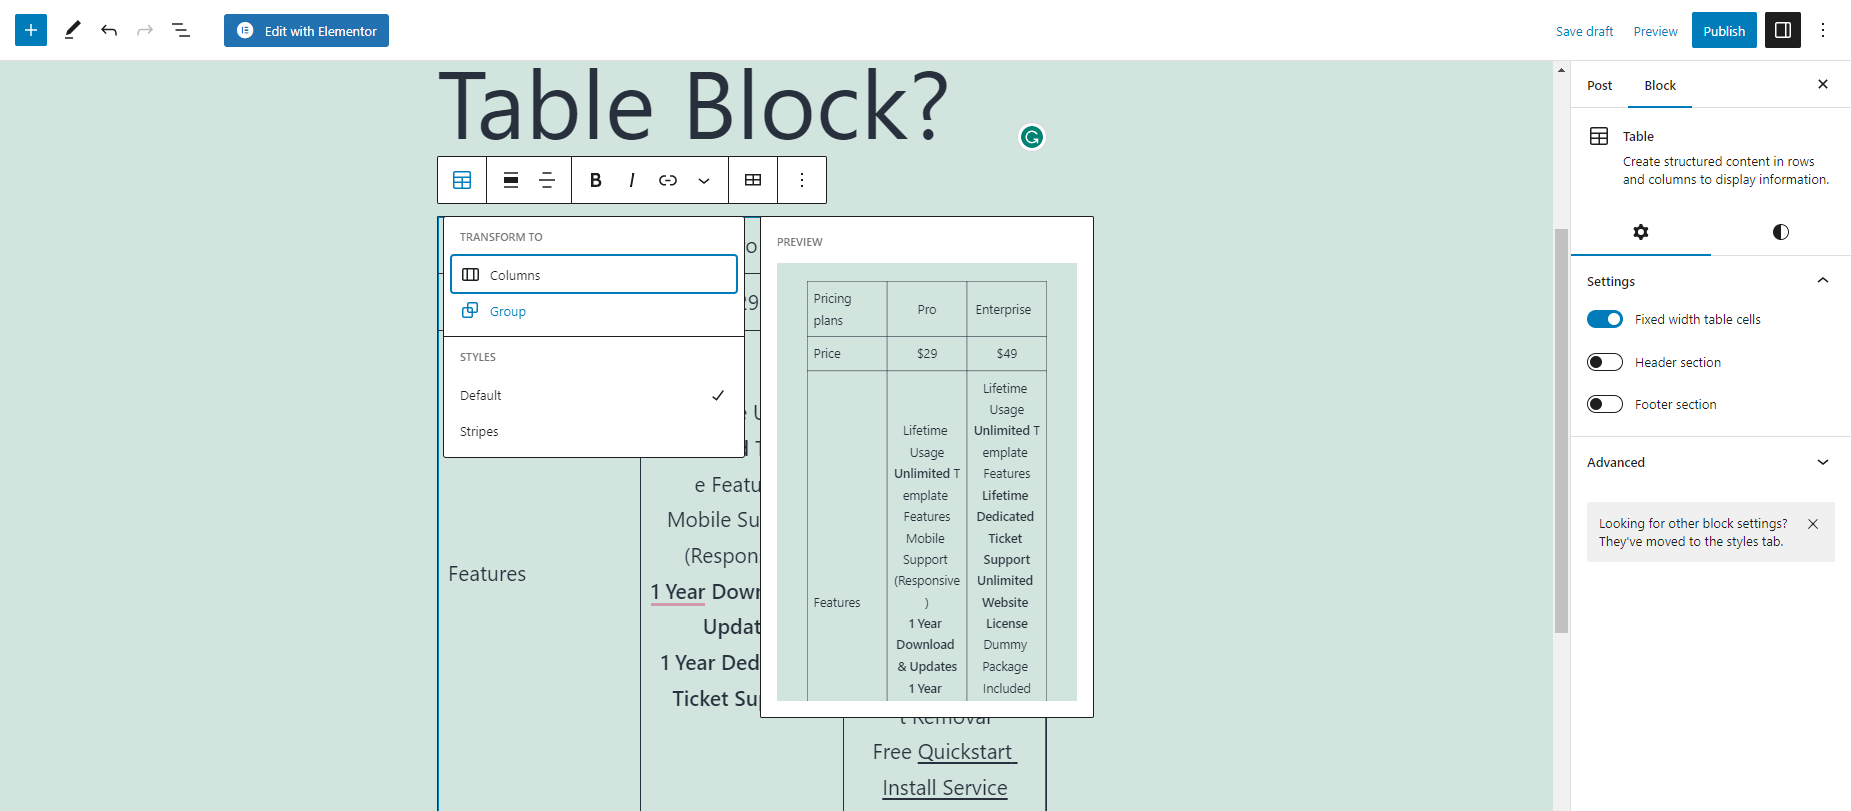
The first option on the toolbar allows you to transform the table into a group or column. In addition, there are two options for the style including default and stripes. You can hover over these options, you will get a preview on the right-hand side.
- Change Alignment
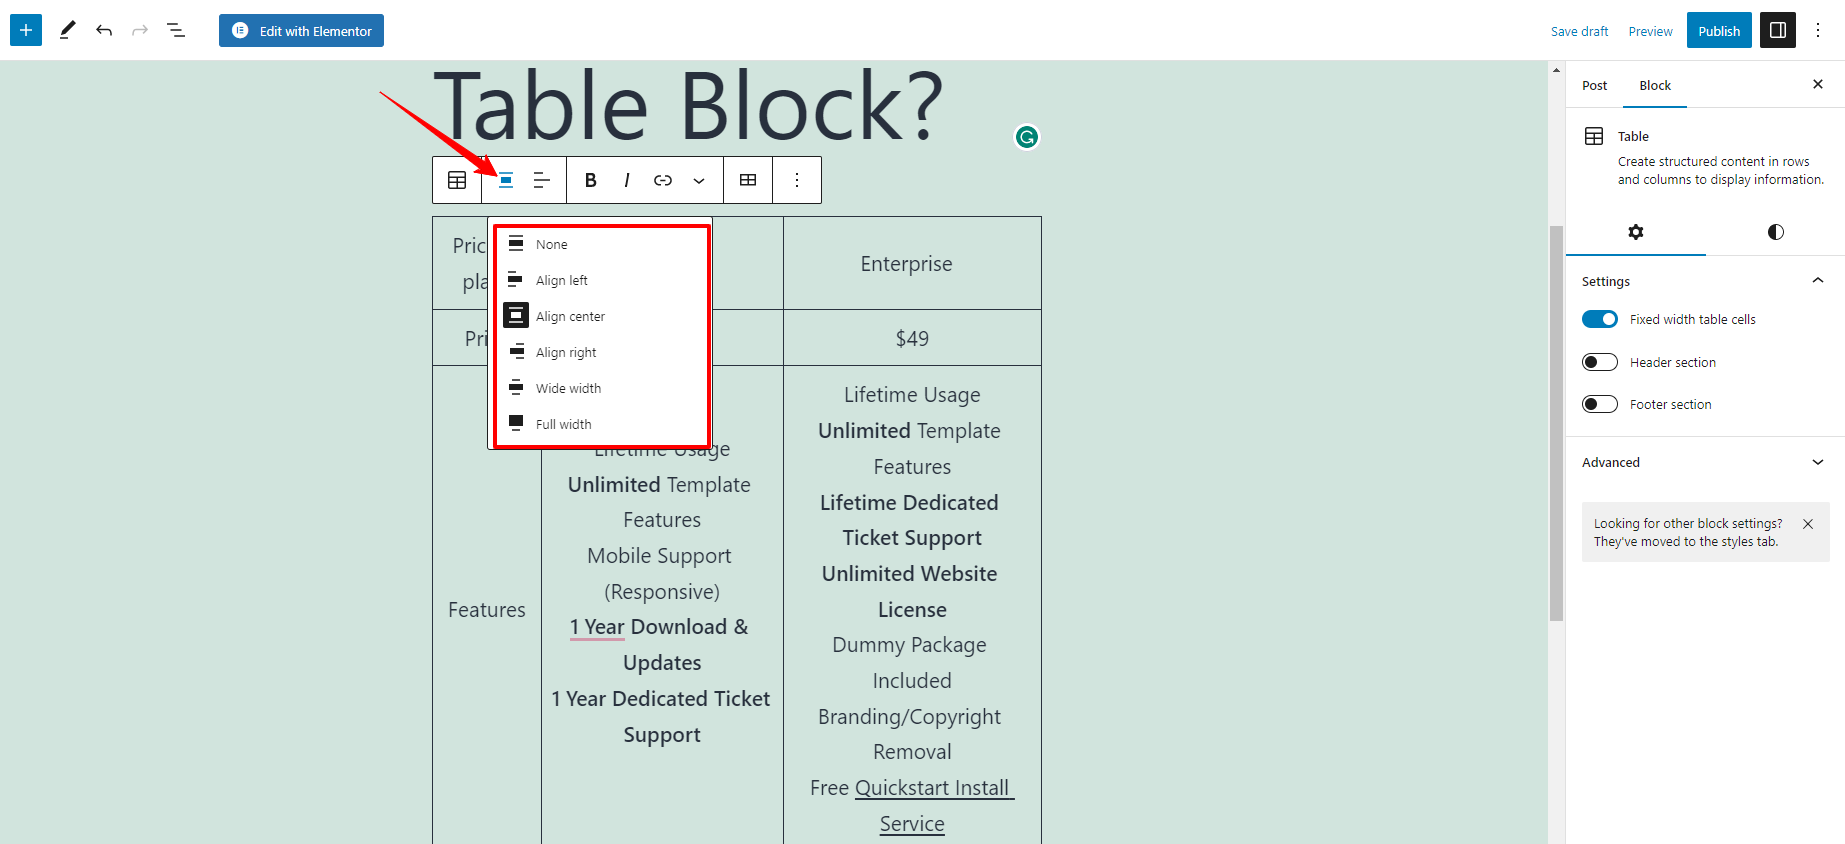
Under the “Table Alignment” option, you can choose to align the table to the left, center, or right of the page. In addition, you can also set the table to wide width or full width. However, the two options may not be supported by all themes.
- Column Alignment
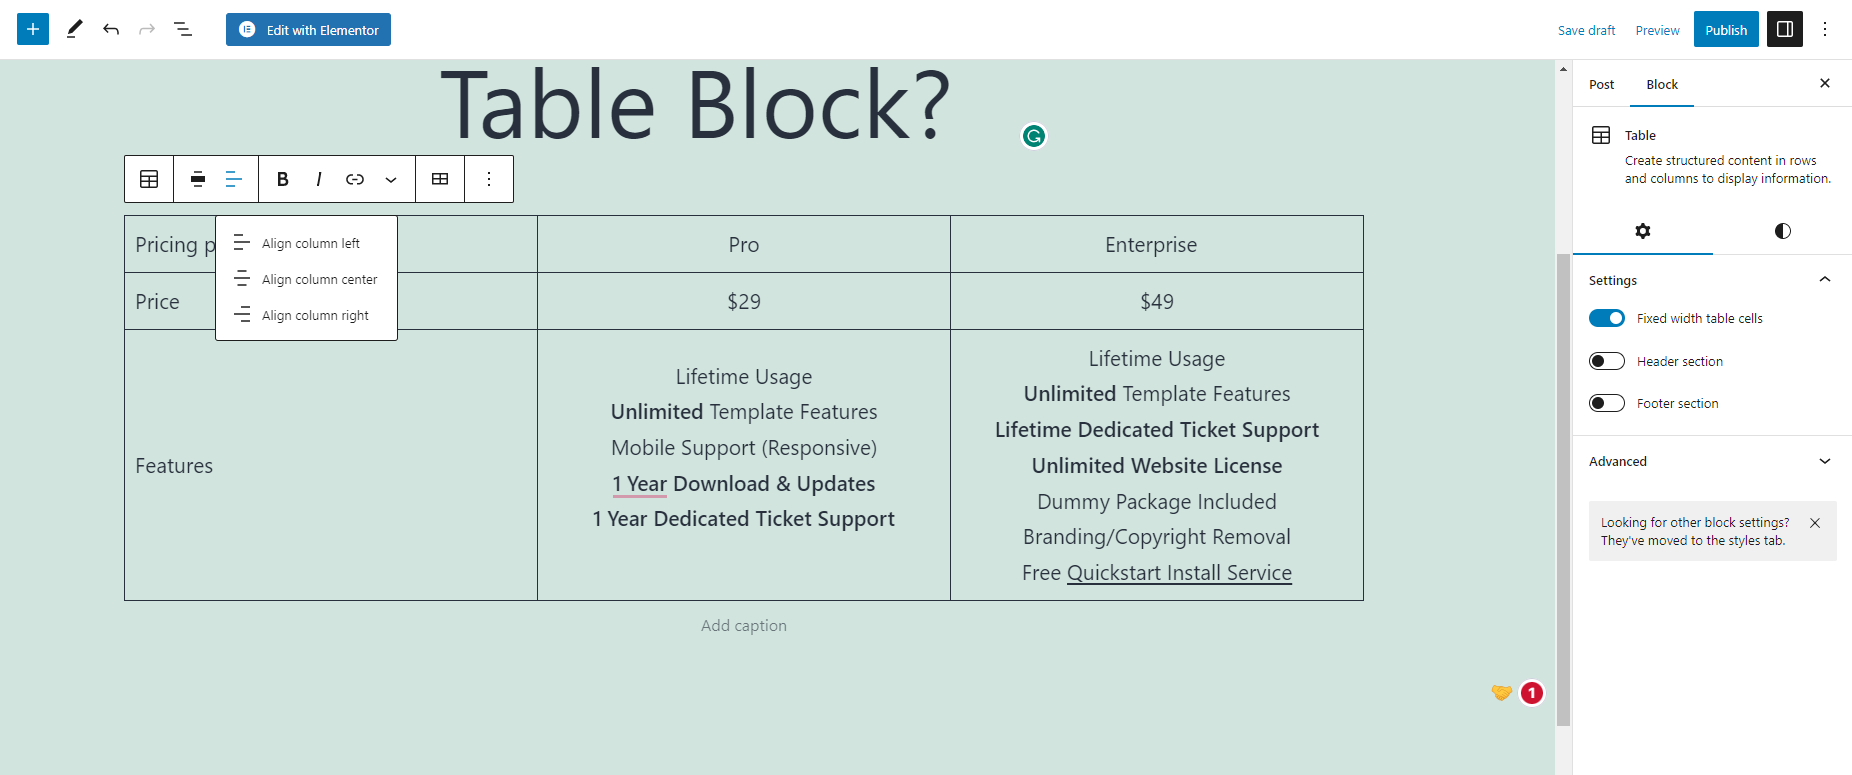
Next, you can choose the alignment for each column individually. You can set each column to the left, center, or right alignment. For example, we set the first column to the Left and set the rest to the Center.
- Bold and Italic
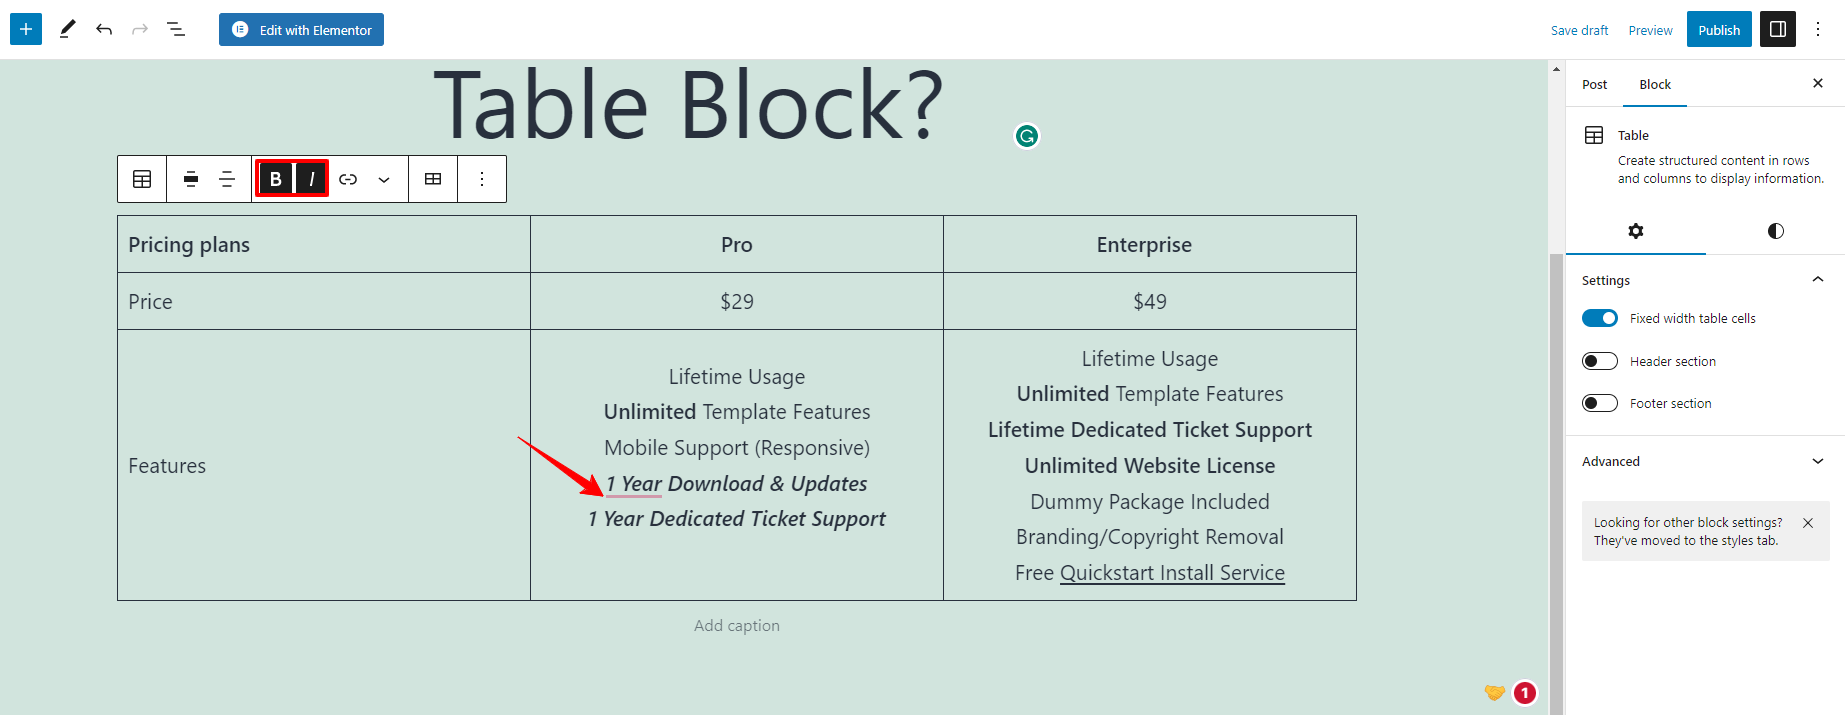
These options allow you to highlight the important text. You can select the text that you want to format as bold or italic within a cell of the table.
In the toolbar that appears above the table, click on the “B” icon to make the text bold, or the “I” icon to make it italic.
- Insert link
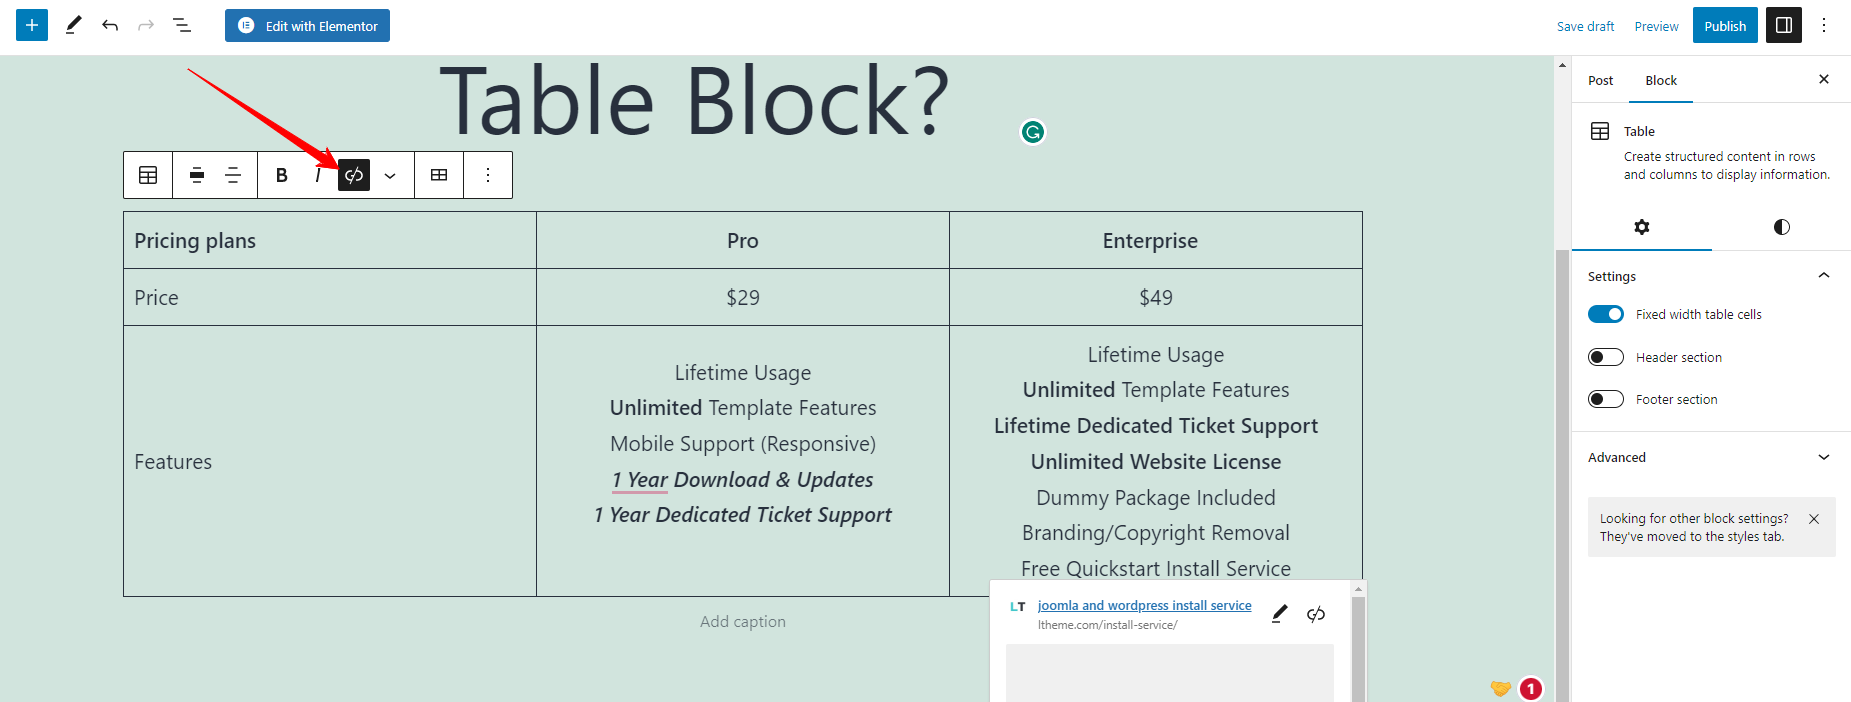
Additionally, you can add a link to anything within the table. First of all, you need to select the text where you want to add a link. Then, this will appear the “Link” icon in the toolbar, and let’s click on it.
When the dialog box appears, simply enter the URL of the content you want to link to the “URL” field and hit “Enter“.
- Additional formatting options
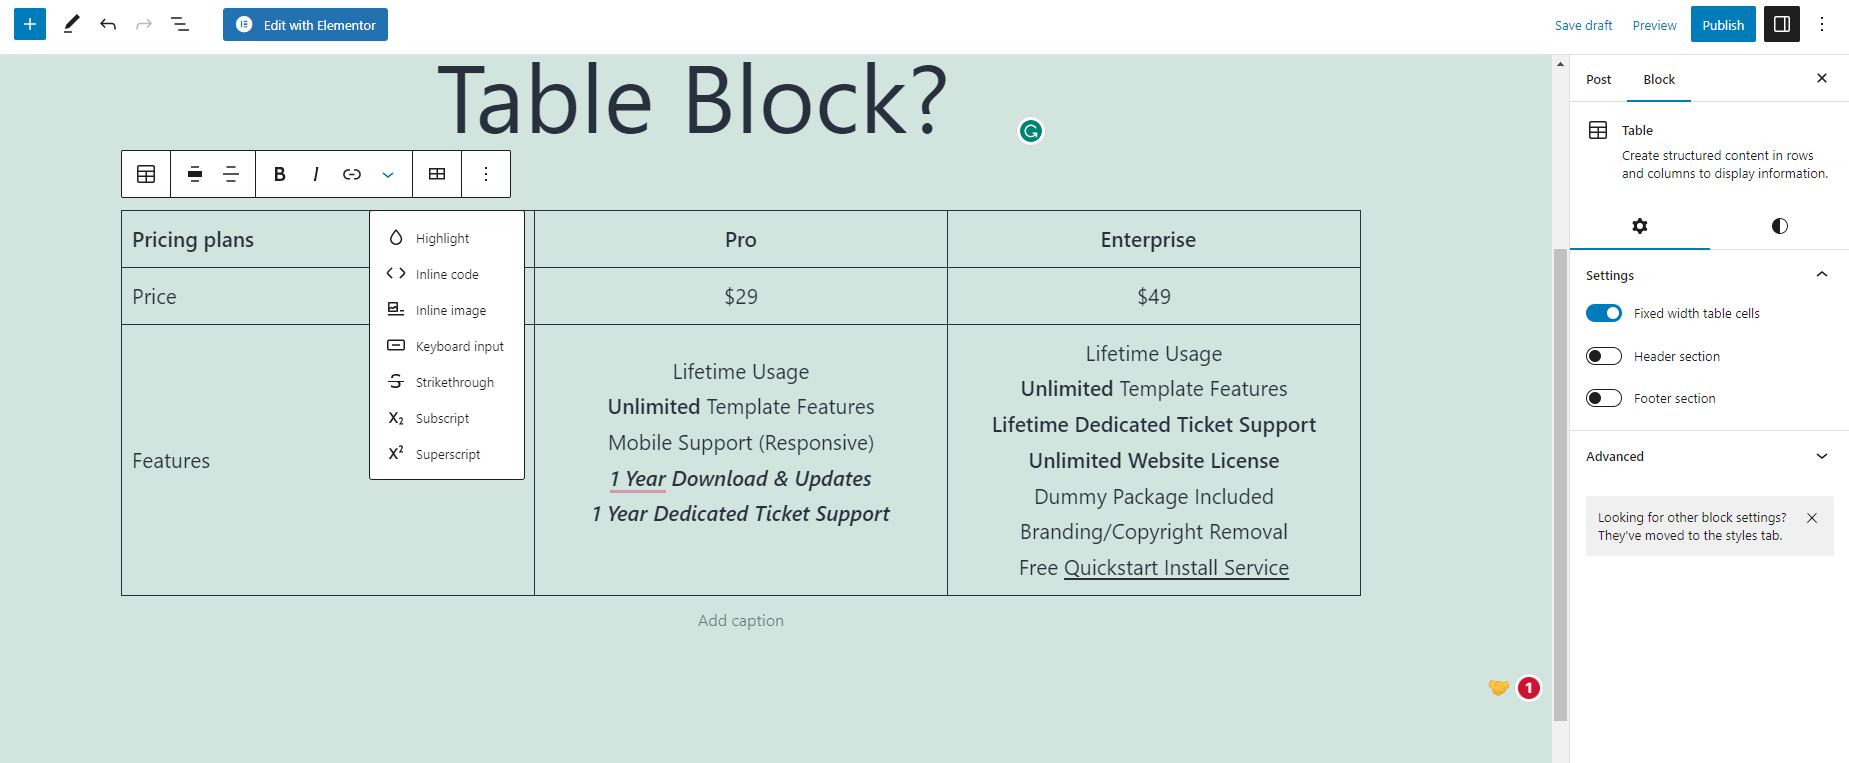
Further, the toolbar also offers plenty of additional options including:
- Inline Code: this option allow you to show the text styled as code
- Inline Image: this option help you select the image to change its width
- Keyboard Input: this lets you add keyboard tags to your content
- StrikeThrought: you can use this option to put a line via the text you’ve highlighted
- Subscript: this option allows you to make the text you have chosen as a subscript
- SuperScript: this option allows you to make the text you have chosen as a superscript
- Text color: you can use this option to change the color of the highlighted text
- Edit table
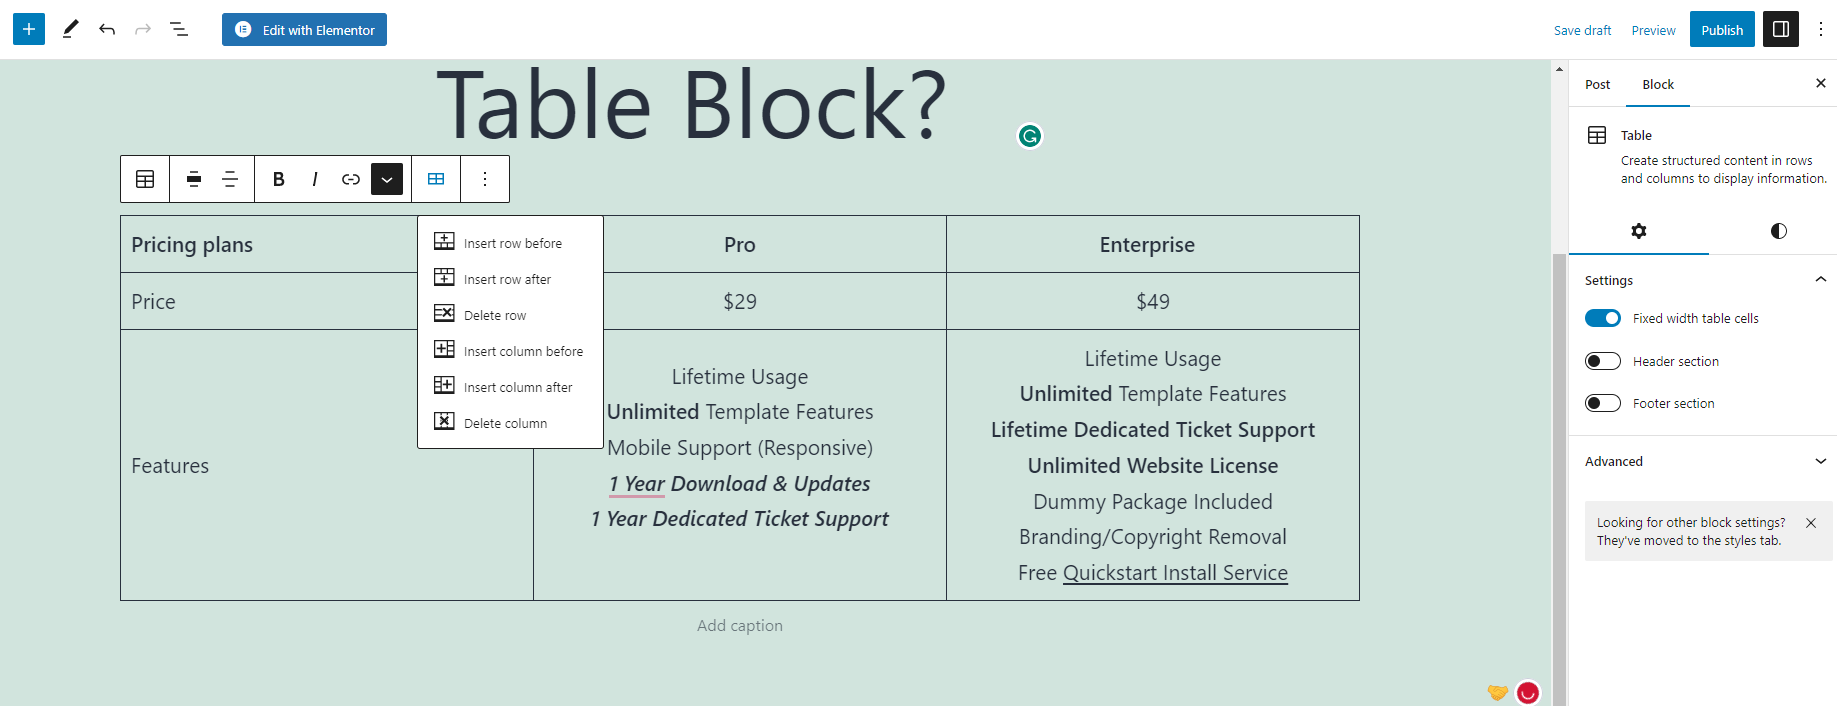
This button comes with a list of drop-down options that allow you to add or delete a row or column before or after the one you’ve chosen.
- Block options
Further, when you click on the “three dots” icon that will display loads of useful block options including Copy block/ Duplicate/ Insert before/ Insert after/ Edit as HTML/ Copy styles/ Paste styles/ and much more.
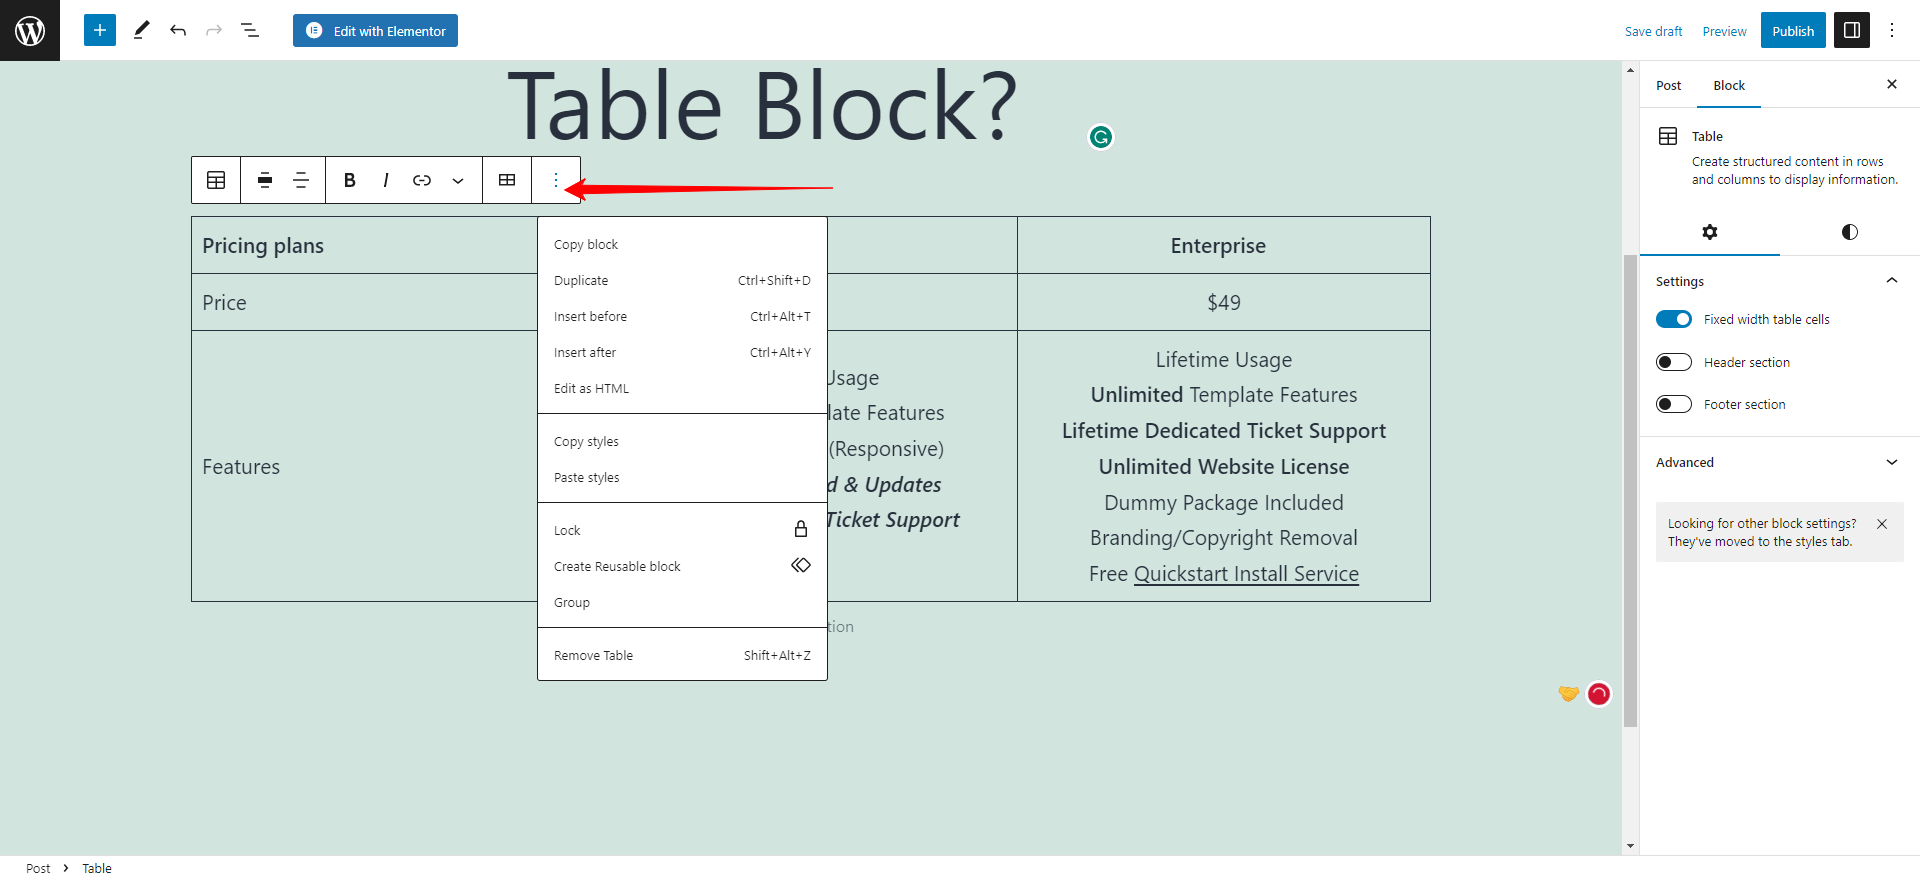
Table Block Settings
Besides that, the Table Block in Gutenberg comes with a number of settings displayed on the right sidebar that you can use to customize the appearance and functionality of your table.
If the left sidebar is hidden, you can click on the “Gear” icon in the top right corner to open it. Alternatively, you can click on the Table block to show the settings.
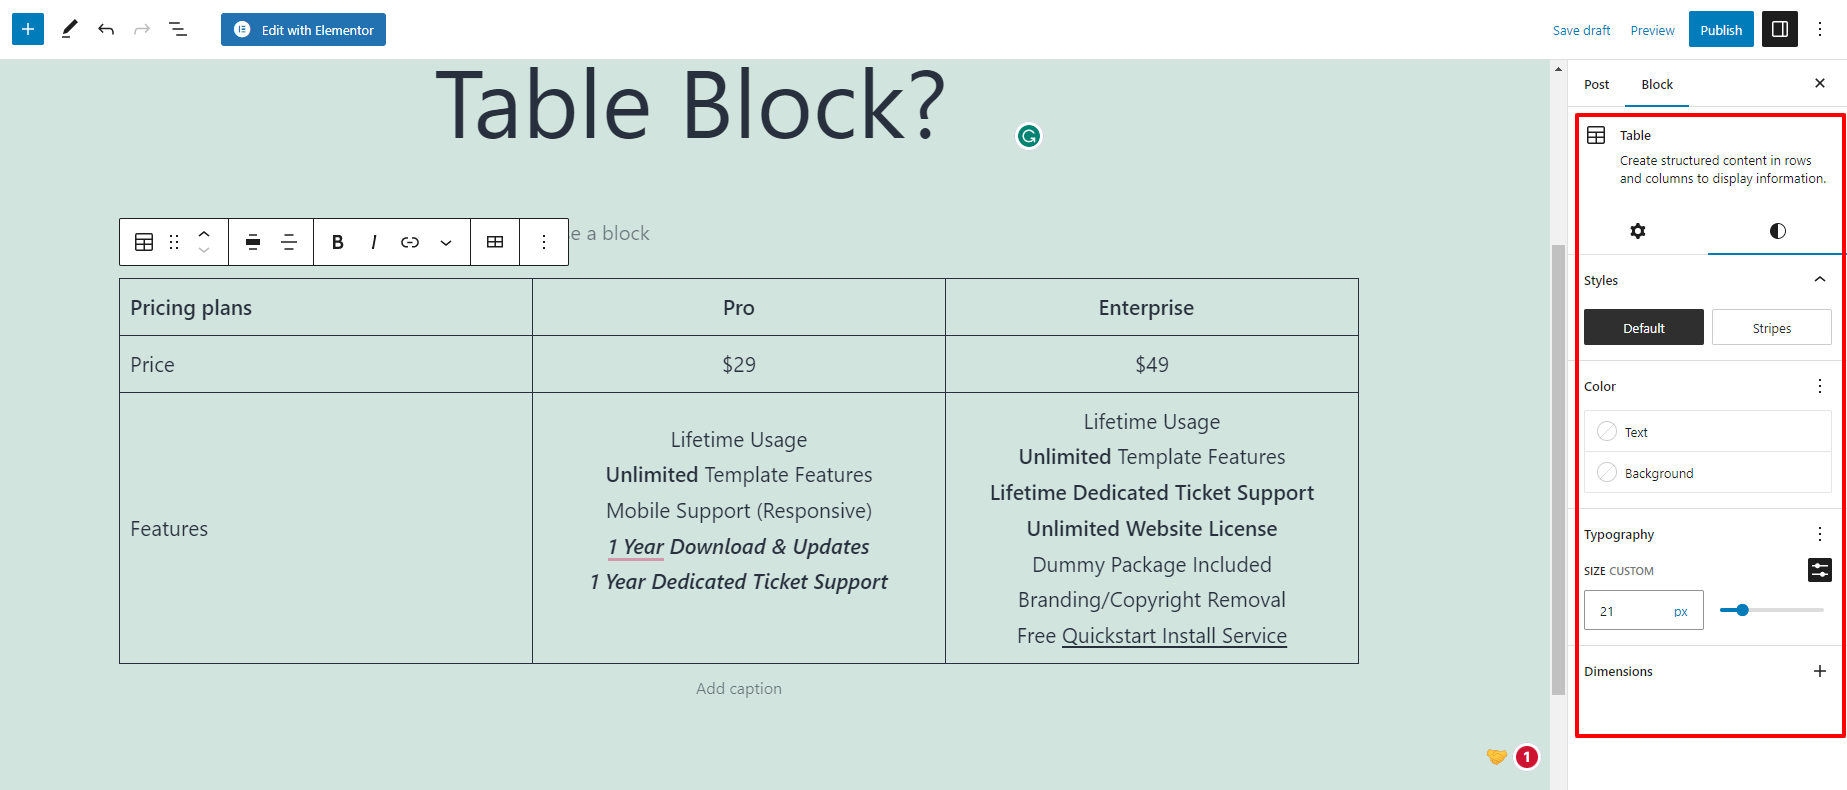
- Choose table style
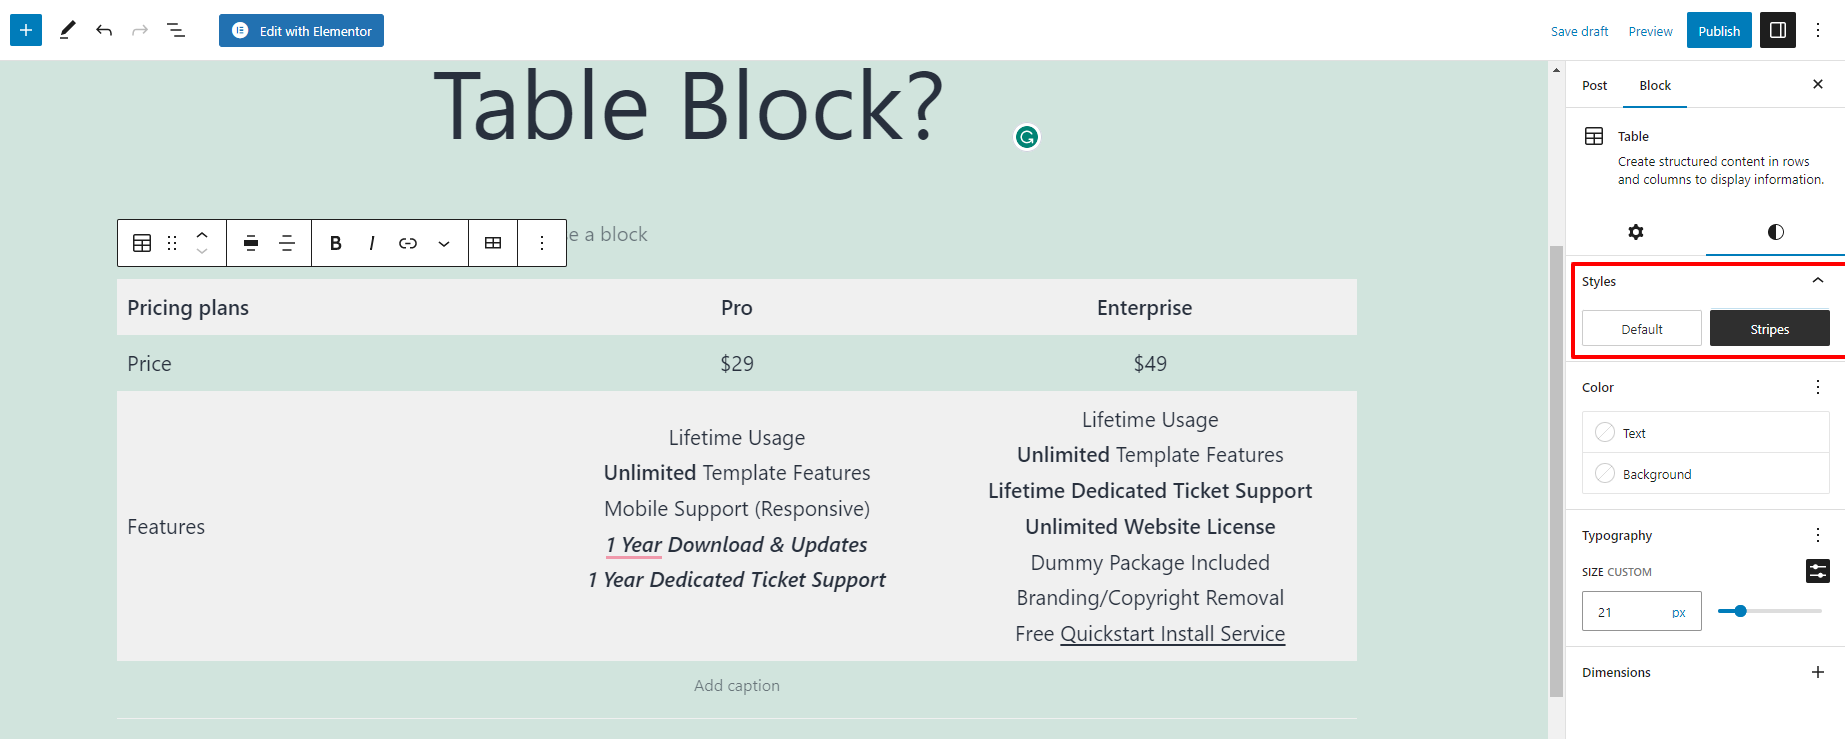
Regarding table style, there are two options including default and stripes. You can see the preview of each option before applying for your table block.
- Change color
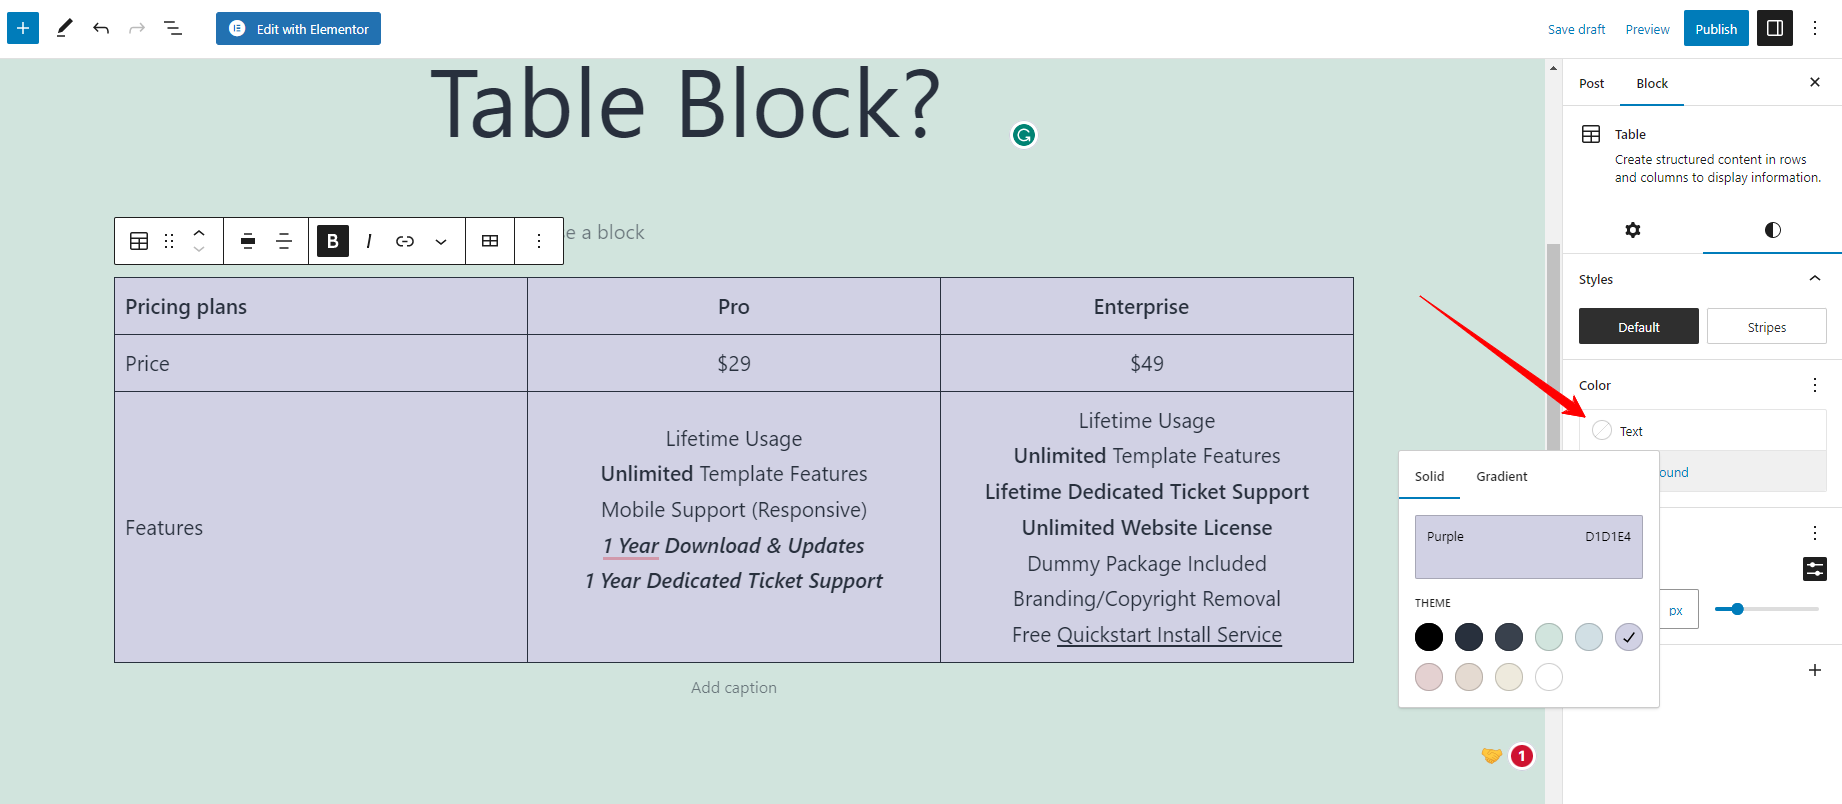
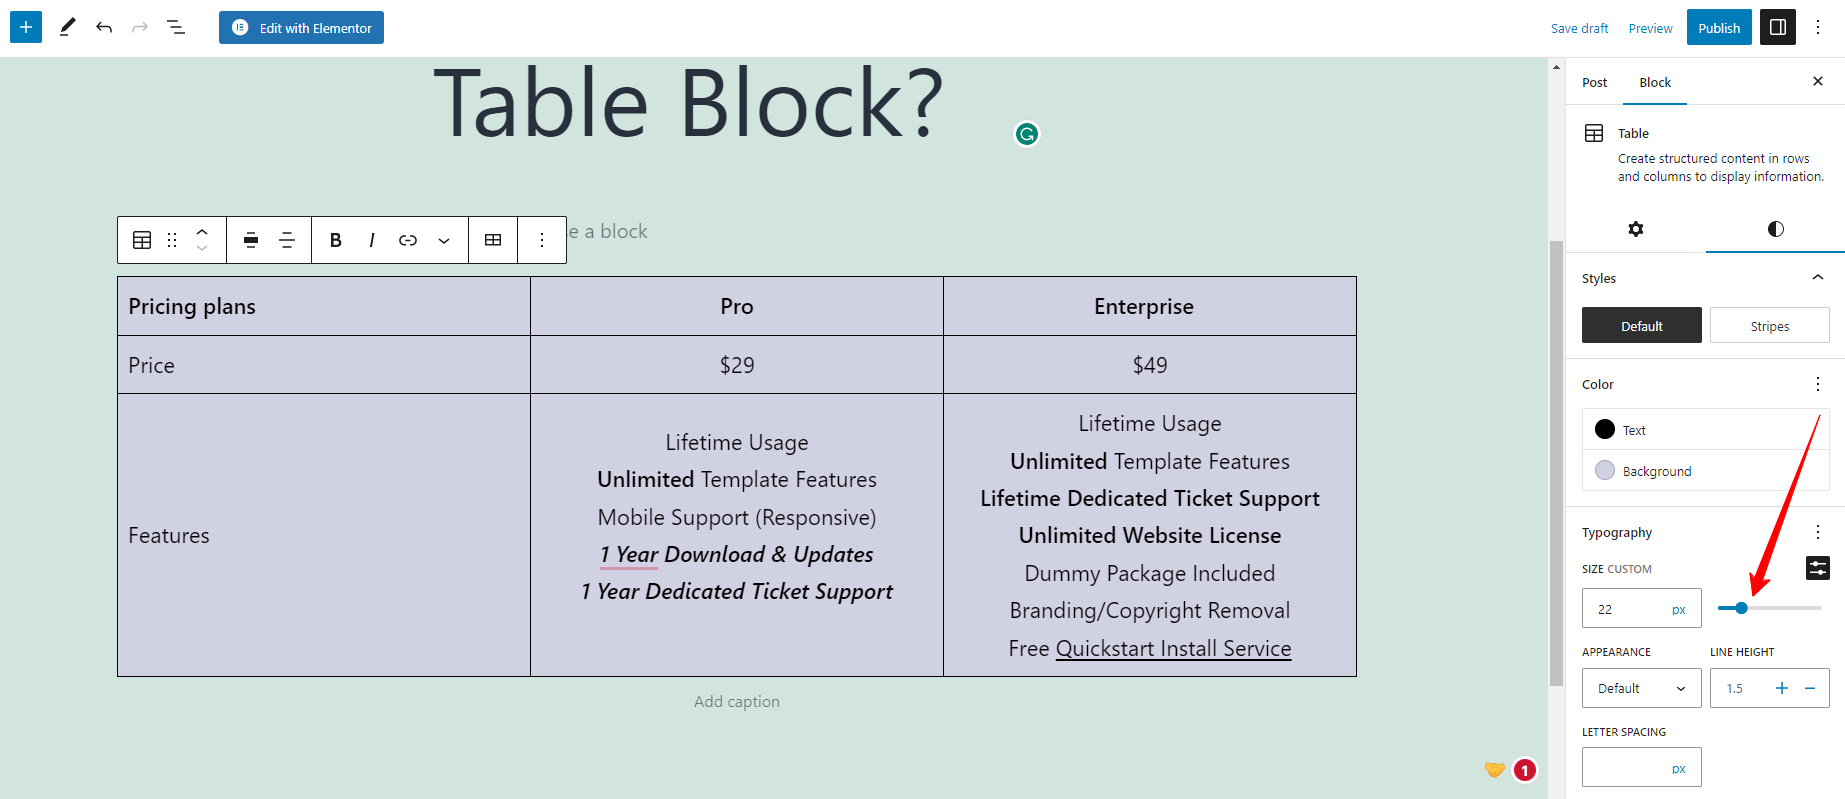
The table block allows you to completely control the text color. Hence, you can easily choose from default colors, or select a custom color from the color picker.
Regarding the background color, you can choose between solid color or create a gradient color.
- Adjust the size of the text
Further, you can adjust the size of the text by scrolling down to the “Typography” section and typing the “Font size” as you want. Additionally, you can adjust other typographical settings such as font family, font weight, line height, and letter spacing.
- Table Settings
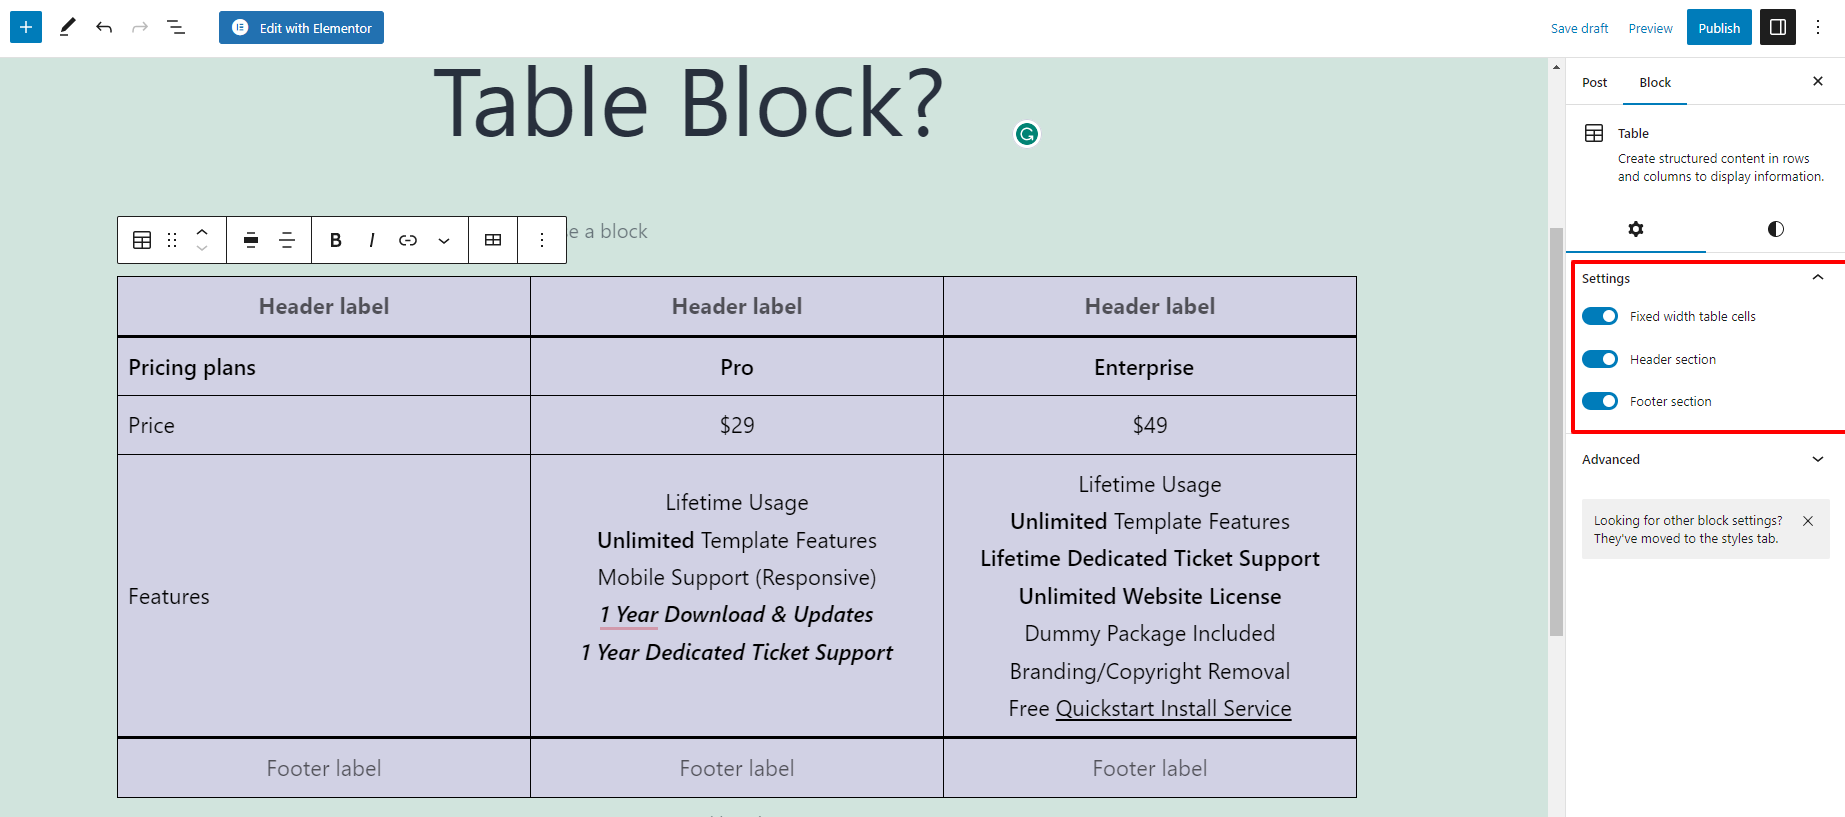
Fixed width: This setting allows you to specify a fixed width for the table, which can be useful for ensuring that the table fits within a specific area of your content.
Header section: This option allows you to add a section at the top of the table that spans all of the columns and is separate from the table body. This section is useful for adding headings or other information that applies to the entire table.
Footer section: This setting is similar to the Header Section setting, but allows you to add a section at the bottom of the table instead. This section can be useful for adding summary information or totals to the table.
- Advanced
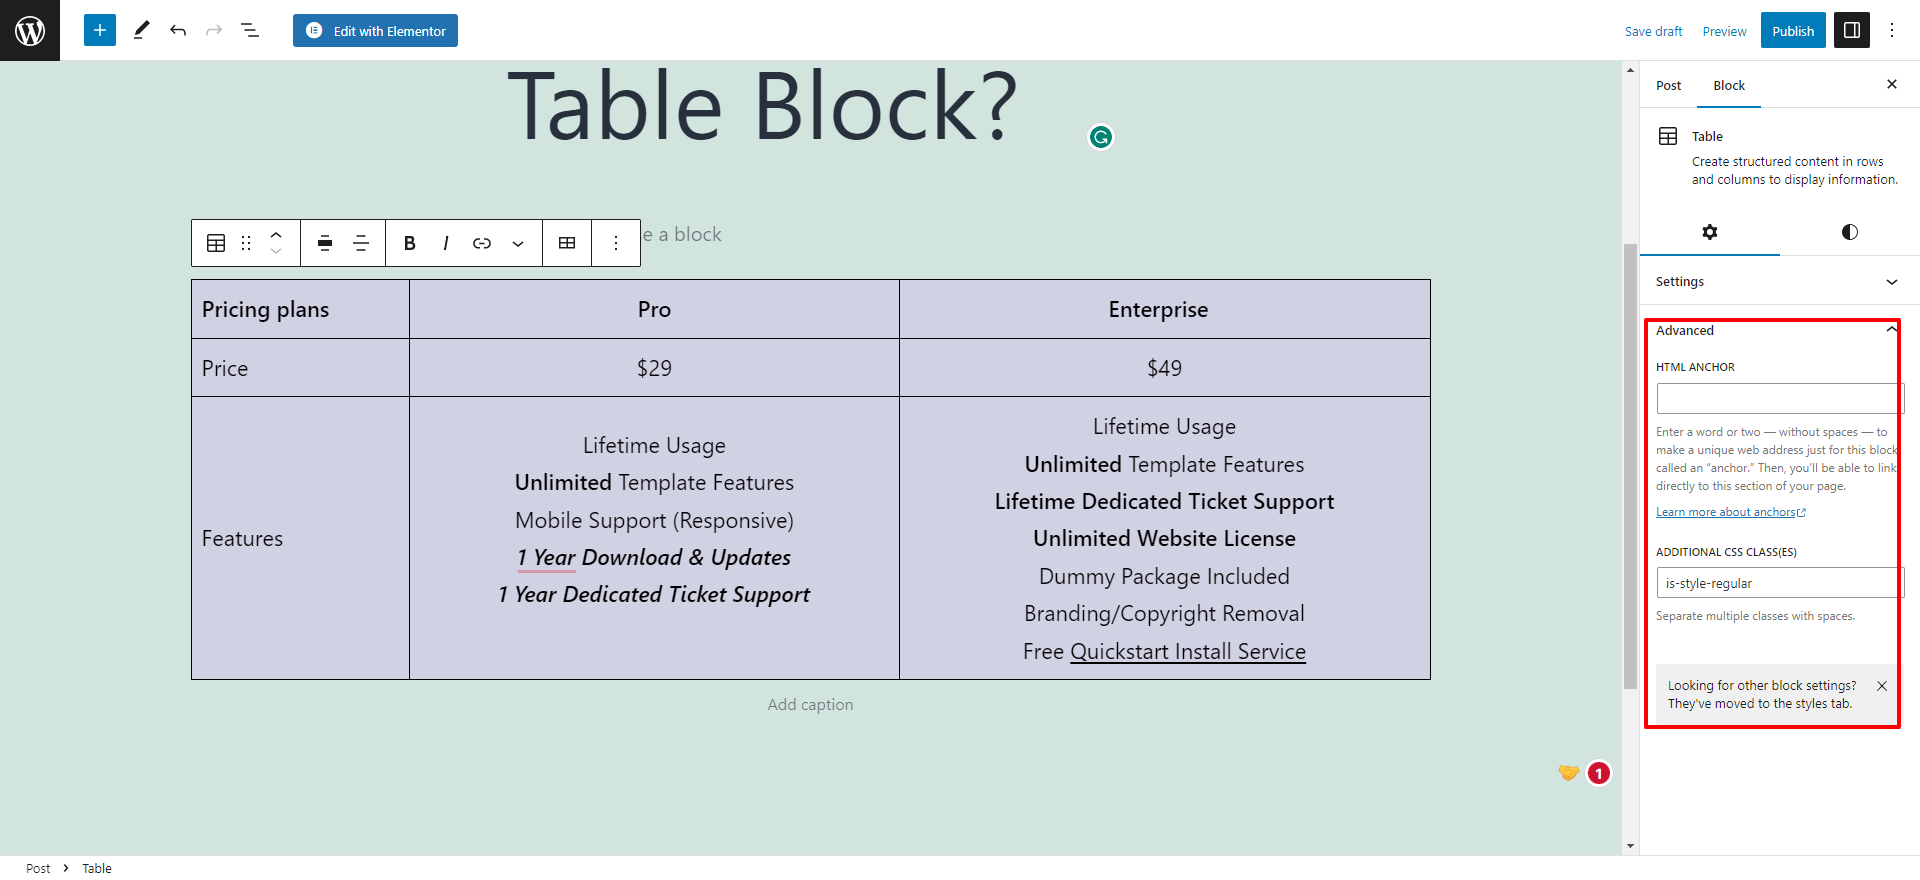
Additional CSS Class: This option allows you to add one or more custom CSS classes to the block. CSS classes can be used to apply styles to the block, or to target the block with JavaScript or other scripting languages. To add a custom CSS class, simply enter the name of the class in the input field.
HTML Anchor: It lets you add a custom HTML ID to the block, which can be used to create links that scroll to the table. To add an HTML ID, enter a name for the anchor in the input field. You can then use the “#” symbol followed by the anchor name in a link to create a scroll-to effect.
The bottom line
By following these steps, you can create professional-looking tables that effectively communicate your data or information to your audience. Remember to experiment with the various options available to find the best settings for your specific needs, and don’t be afraid to seek assistance or guidance if you’re unsure how to proceed. Moreover, you can use the assistance of the Gutenberg Table Block plugins that come with a wide range of advanced features, so you can extend the functionality of the Gutenberg editor.
Further, it is a great chance for you to visit our website and discover tons of eye-catching, free WordPress Themes that work well with Gutenberg editor.

Hello everyone! We’re Galussothemes content team, we love to write new blogs for WordPress Joomla! and other tech niches everyday. We’re talented young people who hold a strong passion for website development, designing, and marketing. Feel free to leave your comment if you have any issues or questions with our blogs.

