In today’s digital landscape, maintaining online privacy and anonymity is becoming increasingly important. Whether you’re a journalist, activist, or simply someone who values their privacy, being able to create an anonymous website can be a valuable tool. In this step-by-step guide, we’ll walk you through the process of setting up a truly anonymous website.
Step 1: Choose a Hosting Provider

The first step in creating an anonymous website is to select a hosting provider that prioritizes privacy and security. Avoid mainstream hosting services, as they often require personal information and may be subject to government subpoenas or data breaches. Instead, consider using a provider that accepts cryptocurrency payments and doesn’t keep detailed logs of user activity.
One such provider is Njalla, a privacy-focused domain registrar and hosting service that allows you to register domains and host websites without disclosing your personal information. Njalla operates out of Nevis, a country with strong privacy laws, and accepts a variety of cryptocurrencies for payment.
1: Avoid Mainstream Hosting Services
Mainstream hosting providers often require personal information and may be subject to government subpoenas or data breaches, compromising your anonymity. Instead, you’ll want to look for a hosting provider that prioritizes privacy and security.
2: Research Privacy-Focused Hosting Providers
Look for hosting services that are known for their commitment to user privacy. Some examples include:
- Njalla – A privacy-focused domain registrar and hosting service based in Nevis, with support for cryptocurrency payments.
- Privatehosting.com – A hosting provider that accepts anonymous payments and does not keep detailed logs of user activity.
- Protonmail.com – Offers both email and hosting services with a focus on privacy and security.
3: Evaluate the Provider’s Privacy Practices
When researching potential hosting providers, consider the following:
- Location – Choose a provider based in a country with strong privacy laws, such as Nevis, Iceland, or Panama.
- Logging Policies – Ensure the provider has a strict “no-logs” policy and does not retain detailed records of user activity.
- Payment Options – Look for providers that accept anonymous payment methods like cryptocurrency to avoid linking your identity to the account.
- Reputation – Research the provider’s history and look for reviews or testimonials from privacy-conscious users.
4: Set Up an Account with the Hosting Provider
Once you’ve selected a suitable hosting provider, follow their instructions to set up an account. Be sure to use an anonymous email address and any other privacy-preserving measures the provider offers, such as domain privacy protection.
5: Configure Your Website for Maximum Anonymity
After setting up your hosting account, ensure that you properly configure your website to maintain anonymity. This may include steps like:
- Implementing HTTPS encryption
- Disabling server logging
- Avoiding third-party trackers and analytics
- Optionally, hosting your site on the Tor network
Step 2: Register an Anonymous Domain
When registering your domain, it’s crucial to use a privacy-preserving service that masks your personal information. Njalla, for example, allows you to register a domain without revealing your name, address, or other identifying details.
To further enhance your anonymity, consider using a domain with a country-code top-level domain (ccTLD) from a privacy-friendly jurisdiction, such as .bz (Belize) or .is (Iceland).
1: Choose a Privacy-Preserving Domain Registrar
To register an anonymous domain, you’ll want to use a domain registrar that prioritizes user privacy and allows you to mask your personal information. Some recommended options include:
- Njalla – A privacy-focused domain registrar and hosting service based in Nevis that allows anonymous domain registration.
- Pananames – A Panama-based registrar that offers domain privacy protection and accepts anonymous payments.
- Namecheap – While not as privacy-focused as the previous options, Namecheap does offer domain privacy services to mask your personal details.
2: Select a Privacy-Friendly Top-Level Domain (TLD)
When choosing your domain, consider using a country-code top-level domain (ccTLD) from a jurisdiction with strong privacy laws, such as:
- .bz (Belize)
- .is (Iceland)
- .pa (Panama)
- .sc (Seychelles)
These ccTLDs are less likely to be subject to subpoenas or data requests from governments, enhancing the anonymity of your website.
3: Register the Domain with Anonymity
When registering your domain, be sure to use the privacy protection services offered by your registrar. This will ensure that your personal information, such as your name, address, and contact details, are not publicly visible in the domain’s WHOIS record.
Many privacy-focused registrars will allow you to register the domain using a pseudonym or anonymous proxy service, further obscuring your identity.
4: Use an Anonymous Email Address
For managing your domain and website, you’ll need an email address. Create a secure, anonymous email account using a privacy-focused email service like ProtonMail or Tutanota. These providers offer end-to-end encryption and do not require personal information for account creation.
5: Consider Rotating Your Domain
To maintain ongoing anonymity, you may want to consider periodically rotating your domain registration. This can help prevent any potential links between your anonymous website and your real identity.
Step 3: Set Up an Anonymous Email Account
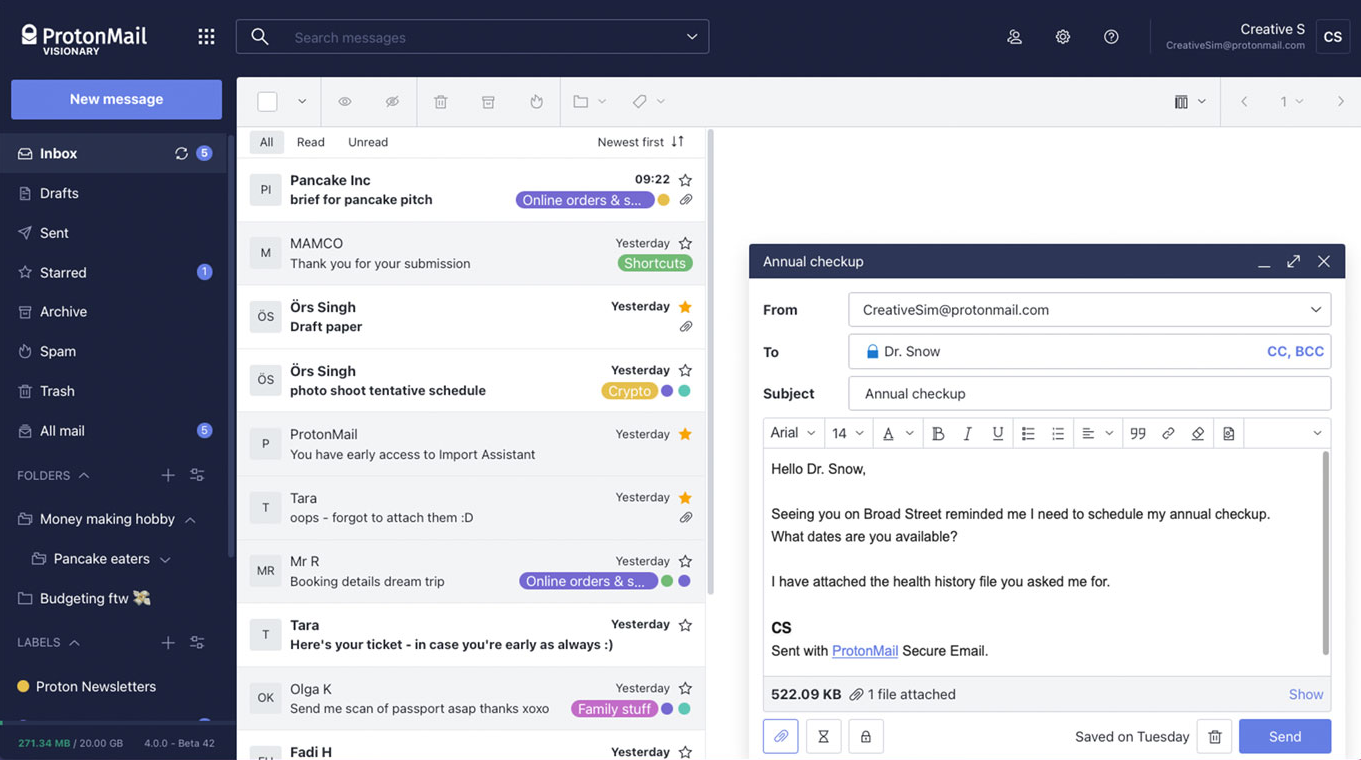
You’ll need an email account to manage your website and domain. Create a secure, anonymous email account using a privacy-focused email service like ProtonMail or Tutanota. These providers offer end-to-end encryption and don’t require personal information for account creation.
1: Choose a Privacy-Focused Email Provider
To create an anonymous email account, you’ll want to use a provider that prioritizes user privacy and security. Some recommended options include:
- ProtonMail – A Swiss-based, encrypted email service that does not require any personal information to create an account.
- Tutanota – A German-based encrypted email provider that allows you to create anonymous accounts.
- Guerrilla Mail – A disposable email service that generates temporary email addresses without requiring any personal details.
2: Select a Username that Avoids Identifying Information
When creating your anonymous email account, choose a username that does not contain any information that could be linked back to your real identity. Avoid using your real name, initials, or any other personal details.
3: Use a Strong, Unique Password
Generate a strong, unique password for your anonymous email account. Avoid using passwords that you’ve used for other accounts, as this could potentially compromise your anonymity. Consider using a password manager to create and store your password securely.
4: Enable Two-Factor Authentication (2FA)
Enable two-factor authentication (2FA) on your anonymous email account to add an extra layer of security. This will help prevent unauthorized access to your account, even if your password is compromised.
5: Avoid Linking the Account to Your Real Identity
Be sure not to link your anonymous email account to any of your real-world identities, such as your name, phone number, or physical address. This could undermine the anonymity of your email account.
6: Use the Account Exclusively for Anonymous Activities
Use your anonymous email account solely for activities related to your anonymous website or online presence. Avoid using it for any personal or professional communications that could be linked back to your real identity.
7: Consider Rotating or Discarding the Account Periodically
To maintain the highest level of anonymity, you may want to consider periodically rotating or discarding your anonymous email account and creating a new one. This can help prevent any potential connections between your anonymous activities and your real identity.
Step 4: Configure Your Website for Anonymity
When setting up your website, take the following steps to ensure maximum anonymity:
- Use Encryption: Implement HTTPS encryption on your website to protect your visitors’ data and prevent eavesdropping.
- Avoid Trackers: Refrain from using third-party analytics, advertising, or social media tracking scripts, as these can compromise your anonymity.
- Use a VPN: Connect to your website through a reliable virtual private network (VPN) to mask your IP address and location.
- Disable Logging: Configure your web server to avoid logging visitors’ IP addresses and other potentially identifying information.
- Utilize Tor: Consider hosting your website on the Tor network to further obfuscate your site’s origin and visitors’ identities.
Step 5: Maintain Ongoing Anonymity
To sustain your website’s anonymity, be vigilant about your online activities and regularly review your security measures. Avoid sharing personal information or linking your anonymous website to your real identity, and consider rotating your domain and hosting provider periodically.
By following these steps, you can create a truly anonymous website that protects your privacy and allows you to express yourself freely online. Remember, maintaining anonymity requires diligence and a commitment to best practices, but the benefits of having a secure and private online presence can be invaluable.

Hello everyone! We’re Galussothemes content team, we love to write new blogs for WordPress Joomla! and other tech niches everyday. We’re talented young people who hold a strong passion for website development, designing, and marketing. Feel free to leave your comment if you have any issues or questions with our blogs.

